Einleitung

  1. WLIQT2yeRhESSSk1
    WLIQT2yeRhESSSk1
    pvUTHgAqlMuZsFOM
    gtg2rcUftvY3enYw
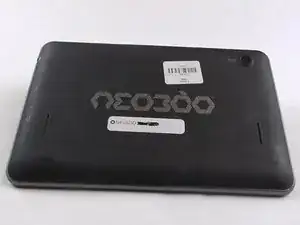
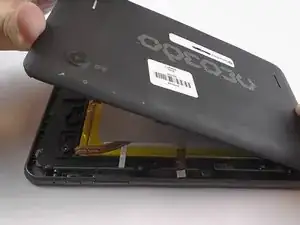
    • Turn the Neo3DO face down so that the logo is facing toward you.

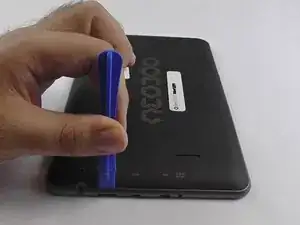
    • Insert the plastic opening tool between the metal frame and the plastic back panel, as shown.

  2. SiCUBXXuSMphNXfy
    SiCUBXXuSMphNXfy
    jXu5HqcAmvxpLDEs
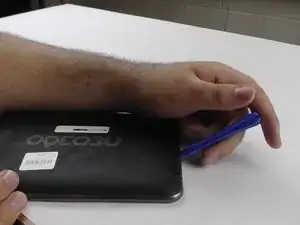
    • Gently pry the back panel upwards.

    • Ensure the tool does not slip into the device and damage the internals.

  3. 6TVZZnRjWJfOD3DV
    6TVZZnRjWJfOD3DV
    c6XchieU5seNnCTu
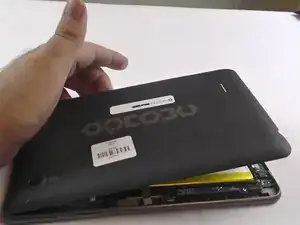
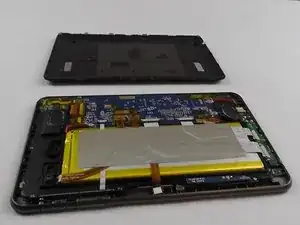
    • Once the back panel has been pried away from the bottom and sides of the Neo3DO, lift the back panel up and away from the tablet.

  4. CbBVdF3VirOerJuG
    • When replacing the back panel, place the top edge of the back panel against the top edge of the Neo3DO, as shown.

    • The top edge of the device is the edge closest to the camera. The top of the back panel is the side with the hole for the camera.

  5. NEApuHqLcAIyx4rc
    NEApuHqLcAIyx4rc
    lXFOXASD1BcQRPWq
    BBXhVJgVbxJMnXvA
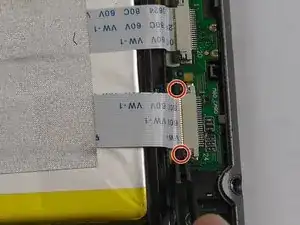
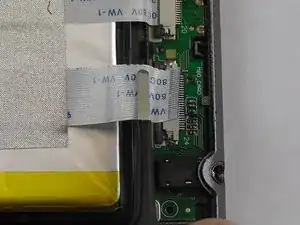
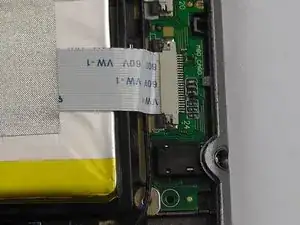
    • Starting with an open back panel, take your tweezers and use them to pull back the black tabs on the connector.

  6. 1kQmKPCJyXElLWGy
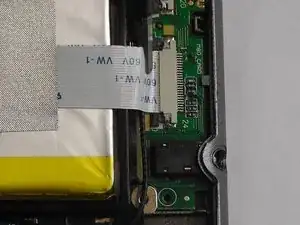
    • Pull the wire completely from the socket.

    • Check the metallic parts for signs of damage or corrosion. If either exists, you might need to replace the battery entirely.

  7. 3k4QSU5AxiM3NvVZ
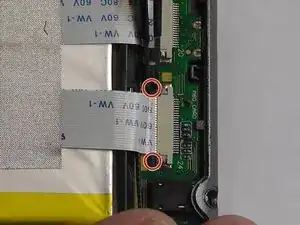
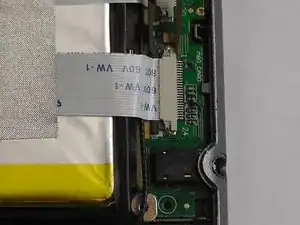
    • Re-insert the wire into the socket.

  8. WdSPZ3eyRhjEIyGU
    WdSPZ3eyRhjEIyGU
    ONvZQyR6mAKmYNKW
    UBlryUumwm2PbKGe
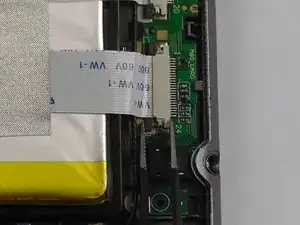
    • Using the tweezers, push the black tabs back in.

Abschluss

To reassemble your device, follow these instructions in reverse order.
Michael Whitehead

Mitglied seit: 26/09/16

201 Reputation

0 Kommentare