Einleitung

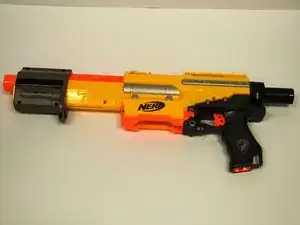
A broken plunger may inhibit your gun from firing correctly. This guide will show you how to replace the plunger and return your riffle to firing condition.

  1. 3mYKUNF3DYxJYJ2S
    • It is important to group screws together by length to ensure proper reassembly.

    • Be sure that the device has been discharged and is unloaded before beginning the repair process.

  2. Bs42yi4ZNu3FQfZa
    Bs42yi4ZNu3FQfZa
    yZM2uhWmCfuPrbok
    xpuBDTTWRe3uIyW4
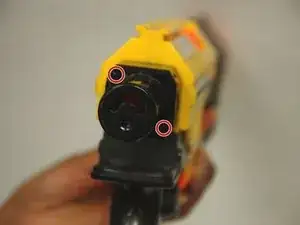
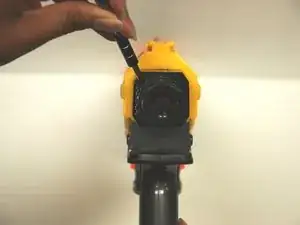
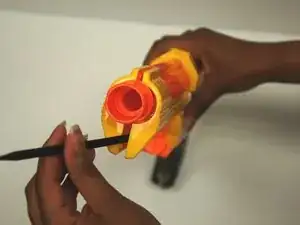
    • Look at the rear of the rifle. Remove the two 10 mm Phillips head screws that hold the black cap to the rear of the rifle.

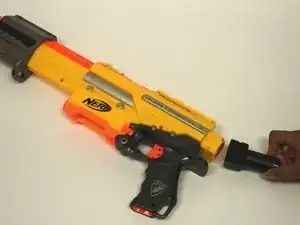
    • Gently remove the black cap.

  3. sRXTaiQYHFNqc4EP
    sRXTaiQYHFNqc4EP
    BEyxlTFQqTThMKLL
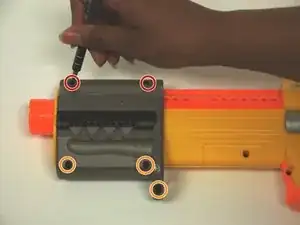
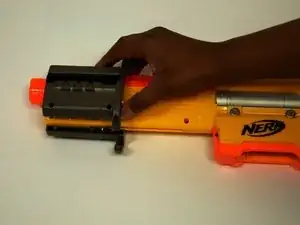
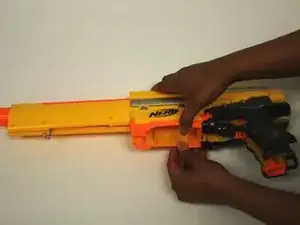
    • Point the barrel of the device to the left, screw side up. Remove the two 8 mm Phillips head screws (the top two) holding the device slide together.

    • Keep the device in the same position, remove the three 10 mm Phillips head screws from the bottom of the device slide.

    • Once all screws are removed, carefully separate the two halves of the device slide and put them aside.

    • Be sure to keep track of which screws correspond to the correct holes.

  4. Y4ospWTNExDYTEbr
    Y4ospWTNExDYTEbr
    uaOdphh12VnbE2ua
    BBOqmXTJQkaP5JEb
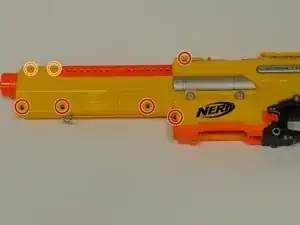
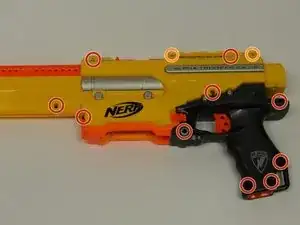
    • Keeping the barrel in the same position as step 3, remove the fourteen 10 mm Phillips head screws from the body of the device.

    • With the device in the same position, remove the 4 remaining 5 mm Phillips head screws from the body of the device.

    • Screws vary in lengths. Be sure to keep track of which screws correspond to the correct holes.

  5. 3DSj1WGbAIVCwfgZ
    3DSj1WGbAIVCwfgZ
    ukKNrDSH1NTQN6la
    bWUFOWrrnGxI42FN
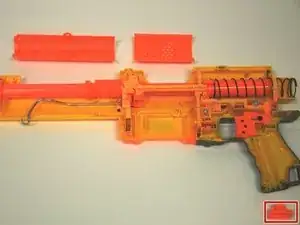
    • Grip the cartridge insert, and pull the two halves of the device apart.

    • Warning! The firing spring is not fastened to the device. It and other small parts may fall out of the device when separating it.

    • If you are having difficulty separating the two halves of the device, use a spudger to pry the two halves apart.

    • Remove the access gate and barrel cover.

  6. YdcwCYCG1NIEGDci
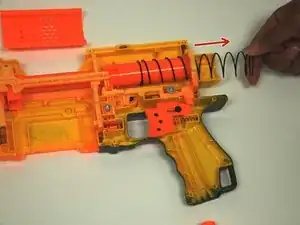
    • Now remove the main firing spring from the rear of the device by gently pulling it.

  7. edXxRgaTSJGLAZyp
    edXxRgaTSJGLAZyp
    1EFUZLnwBXCNAQHR
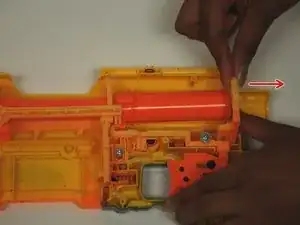
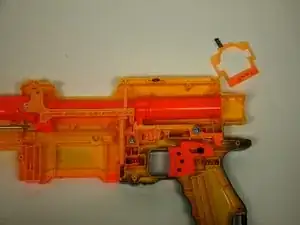
    • Slide the plunger lock back away from the device, then lift out towards yourself to remove.

    • Be careful not to lose the small spring on the top of the plunger lock.

  8. QhRMLRYjBox5yMnM
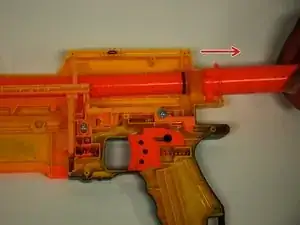
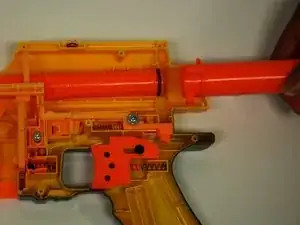
    • Pull plunger away in the same motion as in step 7 with the plunger lock.

Abschluss

To reassemble your device, follow these instructions in reverse order.
Chelsea Frazier

Mitglied seit: 31/01/16

128 Reputation

0 Kommentare