Einleitung
Werkzeuge
Ersatzteile
-
-
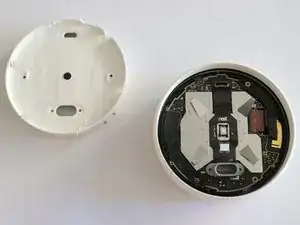
Entferne den Thermostat von der Bodenplatte.
-
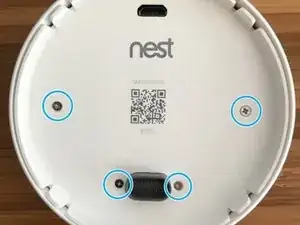
Löse die vier Schrauben auf der Rückseite.
-
Foto von @justlv
-
-
-
Löse die Hauptplatine ab.
-
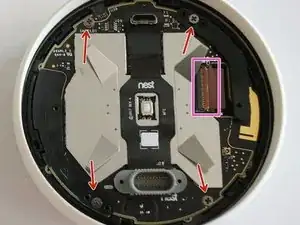
Entferne vier weitere Schrauben.
-
Trenne das Displaykabel.
-
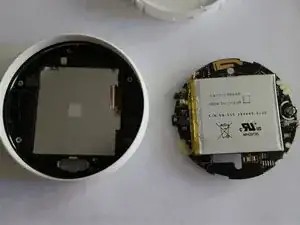
Entnehme die Hauptplatine aus dem Gerät.
-
-
-
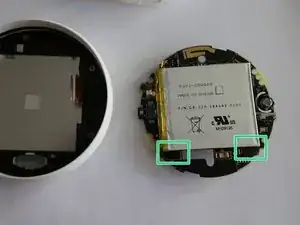
Der Akku-Typ ist 284449. Das bedeutet, dass der Akku 2,8 mm dick ist und 44 mm x 49 mm lang/breit ist. Die Kapazität beträgt 2,1 Wh.
-
Juhu!! Wir lieben Zuuglaschen! Ziehe sie einfach nach unten, um den Akku zu lösen.
-
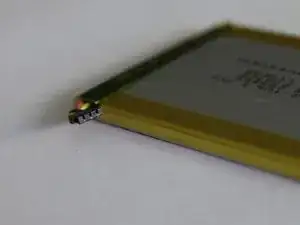
Hier befindet sich der Akku-Anschluss. Zum Trennen des Akkus ziehe einfach den Stecker "nach oben"
-
Um dein Gerät wieder zusammenzubauen, folge dieser Anleitung in umgekehrter Reihenfolge.
3 Kommentare
There are a lot of sellers out there (on Amazon, eBay, etc) that are claiming their batteries are “compatible” with the Nest E, but they are NOT truly compatible – they are underpowered. You’ll need to find a battery that clearly states that it provides 2.1Wh of power, not just 3.7V. Try searching eBay (I couldn’t find one on Amazon) for “authentic” or “genuine” Nest battery, and check the Wh rating. They’re out there, but can be hard to find. As always, check the seller’s ratings as well… many of those for sale are old and may not hold a charge if they’ve been discharged too long.
Bigh -
That is great advise, thank you! I’ve seen too many underpowered (1.4Wh) batteries sold with poor ratings. It’s hard to find a quality battery.
Thank you for this article. I used it to take out my Nest battery, which I thought was “unserviceable”. The step-by-step instructions were very helpful.
