Einleitung

Verwende diese Anleitung, um das Motherboard deines Nexus 5 zu wechseln.

  1. uEMEGFX5kNL1BUaZ
    uEMEGFX5kNL1BUaZ
    d5aupTQfBHnkY6hN
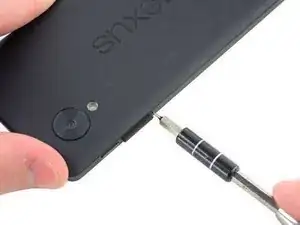
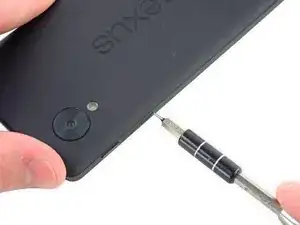
    • Führe ein SIM Card Eject Tool in das kleine Loch neben dem SIM Kartenslot, direkt unter dem Ein-/Ausschalter.

    • Drücke das Sim Card Eject Tool in das Loch hinein, bis der Kartenhalter herauskommt.

  2. LhjbucVW4KhyyAca
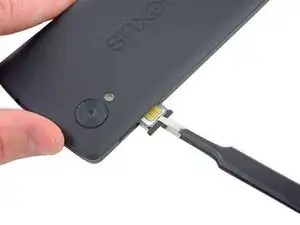
    • Nimm den SIM-Karte vorsichtig aus dem Gerät. Hierfür kannst du entweder deine Finger nehmen oder eine Pinzette, falls der Kartenhalter nicht ganz herausgekommen ist.

    • Achte darauf, dass der Chip zur Rückseite des Smartphones zeigt, wenn du die SIM Karte wieder einlegst.

  3. xEViSRJY4VVHfmOQ
    xEViSRJY4VVHfmOQ
    1Z4SSVIF3RKmHyfE
    FffOOXKKNNbCEdx2
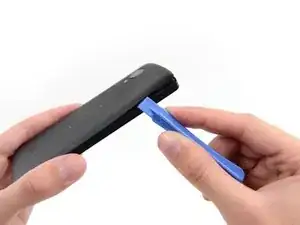
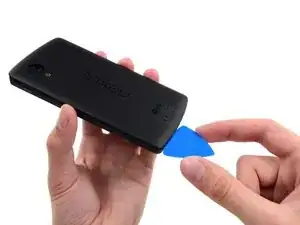
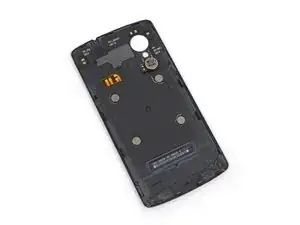
    • Löse mit einem Plastic Opening Tool die Clips oben und auf jeder Seite der Rückabdeckung.

    • Das Unterteil ist mit etwas Schaumstoffkleber befestigt. Du solltest das Rückteil mithilfe eines Plektrums vollständig lösen können.

    • Es ist am Besten nicht um den Sim Slot herum zu hebeln, denn der Kunststoff ist hier sehr dünn und kann beim Hebeln leicht brechen.

    Wireless QI and NFC.

    Once I have put everything together with the new battery in place, I have as last replaced the plastic back cover, snapping all the clips back around the edges of the phone. Alas, I was quick to realise the QI Wireless charging has ceased to work.

    I almost blamed the battery, or worse, me.

    QUICK TIP: there is actually another clip in the middle of the plastic back cover - just press with your thumb just above the 'S' in NEXUS emblem and, voila! Snaps back in.

    Wireless charge and NFC - works, once again.

    cwioro -

    you just saved me like 30 bucks. thank you so much.

    Robert Nolan -

    + 1, had the same issue and pressing just near the S fixed it! Thanks a lot!

    nicco82 -

    Just a me too, I had to press above the S and it was quite a snap

    Erik Karlin -

    There seems to be two contacts that snap into place. One is in line with the led pretty much in the middle of the phone and the second one in line with the camera lens on the opposite side to the lens. The middle one for me snapped pretty lightly, but the side one required a bit more pressure. After that the nfc started working again. Thanks for posting this!

    Dennis Millner -

    Is it hard to remove the battery door? Worried I might damage it.

    Ash -

    When I openend the back cover I damaged two clips. One about 2.5cm (1 inch) below the volume controls and one on the other side about same height. The cover fits good without those two but on one side there is a small gap where the clip broke. But I have a hard cover protector on my phone so it's not that bad.

    simonlwheeler -

    The case around the sim slot is pretty thin and easy to break, best to avoid using the pry tool at this point.

    Aled Morris -

    Excellent tip, should be included in the main guide.

    fprades -

    Hey Author, i need to ur expert advice...i replaced my nexus 5's back cover. since the new one did not have the vibrators battery i had to take it from the old one and connect it to the new one...on removing i noticed that it was stuck to the cover by a glue

    Question: what glue to use to hold the battery to the cover?

    suwaid akbar -

    Any adhesive will do. I used a hot glue gun. You shouldn't need expert advice to figure that out. Use your head.

    tjt263 -

    The case around the volume control is also pretty thin.... I broke mine prying so avoid the pry there too.

    Also my back had glue at the bottom and I haven't seen mentioned

    kornerson -

  4. BTRZoDBr3OKdfuSe
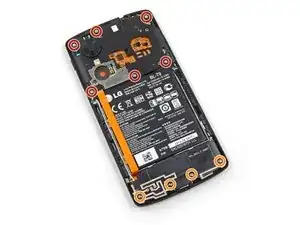
    • Entferne die sechs 4,0 mm Kreuzschlitzschrauben #00, mit denen der Mittelrahmen am Smartphone befestigt ist.

    • Um das LCD und den Touchscreen zu ersetzen, entferne die zusätzlichen vier 4,0 mm Schrauben der Daughterboard-Abdeckung mit dem gleichen Schraubendreher.

    I had a bit more success with the Phillips #000.

    Ross Light -

    Step 4 (removing the screws in the protecting plate) needs to happen before Step 2 ( removing the connectors)

    Esteban Valles -

    These were Y0 screws for me.

    Benjamin Hollway -

    Same here, Benjamin

    Ítalo Masserano -

    Me three on the Y-type screw heads.

    Jamoross -

    Same for me. I had more luck with the two screws in the middle with #000.

    Rewarp -

  5. 3BvbgCuAHbWMQxvD
    3BvbgCuAHbWMQxvD
    dFU2GMl6CVK2L61O
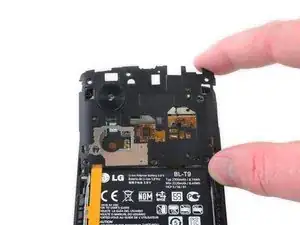
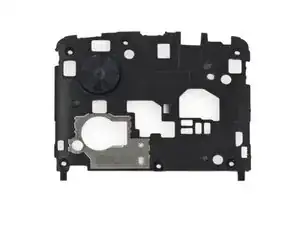
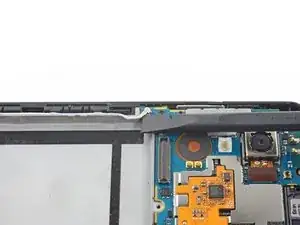
    • Entferne den Mittelrahmen vom Smartphone.

    There's also some adhesive holding the motherboard cover plate in place, below the camera. Has to be pulled a little stronger than expected.

    tkatona -

  6. Oyiy1FAMsRBNFsVx
    Oyiy1FAMsRBNFsVx
    Ai1o2JTP6SWHes2S
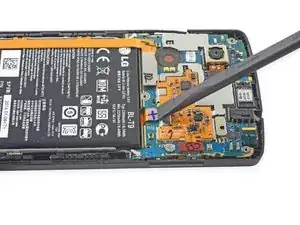
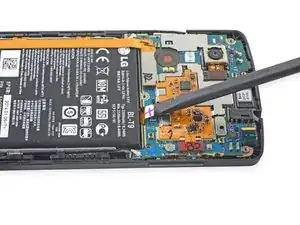
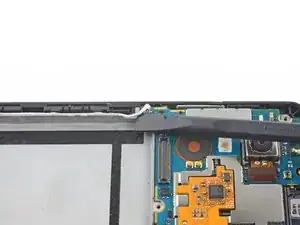
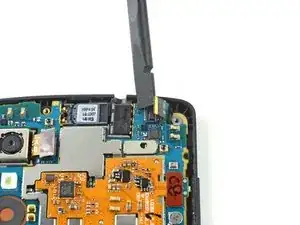
    • Verwende das flache Ende eines Spudgers, um den Akkuanschluss zu trennen.

  7. frVBkaKCOgoPsAYy
    frVBkaKCOgoPsAYy
    cq34GDWnpASPWTSV
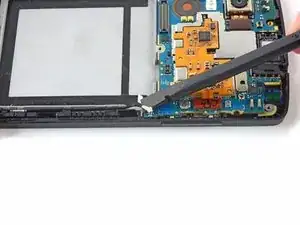
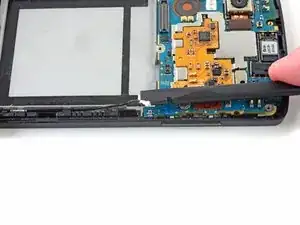
    • Verwende einen Spudger, um den Daughterboard-Anschluss zu trennen und ziehe es weg vom Akku.

  8. ZIeQQP3RVRHYx6Q3
    ZIeQQP3RVRHYx6Q3
    ZkXpmOus3fCXKTFm
    tSaGTMZDJD3XFcRO
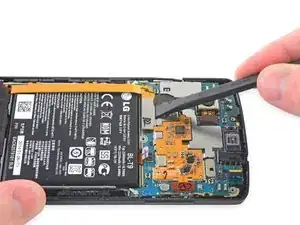
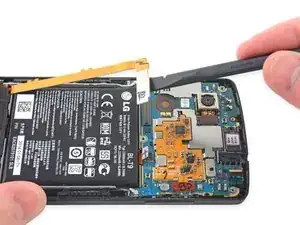
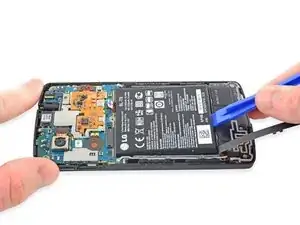
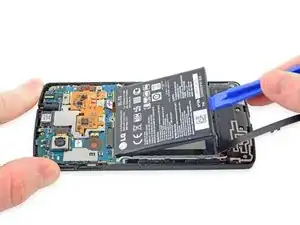
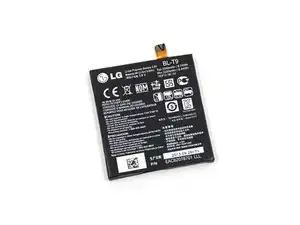
    • Heble den Akku mit einem Plastic Opening Tool aus dem Gehäuse.

    • Möglicherweise kannst du mit einer Heißluftpistole ganz mild die Batterie erwärmen um den Kleber unter ihr zu lösen.

    • Der Akku darf nicht beschädigt oder gebogen werden.

    This part is very delicate. The adhesive is pretty solid and I did puncture the battery. It is dangerous and the battery should be replaced with a new one.

    Christophe De Wolf -

    Thanks Chris for the notice. I have added a warning on your advise. Do you think about any better way to unglue the battery?

    Gaetan -

    Like another user, I had already taken my cover off plenty of times prior to. The issue of course was removing the battery. I purchased the opening tools and spudger and used them but to no avail. I ended up using a flat tip screwdriver and got the battery out within seconds with no puncturing.

    gnewton16 -

    I'll second the flathead screwdriver. Tried different plastic tools only to damage both the battery and a spring connector on the phone. With the flathead screwdriver battery came out quite easily lifting from the bottom end. There is an adhesive tape holding the battery firmly in place that retains the adhesive surface after removing the battery, so the new battery should attach properly.

    Dennis Millner -

    Why do you need to remove the battery at all? Just replaced my rear camera without removing it. I mean, I realise that removing the power source would have been safer, but would it be enough just to detach the motherboard connector?

    eyusupov -

    This guide is about the REPLACEMENT of the battery, and for that it seems necessary to remove it first. ;-)

    biharikristof -

    Do you need to apply adhesive to the new battery to keep it in place?

    Ross Light -

    no there is generally glue remaining and it stays in place pretty good

    mmoodley10 -

    This was fantastic, thank you! I had never done anything like this before! You just saved me some money and also taught me something :D

    anagarciasebastia -

    to make Qi work, you have to press the cover really everywhere afterwards. The contacts for Qi are between th Nexus "S" and the camera. Sometimes the Qi loading needs some time to work - I assume the battery needs to expand after a few loading cycles...

    Apeiron -

    The first time I tried to replace the battery I ended up breaking off the tab on the new battery. It needs to be bent properly to fit into the socket on the phone. The second time, I connected the tab t the socket BEFORE placing the new battery into the area of the phone where it sits. Then I was able to use the plastic tool to correctly bend the connector.

    John Goldin -

    I have replaced the battery and after doing this there is a flashing red light. does this mean its just charging from empty or have I done something wrong? Do i need to press any buttons to make sure its charging properly? do i need to re open it up to check connections? what do i do? there is no mention of whether it should turn back on or what it should do/how long it will take to be up and running again.

    Bambipeach -

    I had the same "problem", though I had misplugged the battery. Just wait for a couple of minutes and your phone should start to charge. Also, I've been told to fully charge and discharge the battery 2-3 times before using it.

    Steve Simard -

    Be extremely careful while prying out the battery. I had damaged a Nexus 4 battery while trying to do this, and smoke started coming out. If you search youtube you can see how a punctured Li-ion battery can explode in seconds.

    Abhi B -

    Why not remove the battery by pulling on the small ribbon cable at the top?

    Matt Szczublewski -

    When you take out the battery, there are some sort of black tape (adhesive) around the inner circle of the empty battery chassis. I might have been too rough and taken the black tape out completely. Now with the newly replaced battery, Nexus 5 won't charge or power on. Does anyone know what the black tape is for? is it the reason or something else?

    Gracie -

    I found out that the heavy duty suction cup I bought to replace phone screens works quite effectively at removing the battery without bending or damaging it. Of course, this was being used on a battery that was itself a replacement of the original, so the adhesive may have weakened significantly.

    Rewarp -

  9. n2ATayK3owfLiG6U
    n2ATayK3owfLiG6U
    TJxKXUvK3cmasqMI
    • Verwende das flache Ende eines Spudgers, um das linke Antennenkabel auszustecken.

  10. Dmunk4EWt5kUWcpa
    Dmunk4EWt5kUWcpa
    hqx6GJNKrDWUoxHQ
    • Verwende das flache Ende eines Spudgers, um das rechte Antennenkabel auszustecken.

    • Die beiden Antennenkabel müssen beim Wiederzusammenbau sicher befestigt werden. Locker aufgesteckte Antennenkabel können den Empfang und die Anrufqualität des Telefons stark beeinträchtigen.

  11. BtIZECIPuSFBFPPU
    BtIZECIPuSFBFPPU
    sLORMBgZOWOjEN3D
    • Verwende das flache Ende eines Spudgers, um das Flachbandkabel, das die Rückkamera mit dem Motherboard verbindet, zu trennen.

  12. 2vLGDUwYvSSfVU2i
    2vLGDUwYvSSfVU2i
    Cphxbju56EhIW4Ff
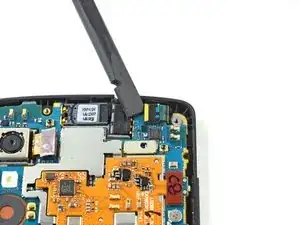
    • Verwende das flache Ende eines Spudgers, um das Flachbandkabel der Frontkamera zu trennen.

  13. 5a2DDouuigCLtDrZ
    5a2DDouuigCLtDrZ
    tJcLaE5ufC3ckwqy
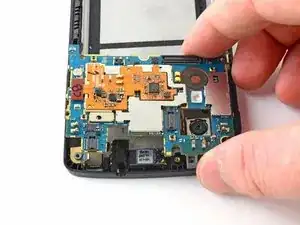
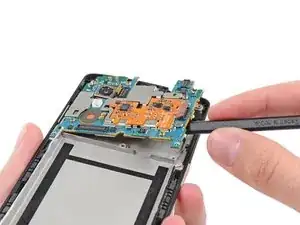
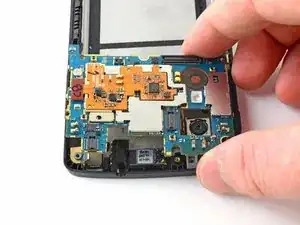
    • Hebe das Motherboard vorsichtig hoch und aus dem Gerät heraus.

Abschluss

Arbeite die Schritte in umgekehrter Reihenfolge ab, um dein Gerät wieder zusammenzubauen.

Kyle Libby

Mitglied seit: 07/04/14

1006 Reputation

12 Kommentare

is the motherboard from the 32gb nexus 5, compatible for the nexus 5 16gb lcd??

Vandalismo Teevee -

It should be, yes. I've chopped and changed loads of Nexus 5 phone around and haven't had a problem.

drunkenmenace -

Thanks for the repy. My Nexus 5 has some bootoop problems and when i go to the boot options, (the hold power and volume down), it says Lock State - LOCKED. so im thinking of replacing the motherboard. or is there a way to fix my problem? Thanks for the reply. I appreciate it.

Vandalismo Teevee -

My Nexus 5 just switched off while i was recording a video. It isnt switching on now. How to bring it back to life??Any solution will b of great help. Thanks
Jasmine K -

I just used this guide to quickly get at the motherboard to replace a faulty power button. It's tedious but not impossible with a very clean soldering iron tip, solder wick, and lots of flux. The replacement button and covers from iFixit were an exact match (I checked under a microscope).

Mark Renouf -

Tip: You do not need to remove the battery to swap or repair the motherboard. I prefer not to use a heatgun and pry against adhesives unless absolutely necessary.

Mark Renouf -

Pls my nexus 5x stopped working since January and I tried charging but any time I fix the battery it will be v.hot till I remove d battery, any help pls.

Abdul Jelil Badmus -

If I replace the motherboard do I have to flash OS ?

MrSavedby Grace -

I will want mother board of lg nexus 5x, 32 gb, how can i buy it

Hildegarde Cyril -

Hello every one My nexus 5 LG screen was damaged and replaced. after a few days the phone died. the repair man told me its motherboard must be repalced to return it to life. Please help me how to get one here Nairobi. They are not available. Kindly help

mutindirose -

I have problem with the WiFi in my Nexus 5

is just stuck on turning on and it doesn't and Mac address disappeared I tried software solutions but doesn't work so what is the problem should I exchange the motherboard chip ?

ammar basha -

Is there any way to salvage photos from the memory if you have to change the motherboard? I changed the battery but the phone still does not turn on. When I plug it into the USB the computer says the device malfunctioned. So it knows something is there...but not working properly

Esp Ghia -