Einleitung

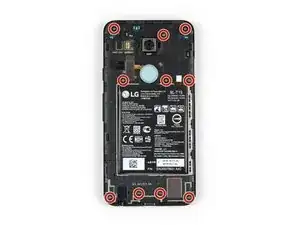
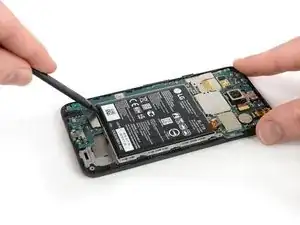
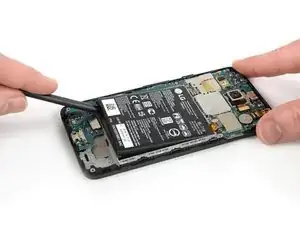
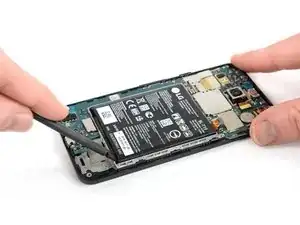
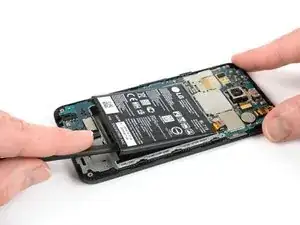
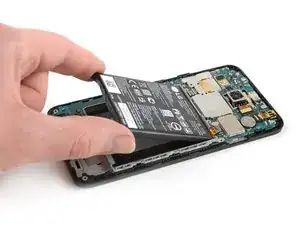
Verwende diese Anleitung, um den Akku deines Nexus 5X zu ersetzen.

Entlade den Akku vor der Reparatur auf unter 25 %. Wenn dein Akku aufgebläht ist, erwärmen dein Handy nicht! Aufgeblähte Akkus können sehr gefährlich sein, also trage einen Augenschutz und gehen mit der gebotenen Vorsicht vor. Wenn du nicht sicher bist, wie du vorgehen sollt, wende dich an einen Fachmann.

Du benötigst Ersatzkleber, um Komponenten beim Zusammenbau des Geräts wieder anzubringen.

  1. hZuBjDNMirRpxDPW
    hZuBjDNMirRpxDPW
    JWDcUTTe2RHKb3Aw
    CyV6ZtdsOoQKFIlC
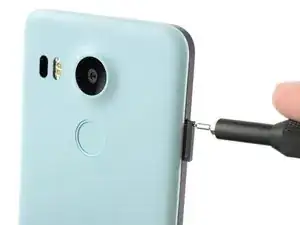
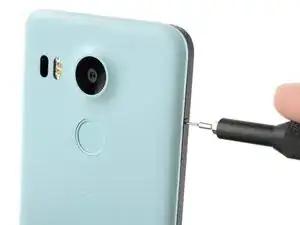
    • Setze ein Auswurfwerkzeug für SIM-Karten in das Loch im SIM-Kartenfach an der linken Kante des Telefons.

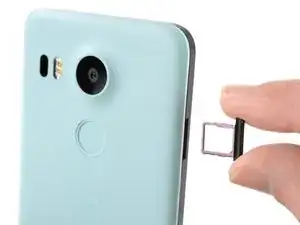
    • Drücke das Auswurfwerkzeug hinein, um das SIM-Kartenfach auszuwerfen.

    • Entferne das SIM-Kartenfach.

  2. ICCoMW16jfCrFbcn
    ICCoMW16jfCrFbcn
    sQxCgO3CGWjyHP2m
    MDAUADr5BeVSLDZl
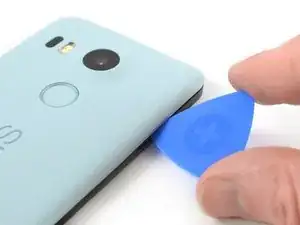
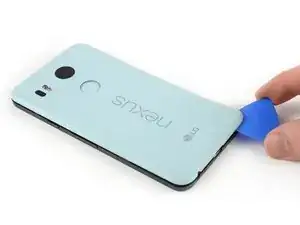
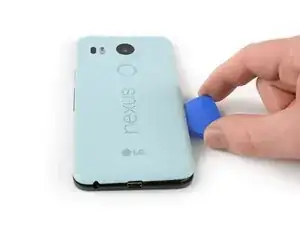
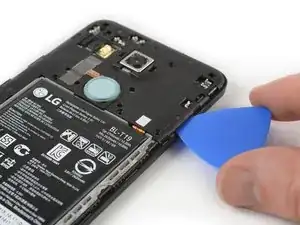
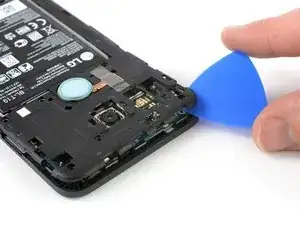
    • Setze ein Plektrum in die Öffnung des SIM-Karteneinschubs und verdrehe es zur Seite, um die erste Plastikklammer zu lösen, mit der die Rückabdeckung befestigt ist.

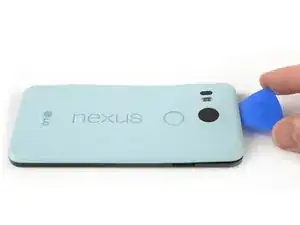
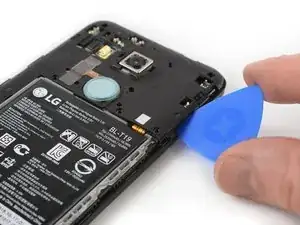
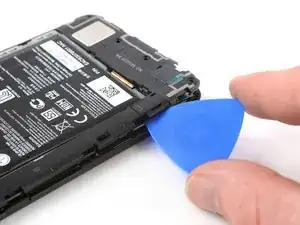
    • Schiebe das Öffnungswerkzeug um die Oberkante des Gerätes, um die Plastikklammer zu lösen, mit der die Rückabdeckung befestigt ist.

    A guitar pick is a good substitution for the plastic opening tool.

    Sam Sippe -

    Here’s a photo of the location of the 18 tabs that hold the back cover in place

    Steve -

    Twisting sideways didn’t do it for me, but sliding along the edge did. However, at first I didn’t realize that the pick was between the motherboard and midframe, rather than between midframe and back cover like it was supposed to. This led to breaking off a spring-loaded connector on the motherboard, connecting to an antenna (I guess) in the back cover. So far I haven’t noticed any reception issues, but I can’t say for sure.

    In essence: be careful to get the pick towards the back cover, and not “straight in” under the midframe.

    Hampus -

  3. afVYqSRSsfYK5iHi
    afVYqSRSsfYK5iHi
    pIWZAi2MnVlPLqqa
    WCXoRcGIOO46lSW1
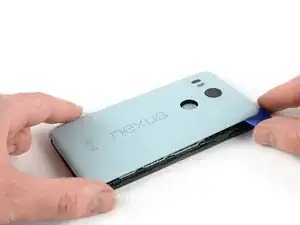
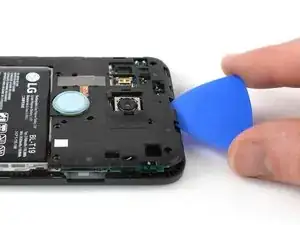
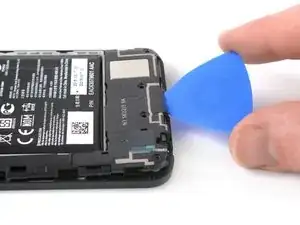
    • Schiebe das Plektrum um alle Seiten des Smartphones herum, um alle Klammern zu lösen, mit denen die Rückabdeckung befestigt ist.

  4. elaUMDhpoLaSyiLC
    elaUMDhpoLaSyiLC
    xC4oPmeXKWyCeJYD
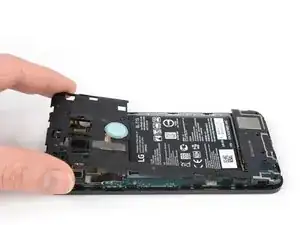
    • Kippe das Plektrum, um die Rückabdeckung ein wenig anzuheben.

    • Beim Fingerabdrucksensor befinden sich noch zwei weitere Plastikklammern. Löse sie, indem du die Rückabdeckung behutsam wegziehst.

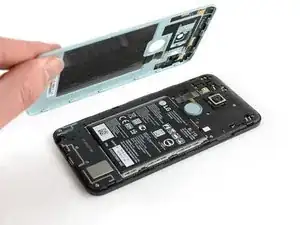
    • Entferne die Rückabdeckung.

  5. SLBb5Cl3QMGTDxxc
    • Entferne die zehn 3,6 mm Kreuzschlitzschrauben #000, mit denen der Mittelrahmen befestigt ist.

    Some models use a Y1 screw head.

    Kyle Wright -

  6. kbJbMKZvCYpi5Ym1
    kbJbMKZvCYpi5Ym1
    SBDl6Qt1OeRUcuOJ
    • Setze ein Plektrum in den SIM-Karteneinschub ein. Drehe es zur Seite hin, damit sich die Kunststoffraste löst.

    The photo seems to show that the person is opening from the top, which is the opposite of your advice. So, just want to be clear.

    Robert Konigsberg -

    yes, open from bottom first... the pic above shows the finished product after reaching top of phone. I found it best to actually start close to the right of the usbC connector. Pushing inbetween the 2 tabs and up will release the shell.. then work clockwise.

    Chris Mayberry -

    Chris, your advice to start to the right of the usbC connector was excellent, thank you!

    Robert Konigsberg -

    I found that my middle panel was already broken at the narrowest part just to the left of the 2-D scan code on the battery, perhaps from some ham-fisted previous repair. This seems of little consequence, there do not seem to be any electrical connections running through this part.

    Wiley Sanders -

    After a long amount of prying, I discoved that, if used gently, a jimmy can really help get the plastic off

    Timothy Owens -

    I could not remove the cover with the opening tool but had success with the opening picks (the triangle parts). Just slide them under the cover and gently bend and twist the pick to release the cover from the locks. By the way: it’s perfectly normal for the bottom cover part to come loose from the top cover part. It’s designed that way (they interlock).

    Marco Miltenburg -

    Here’s a photo of the location of the 20 tabs that hold the middle assembly in place, and the pry angle needed.

    Steve -

    This is the scariest part but it is the same process of taking a bike tire off the rim: lift up one part of the cover then put a wedge under the lifted section to hold it up then continue around the frame lifting it up and holding it up with the blue picks. You’ll find that after you life the bottom you can wriggle free the rest by hand.

    The 10 screws came out quickly using the IFIXIT.com magnetic screwdriver.

    mcguinness.david -

  7. MPaVeGZ53Yant1bX
    MPaVeGZ53Yant1bX
    1EYFK4Jmr4ZkYCXc
    • Schiebe das Plektrum weiter um den oberen Teil des Mittelrahmens, um die Plastikrasten zu lösen.

  8. UnqADRuHrCdSINRZ
    UnqADRuHrCdSINRZ
    LfjUs6JGfUqrEVjA
    • Öffne mit dem Plektrum die Plastikrasten an der langen Kante des Mittelrahmens und an der unteren Kante.

    • Stelle sicher, dass die Rasten an der langen Kante gelöst sind. Der Mittelrahmen kann hier leicht brechen, wenn die Rasten nicht richtig abgelöst sind.

  9. A65jPFCZQIiwZlZb
    A65jPFCZQIiwZlZb
    CLJTmiqEsupw21Yg
    • Stelle sicher, dass alle Rasten gelöst sind.

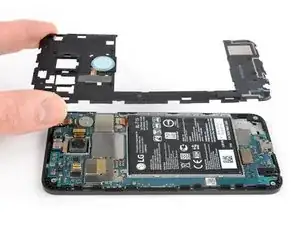
    • Entferne vorsichtig den Mittelrahmen.

  10. Ifqg6MTxcFQ6GQ2l
    Ifqg6MTxcFQ6GQ2l
    kgXBZmhgQmKKwHKW
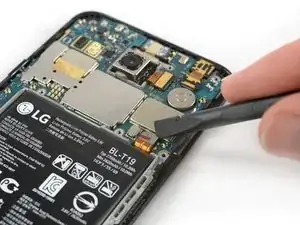
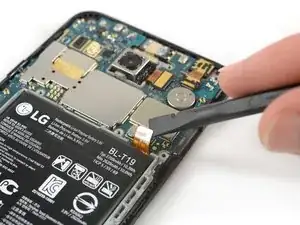
    • Verwende die Kante eines Spudgers, um das Akku-Kabel, welches sich unten rechts auf der Hauptplatine befindet, hochzuhebeln und zu trennen.

  11. uqrJb2kFfeGpZ2yo
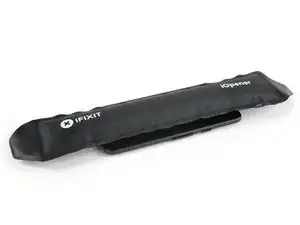
    • Verwende einen iOpener, um den Klebstoff unter dem Akku zu lösen. Legen den iOpener für mindestens zwei Minuten auf der Rückseite des Telefons auf.

    And all that in 3 minutes.

    No way!!!

    Chris Hibbert -

    Yeah, three minutes is probably not very realistic. I updated the time estimate to something a bit more conservative. :)

    Jeff Suovanen -

    The adhesive on mine was also really strong.

    I had to use a heat gun at about ~110F while applying pressure to get the battery to release

    Brian Stambaugh -

    Seriously? All this, just to change the battery?

    Robin Gregory -

    Your comment only makes sense in 2017.

    Krzeszny -

    I was able to spudge the battery out from the bottom edge using a “custom” tool made from an old credit card cut to a width slightly less than the bottom of the battery.

    Wiley Sanders -

    Great tip - I used a credit card too without the need for a heat gun.

    Sam Sippe -

    No need to remove the battery if you only want to get the mainboard out. Just release all the connectors

    Wim Brouwer -

    I’d recommend trying to remove the battery without using heat as my phone failed with the infamous “boot loop” problem less than a week after I changed the battery.

    chilton cabot -

    Following these helpful comments, I used isopropyl alcohol and the spudge to get the battery loose, no heat.

    hans haucke -

    Another data point: to be safe, I used the iOpener according to instructions (30s, ~900W microwave, the iOpener just started to expand a bit) and added some isopropyl alcohol. The battery came out without too much effort in a few minutes. No reheating needed, used the spudger from the kit.

    The pre-exiting adhesive seemed good enough still, so I didn’t bother removing and re-applying.

    Hampus -

    I also used isopropyl alcohol only without heat. I got the spluger into the corner just a little to give a small space between the battery and the surrounding plastic enclosure for the battery. Then soaked a corner of a paper towel with a little alcohol. Tipped the phone and squeezed some of the alcohol into the space and let it drain down the edge of the battery. Waited about 60 seconds and then pryed gently with the spluger on that side. It came up pretty easily. Once I got one side of the battery up, I soaked the paper towel again tipped the phone so the edge that was still stuck was down, and squeezed alcohol all along the edge that was freed to let alcohol get down to the tape that was still holding. Waited another minute and then pried gently again and the rest of the battery came right up. The whole procedure took maybe 4-5 minutes.

    Jonathan Stucklen -

  12. GrPYrJccvZbJsOrg
    GrPYrJccvZbJsOrg
    J6QOY1pDtjdXw6GR
    • Versuche, den Akku während des folgenden Ausbauprozesses nicht zu verformen. Aus Soft-Shell-Lithium-Ionen-Akkus können gefährliche Chemikalien auslaufen, sie können Feuer fangen oder bei Beschädigung sogar explodieren. Wende keine übermäßige Kraft an und benutze keine Metallwerkzeuge, um den Akku zu entferen.

    • Setze das flache Ende eines Spudgers unter die linke untere Ecke des Akkus und heble vorsichtig nach oben.

    • Der Klebstoff befindet sich nur unter den Kanten des Akkus, sodass du nicht die Mitte des Akkus nicht mit dem Spudger anheben musst.

    • Wenn der Akku sich nur schwer anheben lässt, ist der Klebstoff möglicherweise noch zu fest. Du kannst etwas Isopropylalkohol unter jede Ecke des Akkus träufeln und einige Minuten einwirken lassen, um den Klebstoff zu lösen.

  13. lytcTWZeVOcpIoWh
    lytcTWZeVOcpIoWh
    mqywwCDXvRK1akDB
    • Setze das flache Ende eines Spudgers unter die rechte untere Ecke des Akkus und heble vorsichtig nach oben, um den verbleibenden Kleber zu lösen.

  14. vP1iMlVEupJeYEQp
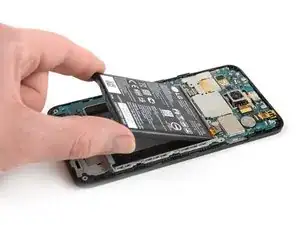
    • Entferne den Akku.

    • Verwende den Akku nach dem Entfernen nicht wieder, da dies ein potenzielles Sicherheitsrisiko darstellt. Ersetze den Akku durch einen neuen.

    • Entfernen vor dem Einsetzen eines neuen Akkus den verbleibenden Klebstoff vom Smartphone und reinige die geklebten Stellen mit Isopropylalkohol und einem fusselfreien Tuch.

    • Verklebe den neuen Akku mit vorgestanzter Klebefolie oder doppelseitigem Klebeband. Um den Akku richtig zu positionieren, platziere den neuen Klebstoff an den Stellen im Smartphone an denen sich der alte Kleber befand. Drücke den neuen Akku 5-10 Sekunden lang fest.

    If you use the ifixit heat-pad to remove the battery and gently lever the battery away from the internal glue then the original glue will still be functional.

    Edmund Cramp -

Abschluss

Um dein Gerät wieder zusammenzubauen, folge diesen Anweisungen in umgekehrter Reihenfolge.

Schalte dein Smartphone, wenn möglich, wieder ein und teste, ob die Reparatur erfolgreich war, bevor du neuen Klebstoff aufbringst und das Gerät wieder verschließt.

Für eine optimale Leistung kalibriere deinen neu eingebauten Akku: Lade dein Smartphone auf 100 % auf und laden es noch mindestens zwei weitere Stunden. Verwende es dann, bis es sich aufgrund eines leeren Akkus von selbst abschaltet. Lade das Gerät anschließend ohne Unterbrechung auf 100 % auf.

Bringe deinen Elektroschrott zu einem Recyclinghof.

Die Reparatur verlief nicht wie geplant? Auf unserem Nexus 5X Antwortenforum findest du Hilfe bei der Fehlerbehebung.

Dominik Schnabelrauch

Mitglied seit: 23/11/16

167773 Reputation

29 Kommentare

I replaced the battery with a stock LG OEM replacement. Now, 1. Lighting bolt indicator doesn't appear. 2. Doesn't read "Charging" or "Charging Rapidly" on the lock screen. 3. I lost rapid charge; it charges slooooowly. Help!

Thom -

Is the battery supposed to be one hard piece or is it supposed to be squishy as in bendable?

danchee -

I replaced the battery, but I'm still not getting an led or anything on the screen to show it's charging. What else could be the issue?
pocketdrummer -

All went smooth here. Pulled the mainboard out and was able to gently pry the battery free without heat. Rapid charging is working fine. I got an LG battery off Amazon. Didn't cost much more than knock-offs.

Andrew Cook -

worked great for me, in the end used brute force to get the battery off with a terrifying crack.

Terrence Benade -

I replaced screen + battery at the same time (using ifixit replacement battery and display assembly). All went well, pretty easy to do, and the new display looks great. However, my battery appears to be stuck at 50%. I suppose I can pop loose and then try to re-seat the connector. Probably won't help. Has anyone else experienced this issue? Any hints/ideas on how to fix it? Thx

dave white -

Great guide - I used a hairdryer for the heat... Was quite concerned the phone was getting very hot but in the end the battery did start to become unstuck. I also removed the motherboard (disconnecting the two connectors to do so) following Andrew's comment, but had to use heat in the end. Patience is a virtue... All working once back together again; I got a genuine LG replacement on eBay for £15. Hopefully the battery will last a day now - time will tell!

Ollie Steer -

All worked - hardest part was getting the back off - the fixit tool isn’t great to be honest. Hairdryer a better option then the iOpener for getting the battery out.

Rob Wood -

thank you,,,, your instructions were clear and to the tee. Worked like a dream. It was a little scary at first, however, I took my time and did it! thank you again.

TracyN

Tracy Nikol -

Thank you … your instructions were clear and to the tee. It was a little intimidating at first, however, I took my time and was able to switch out my old battery for the new one without any problems. Thank you again.

Tracy Nikol -

Thank you very much! Very clear instructions.

I didn’t have a iOpener kit, so I used the kind of things to keep you warm that you put in the microwave. It’s not too hot so it can’t damage the phone but warm enough for the glue to slightly melt. Then I used a dental floss to separate the adhesive from the battery.

But when I reassembled the phone the fingerprint reader was not working. It was because I damaged the connections which are on the top left above the battery (opposite side of where the battery is connected (step 6). I managed to fix it but I’d advise to be very careful any time you manipulate the phone when removing the battery.

Remi -

Thanks for the guide. I replaced the battery (official LG replacement) last week and so far everything is working properly. Overall it’s not difficult. The only step which is a bit more challenging, is removing the battery itself as it’s “squishy” and the adhesive is rather strong.

But nevertheless I would only do it if really is needed & make sure to take enough time to follow the process carefully. After all it’s clear the phone is not made to dis/re-assemble often as it has a lot of fragile parts (in particular in step 5)

Dieter Termote -

Worth noting that the flat cable between battery and main board is slightly longer than required and arrives straight.

You need to put a fold in it for it to fit, which is easier to do before you place the replacement battery in the sticky slot.

Travis Dixon -

Also that the back panel clips to the camera, not the finger print panel

Travis Dixon -

I was able to slightly pry up one side of the battery, and then used a small hairdryer to loosen the rest of the glue. By slowly and gently prying as I heated the battery, it released from the glue without damage to t he phone. I proceeded with that step very carefully and it all went well. The instructions were very helpful. Everything is working perfectly.

Gary Dolan -

Did everything, no sweat. Battery level now stuck at 50%. Ideas?

spencer.andre -

Just a  thank you. Good job

jay Smithers -

Same here. Battery level stuck at 50% after battery replacement.

Darren Chapman -

Thank you so much. I’ve used this a few times with some issues on my phone, once again saving my bacon!

Heather -

Geht keine 5 Minuten, Danke!

Andreas Soder -

It took less than half an hour to do this, and the phone is back up and running like it was never taken apart.

Outstanding tutorial. The only tip I can really suggest, is take your time, and be patient. It also might help to carefully use an IFixit prying tool to work the corners of the outer case loose, very carefully.

Thanks :)

Brian “Retina Burner” Turner -

Took about 15 minutes. Thanks so very much. With your info I was not treading into the unknown. P.S. I found it easier to to connect the battery and then put the battery into the case.

Robert H Smith -

Much easier than I expected. Took about 10 minutes.

Using a credit card as a spudger to remove the old battery worked like a charm. Didn’t need to use any heat!

Thanks to all for the great suggestions.

richardfrisch -

This worked great for me as well, however now suddenly the sim slot does not detect my sim card anymore :(

Jeroen Tuijn -

Replaced with battery from iFixit. Remains to see if capacity improved. Volume down button did not work after the replacement. Upon further inspection, I found a dislocated resistor on my desk while cleaning up. Sad days.

Opened the sim tray with a 0.1” pin header. Opened back cover clips with the back lever of a pair of nail clippers. Removed battery by heating it with a soldering station heat gun on the lowest setting for a few seconds, then prying it up starting under the flex cable. Experienced the “terrifying crack” mentioned by another commentor.

On the volume button, looks like this reddit commentor had the same issue: https://old.reddit.com/r/nexus5x/comment...

So please be careful with the volume buttons if you’re doing this replacement.

Daniel Walters -

It seemed to me that the biggest trick to completing this was getting the metal ribbon on the battery to connect precisely to that spot on the phone. It took me several tries to get the ribbon in the right spot to make the connection. A tip… I could tell that it wasn’t connected properly when I couldn’t turn the phone on, but I also wondered maybe the battery wasn’t “pre-charged” enough to register… I plugged the phone in and got the lightning bolt, but it did not indicate it was charging, and so I tried again to connect the ribbon correctly. It took several tries before I saw that the lightning bolt indicator showed it was charging before I reassembled the rest of the phone.

George Bingham -

This is a superb guide - thanks so much for pulling it together! I did it step by step with my 10 year old son, revitalising my 5 year old Nexus to hand down to him. It’s a good lesson all-round. Spend $25 for an original LG battery (rather than $500 of my hard earned wage), use this excellent and easy to follow guide and keep another perfectly usable piece of tech out of landfill. I didn’t use any heat guns, just a basic spudger that came with the battery, a guitar pic for the SIM slot and no shortage of patience with firm but supple pressure - both to get the case off and the battery out. Successful rapid charging of the battery and all working as expected. Really happy with it. Thanks again!

Craig -

I have a tray full of tools for this work - following the instructions in sequence took less than 30 minutes with no problems at all and the phone is now fully functional again. The internal design of the Nexus 5X phone is much better than more modern phones and the battery replacement is relatively simple and easy.

Edmund Cramp -

everything you just said. Wish all modern phones were this easy

Jaxon Lee -