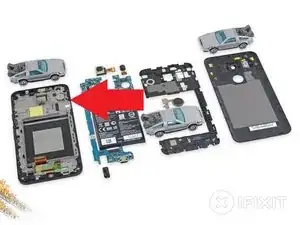
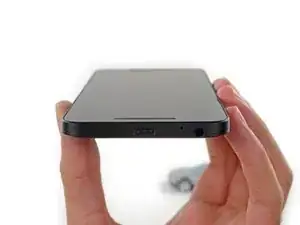
Einleitung

  1. ICCoMW16jfCrFbcn
    ICCoMW16jfCrFbcn
    sQxCgO3CGWjyHP2m
    MDAUADr5BeVSLDZl
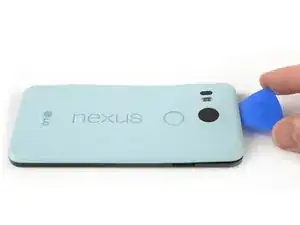
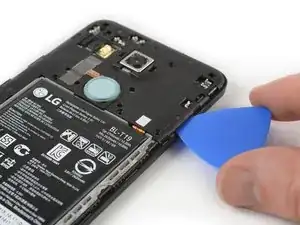
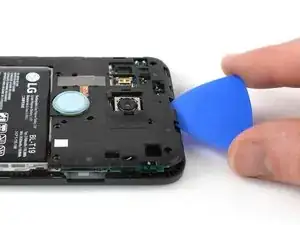
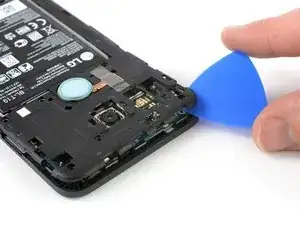
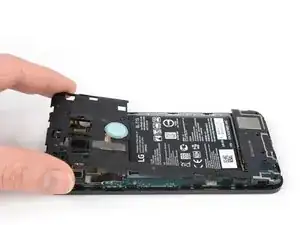
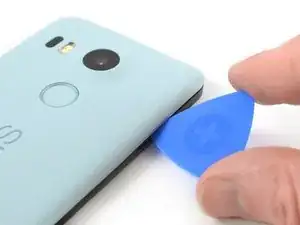
    • Setze ein Plektrum in die Öffnung des SIM-Karteneinschubs und verdrehe es zur Seite, um die erste Plastikklammer zu lösen, mit der die Rückabdeckung befestigt ist.

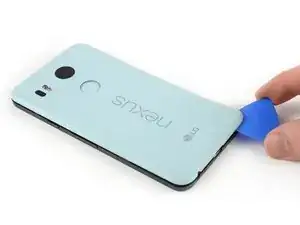
    • Schiebe das Öffnungswerkzeug um die Oberkante des Gerätes, um die Plastikklammer zu lösen, mit der die Rückabdeckung befestigt ist.

    A guitar pick is a good substitution for the plastic opening tool.

    Sam Sippe -

    Here’s a photo of the location of the 18 tabs that hold the back cover in place

    Steve -

    Twisting sideways didn’t do it for me, but sliding along the edge did. However, at first I didn’t realize that the pick was between the motherboard and midframe, rather than between midframe and back cover like it was supposed to. This led to breaking off a spring-loaded connector on the motherboard, connecting to an antenna (I guess) in the back cover. So far I haven’t noticed any reception issues, but I can’t say for sure.

    In essence: be careful to get the pick towards the back cover, and not “straight in” under the midframe.

    Hampus -

  2. afVYqSRSsfYK5iHi
    afVYqSRSsfYK5iHi
    pIWZAi2MnVlPLqqa
    WCXoRcGIOO46lSW1
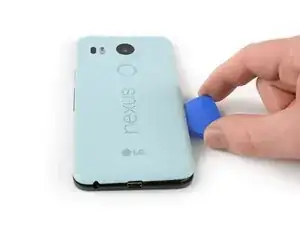
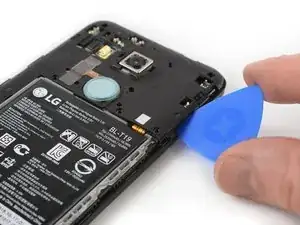
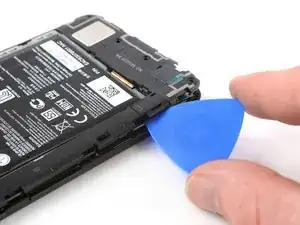
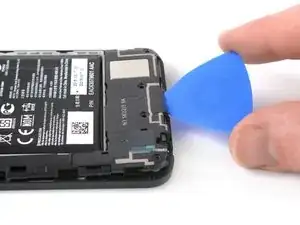
    • Schiebe das Plektrum um alle Seiten des Smartphones herum, um alle Klammern zu lösen, mit denen die Rückabdeckung befestigt ist.

  3. elaUMDhpoLaSyiLC
    elaUMDhpoLaSyiLC
    xC4oPmeXKWyCeJYD
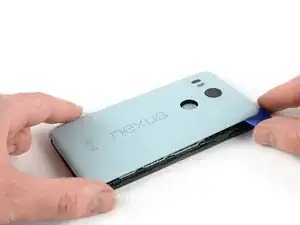
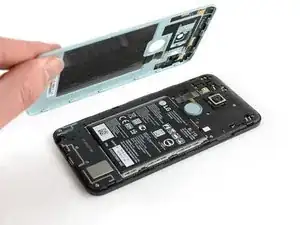
    • Kippe das Plektrum, um die Rückabdeckung ein wenig anzuheben.

    • Beim Fingerabdrucksensor befinden sich noch zwei weitere Plastikklammern. Löse sie, indem du die Rückabdeckung behutsam wegziehst.

    • Entferne die Rückabdeckung.

  4. SLBb5Cl3QMGTDxxc
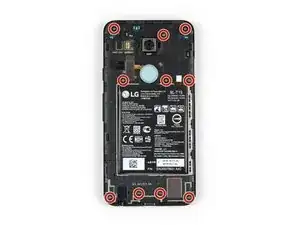
    • Entferne die zehn 3,6 mm Kreuzschlitzschrauben #000, mit denen der Mittelrahmen befestigt ist.

    Some models use a Y1 screw head.

    Kyle Wright -

  5. kbJbMKZvCYpi5Ym1
    kbJbMKZvCYpi5Ym1
    SBDl6Qt1OeRUcuOJ
    • Setze ein Plektrum in den SIM-Karteneinschub ein. Drehe es zur Seite hin, damit sich die Kunststoffraste löst.

    The photo seems to show that the person is opening from the top, which is the opposite of your advice. So, just want to be clear.

    Robert Konigsberg -

    yes, open from bottom first... the pic above shows the finished product after reaching top of phone. I found it best to actually start close to the right of the usbC connector. Pushing inbetween the 2 tabs and up will release the shell.. then work clockwise.

    Chris Mayberry -

    Chris, your advice to start to the right of the usbC connector was excellent, thank you!

    Robert Konigsberg -

    I found that my middle panel was already broken at the narrowest part just to the left of the 2-D scan code on the battery, perhaps from some ham-fisted previous repair. This seems of little consequence, there do not seem to be any electrical connections running through this part.

    Wiley Sanders -

    After a long amount of prying, I discoved that, if used gently, a jimmy can really help get the plastic off

    Timothy Owens -

    I could not remove the cover with the opening tool but had success with the opening picks (the triangle parts). Just slide them under the cover and gently bend and twist the pick to release the cover from the locks. By the way: it’s perfectly normal for the bottom cover part to come loose from the top cover part. It’s designed that way (they interlock).

    Marco Miltenburg -

    Here’s a photo of the location of the 20 tabs that hold the middle assembly in place, and the pry angle needed.

    Steve -

    This is the scariest part but it is the same process of taking a bike tire off the rim: lift up one part of the cover then put a wedge under the lifted section to hold it up then continue around the frame lifting it up and holding it up with the blue picks. You’ll find that after you life the bottom you can wriggle free the rest by hand.

    The 10 screws came out quickly using the IFIXIT.com magnetic screwdriver.

    mcguinness.david -

  6. MPaVeGZ53Yant1bX
    MPaVeGZ53Yant1bX
    1EYFK4Jmr4ZkYCXc
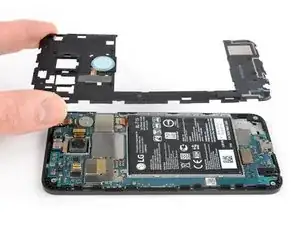
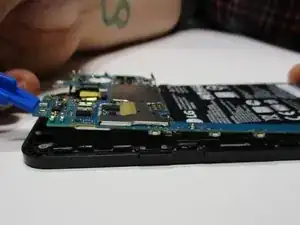
    • Schiebe das Plektrum weiter um den oberen Teil des Mittelrahmens, um die Plastikrasten zu lösen.

  7. UnqADRuHrCdSINRZ
    UnqADRuHrCdSINRZ
    LfjUs6JGfUqrEVjA
    • Öffne mit dem Plektrum die Plastikrasten an der langen Kante des Mittelrahmens und an der unteren Kante.

    • Stelle sicher, dass die Rasten an der langen Kante gelöst sind. Der Mittelrahmen kann hier leicht brechen, wenn die Rasten nicht richtig abgelöst sind.

  8. A65jPFCZQIiwZlZb
    A65jPFCZQIiwZlZb
    CLJTmiqEsupw21Yg
    • Stelle sicher, dass alle Rasten gelöst sind.

    • Entferne vorsichtig den Mittelrahmen.

  9. hmO33vsqZuTe35JY
    hmO33vsqZuTe35JY
    OrCtpe6SqaDtkiEL
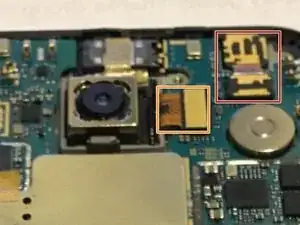
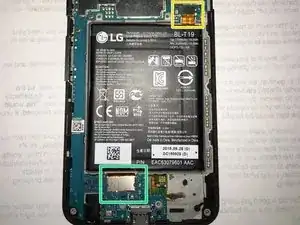
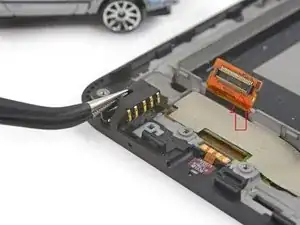
    • Entferne folgende vier Press-Fit Verbinder. Benutze dazu das flache Ende des Spudgers:

    • Für die Frontkamera.

    • Für die Rückkamera.

    • Für den Akku.

    • Für das Display.

  10. iGK66GjIfLEHlyVu
    iGK66GjIfLEHlyVu
    ULhUeL3lUyk5LvwW
    2YQWfP1xOO61tlvk
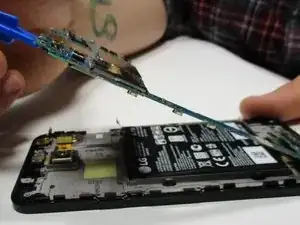
    • Platziere das Ende eines Plastik-Öffnungswerkzeugs unter einer der beiden oberen Ecken des Motherboards.

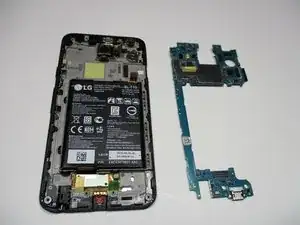
    • Drücke das Motherboard behutsam nach oben, um es vom Gehäuse zu lösen.

    • Achte darauf, dass kein Flachbandkabel am Motherboard hängen bleibt.

    From where we can buy motherboard

    SANDHU CAR DESIGNS (SCD) -

  11. 3hbGdNowa1WXHula
    • Elektrostatische Ladung kann dein Gerät beschädigen. Berühre daher nicht die Anschlüsse und Widerstände auf dem Motherboard mit deinen bloßen Händen!

    • Diese Anleitung funktioniert vielleicht nicht, wenn du probiert hast dein Gerät anzuschalten oder aufzuladen, nachdem es nass war.

    • Hardwareschäden sind immer möglich, deswegen ist dies nur ein Versuch die Überlebenschancen zu verbessern.

    • Nachdem die vorbereitende Demontage fertig ist, musst du vorsichtig die Metallabdeckungen auf der Vor- und Rückseite des Motherboards mit einem Messer entfernen.

    • Sie klippen sich einfach aus und ein.

  12. b5HEmKUKmOGqwO4B
    b5HEmKUKmOGqwO4B
    oYhRvjkIUmBY2MKF
    • Säubere das gesamte Motherboard mit Alkohol. Stelle sicher, dass alles trocken und die Korrosion weg ist, nachdem der Alkohol verdampft ist.

    • Die Alkoholkonzentration MUSS unbedingt über 90% sein

    • Mache weiter mit dem Entfernen von Wasser im Gehäuse, sowie von allen Steckern.

  13. 4vXfxDicaHq11nt2
    • Bringe die Temperatur nicht über 65°, um Schäden an der Hardware zu vermeiden

    • Lege das Display inklusive Gehäuse für 2 Stunden bei 60°-65° in den Backofen. Dies lässt das Wasser hinter dem Display, was du nicht mit Alkohol erreichen kannst, verdampfen.

  14. XofGOrAyUOJpfUED
    • Wieder zusammenbauen und Anschalten!

    I didn't do the alchohol sections, I just stripped the phone, as above, stood all parts on a radiator overnight, and this morning re-assembled. All currently working except fingerprint reader. :-)

    unseenu -

Abschluss

Arbeite die Schritte in umgekehrter Reihenfolge ab, um dein Gerät wieder zusammenzubauen.

Allen Finley

Mitglied seit: 29/08/16

390 Reputation

9 Kommentare

Where is the microphone located at? Mine was water damaged and it works fine except for the microphone is very low. Thanks in advance for your help

John Zenobia -

If you look at the bottom of your Nexus 5x you will see a pin hole that allows the microphone to receive your voice. The microphone component will be right above that small hole. Unfortunately, I believe that the microphone component itself is soldered to the motherboard. You may be able to clean it more with alcohol and try again after it dries. Buying a new microphone and soldering on the new one would require a special soldering iron and almost expert skill. If you could purchase one with a broken screen for a reasonable price you could replace your whole motherboard with ease

Allen Finley -

My nexus 5x was water damaged about 3 months ago.If follow this process ,is it possible to recover it?

Talha Babor -

Did you tried it? I want to give it a go, if it’s still possible, but its broken about half a year.

Balázs Bulcsú -

My phone is not working it was fine till morning phone automatically switched off tried 1000 times its not working.
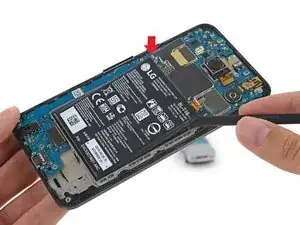
Amritpal Singh -

Does nexus 5x start without battery? My nexus 5x won't start and then I openned it and removed the battery. I thought maybe it starts without battery so I can tell the battery was dead.

Yun Luo -

My 5x fell briefly into a pool. Put it immediately into rice and left it for a day. Then plugged it in and it took a charge. Then a few hours later, I turned it on. Worked completely fine. About 6 hours after I got it up and running, it suddenly went black. If I plug it in, it gives the charging indicator. If I try to turn it on, it vibes once, the Google screen comes on, and then it goes back to the charge indicator on the screen. What can I do next?

lauren.a.schleicher -

My nexus 5x doesn’t charge, I think the problem is made by the rain when some days ago I had that kind of accident.

So, from that moment my phone stop to charge, it works properly except the USB connector. So, now it doesn’t charge and it’s not recognised by the PC whenever I connect to that.

Marco Faccin -

same, i even replaced the battery still doesn’t work. I had experience with the internals before it got water damaged (i had done a battery replacement) so as soon as it got water damaged i powered it down, opened it up, (then proceed to look forever to look for my screwdriver) , found it and took it completely apart, let it sit for a while, put it back powered it on, it had 20% battery (i couldn’t replace the battery then, i needed a phone immediately then), and then i realized it wouldn’t charge. I then replaced the battery and still doesn’t work.

nithin -