Einleitung

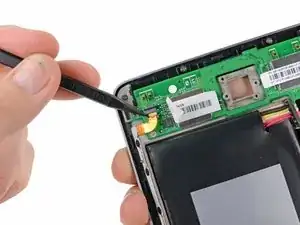
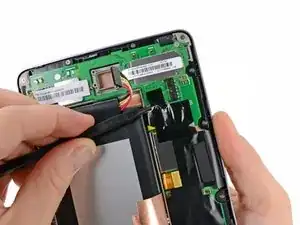
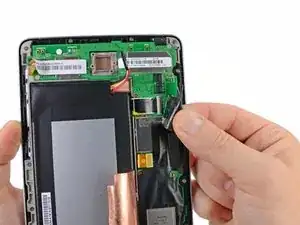
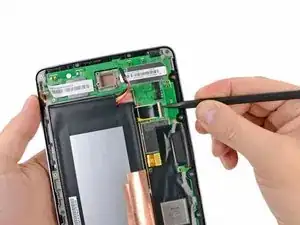
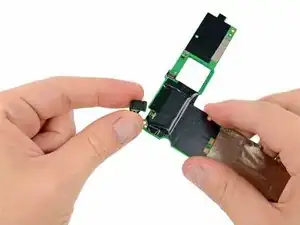
Eine fehlerhafte Hauptplatine kann sehr viele Probleme verursachen. Diese Anleitung zeigt dir, wie du eine defekte oder beschädigte Hauptplatine austauschen kannst.

  1. X5Ts2NpboWv1CrVs
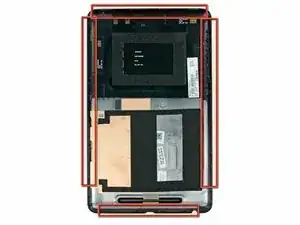
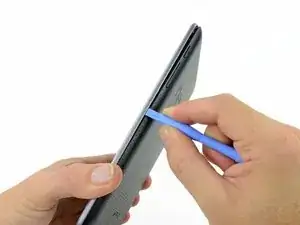
    • In den folgenden Schritten wirst du die Klammern (in rot hervorgehoben) lösen, die sich um den Rand der Rückabdeckung des Nexus 7 befinden.

    • Wende keinesfalls übermäßige Gewalt an, leider brechen die Klammern leicht.

    Mine doesn't look like this. There is no metal band around it. The only opening looks like its between the front glass and back which is on the front. I'm afraid to try it for fear of breaking it. Any suggestions?

    Kim McCauley -

    There is no front or rear panel. There’s no sign of any seam whatsoever. The front and back are one solid piece of plastic.

    Proud Liberal -

  2. GfNZgZXTDvoLusXy
    GfNZgZXTDvoLusXy
    anLmRNrUoNQWBKUY
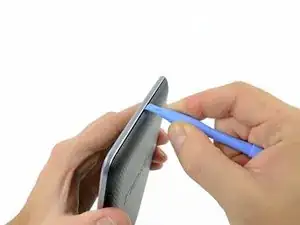
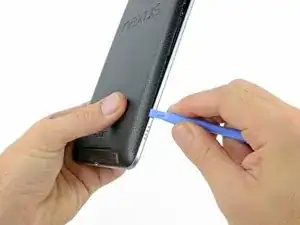
    • Führe vorsichtig ein Plastic Opening Tool am oberen Ende des Nexus 7 zwischen Vorder- und Rückseite ein.

    • Führe das Opening Tool am oberen Ende entlang, um die beiden Hälften des Nexus 7 zu trennen.

    My Nexus 7 looks nothing like this. These instructions are horrible as they do not work.

    Andy Garcia -

    someone help? my nexus looks completely different

    Music Raider -

  3. WwtYTYZ2CAceGXng
    WwtYTYZ2CAceGXng
    53wRQHjFW23GmNT1
    jYpEiy4UnehyKoDM
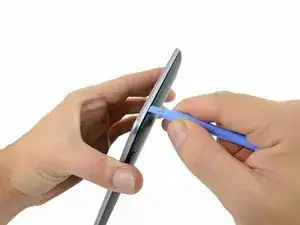
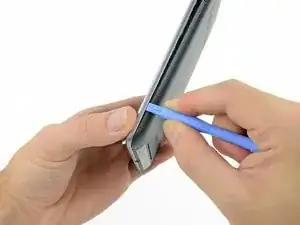
    • Führe an der Seite in der Nähe des Power Buttons vorsichtig ein Plastic Opening Tool zwischen Vorder- und Rückseite ein. Löse so einige Klammern entlang der rechten Seite.

  4. XyWkGPoQkp2N3sRo
    XyWkGPoQkp2N3sRo
    kywiZcRePllXllUk
    cFluDH2DnBlOygwN
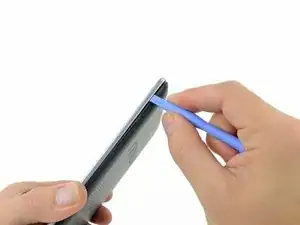
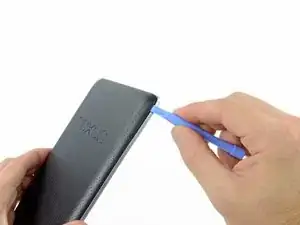
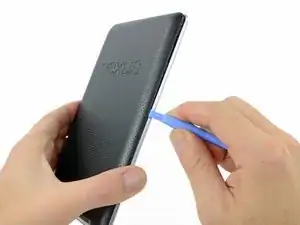
    • Führe vorsichtig ein Plastic Opening Tool an der linken Seite des Nexus 7 zwischen Vorder- und Rückseite entlang, so wie in früheren Schritten beschrieben.

  5. YMtnflWPHAXsTTiZ
    YMtnflWPHAXsTTiZ
    2YmqXWNHKoB6qB1x
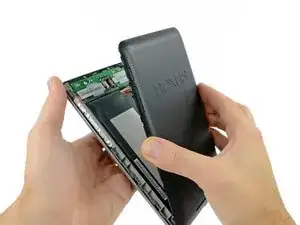
    • Nun kannst du – vorsichtig – Vorder- und Rückseite trennen.

  6. KPSU3Bq55IZSRIyl
    KPSU3Bq55IZSRIyl
    LvEv41KaObLIDhVE
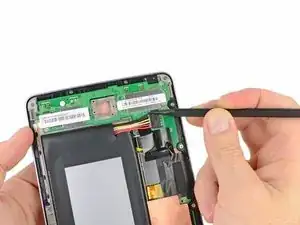
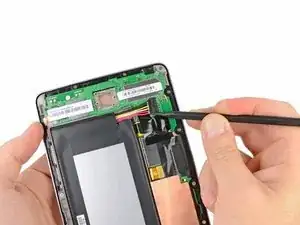
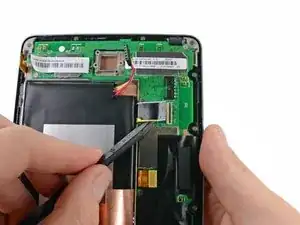
    • Benutze die Spitze eines Spudgers. Wackle abwechselnd erst an einer, dann an der anderen Seite des Akkukabels, um es senkrecht aus seinem Sockel zu ziehen.

    I have the newer version of Nexus and the battery connection inside is different from pictured here. I can't seem to get any part of the connector backed out. Any further details about how to accomplish this step?

    indianowen31 -

    After my post I tried it again, and realized the connector comes straight UP, not OUT. Once I went this direction, the process was simple.

    indianowen31 -

    I followed this, everything worked fine. Even though the battery is now charging, the OS doesn't recognise when the USB cable is connected to a wall socket or a PC. The battery icon when the tablet is shut down shows charging so it works, but the OS in itself doesn't seem to know about it...any ideas?

    /D

    Daniel Zakrisson -

    Thanks for your guide. It makes the process very straightforward. Easier than I was expecting.

    Les Gordon -

    Superb easy to follow guide. Thanks greatly, the nexus 7 lives on ! Just need to patiently wait for it charging now !

    stuart -

    Yes, this is a really helpful guide. I wouldn't have had a clue without it, but it all turned out to be very simple. Thanks a lot!

    Ian Gibson -

    I managed to break one of the two small golden pins to the right of the battery cable (obscured by the tool in the picture above).

    Is this terminal (sorry for the pun)?

    I tried re-assembling (without screwing the assembly back to the bezel) and the display doesn't work.

    gravelld -

    Step 6 could be much clearer. I thought it meant to pry the connector upward, away from the surface. When I did this, all the pins broke off. The correct procedure would appear to be to slide the connector along the surface toward the wire side and battery, leaving the pins at parallel to the surface.

    Unfortunately I don't think my Nexus 7 is salveagable now.

    Warren Harris -

    Watching a YouTube video helped. Dislodge the battery first, then pull the battery away from the connector and the connector will become dislodged quite easily.

    d_ratner_1999 -

  7. 3DVP6vtj2kVyyJtK
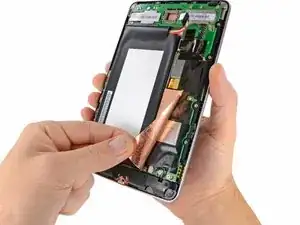
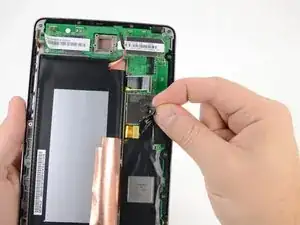
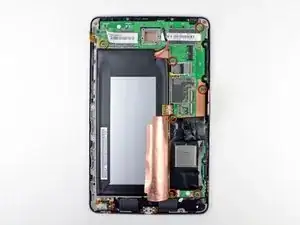
    • Ziehe die kupferne ESD Abschirmung von der Unterseite der Hauptplatine etwas ab.

    • Löse die Abschirmung nicht ganz ab, sie ist noch unter dem Akku befestigt.

    • Wenn du nur den Micro USB Buchse austauschst, brauchst du nicht das kupferne Kühlblech, so wie im Foto, abzuziehen. Wenn sie losgeschraubt ist, kann die Lautsprechereinheit einfach weg geschobenen werden. Wenn die Lautsprecher ersetzt werden, dann brauchst du nur die untere Ecke abzuziehen, um an den Stecker zu gelangen. Den Rest kannst du lassen.

    Peel back the copper heat spreader for the Nvidia Tegra 3 processor

    Jack J -

  8. GGvCAXX5WDAeFPUH
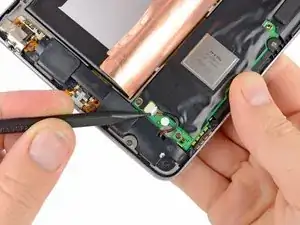
    • Drücke den Stecker am Lautsprecherkabel mit der Spudgerspitze aus seinem Sockel auf der Hauptplatine.

  9. cJVGaSaNN3u1eIUE
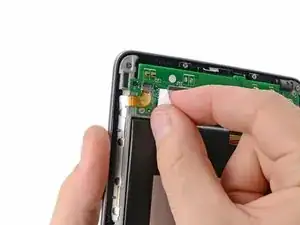
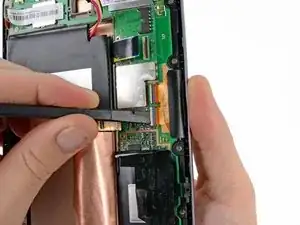
    • Löse den Aufkleber ab, der den ZIF Verbinder an Lautstärkeregler und Einschalttaste bedeckt.

  10. ForvFKNHSykqGxKm
    ForvFKNHSykqGxKm
    fBXZlUJfZmGKJtPt
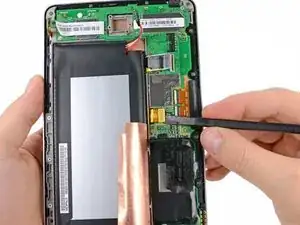
    • Kippe den Sicherungsbügel am ZIF Verbinder am Flachbandkabel von Lautstärkeregler und Einschalttaste mit der Spudgerspitze vorsichtig hoch.

    • Achte darauf, dass du nur am Sicherungsbügel arbeitest, nicht am Sockel selbst.

    • Ziehe das Flachbandkabel von Lautstärkeregler und Einschalttaste mit der Spudgerspitze gerade aus seinem Sockel.

    Looking to purchase a power & volume cable strip?

    Mike Patrick -

  11. 2CTtHaWbyuWURshe
    2CTtHaWbyuWURshe
    dELmSSpj4YuY5vvx
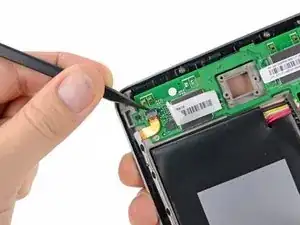
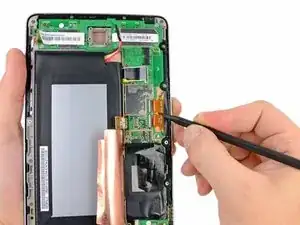
    • Ziehe vorsichtig das Klebeband ab, welches den Sockel des Flachbandkabels zur I/O Karte auf der Hauptplatine bedeckt.

  12. TDgYoUaKCYqojgCy
    TDgYoUaKCYqojgCy
    xVuDEA2XntndNOta
    • Kippe den Sicherungsbügel am ZIF Sockel des I/O Datenkabels vorsichtig mit der Spudgerspitze hoch.

    • Achte darauf, dass du nur am Sicherungsbügel, nicht am Sockel selbst arbeitest.

    • Ziehe das I/O Flachbandkabel mit der Spudgerspitze gerade aus seinem Sockel.

  13. kYPnReGMEseNkJPb
    • Ziehe das Klebeband von den Sockeln des Display- und Digitizerkabels ab.

    • Es ist nicht notwendig, dass du das Klebeband ganz entfernst. Aber es ist hilfreich, wenn du es auf sich selbst zurückfaltest, damit es aus dem Weg ist.

  14. SfIWm2sRDr5coIw1
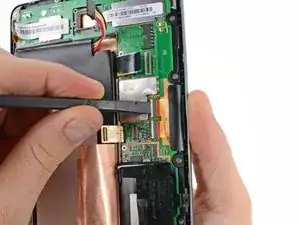
    • Hebele das Displaydatenkabel mit dem flachen Ende des Spudgers gerade aus seinem Sockel auf der Hauptplatine.

  15. YywCLeSyRkTp1iZn
    YywCLeSyRkTp1iZn
    AJFhSMdFaFRA5jPM
    BmaCmZvEwRN2qZHU
    • Kippe vorsichtig die Sicherungsbügel an den ZIF Sockeln des Flachbandkabels zum Digitizer hoch.

    • Achte darauf, dass du nur an den Sicherungsbügeln arbeitest, nicht an den Sockeln selbst.

    • Ziehe das Flachbandkabel zum Digitizer mit der Spudgerspitze gerade aus seinem Sockel.

  16. mV3tgUiNAkcneKNT
    mV3tgUiNAkcneKNT
    QuqdtHSKCheCVoge
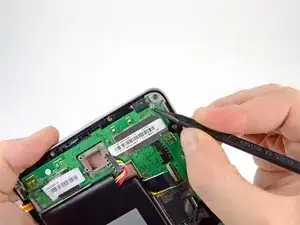
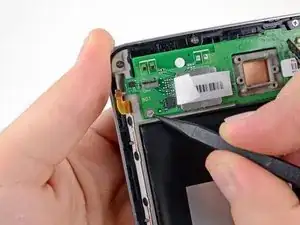
    • Entferne die Garantiesiegel mit der Spudgerspitze.

  17. Uoaid5luEbAv3ReP
    • Entferne folgende Schrauben, welche die Hauptplatine am Metallrahmen befestigen:

    • Sechs 3,25 mm silberfarbene Kreuzschlitzschrauben

    • Eine 2,23 mm schwarze Kreuzschlitzschraube

    I found for the screws it is one PH#000 and six PH#00

    kateumf -

  18. r6KwFHgoegG4KybX
    r6KwFHgoegG4KybX
    NbwCJFrAnGvp3mPF
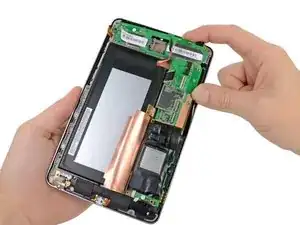
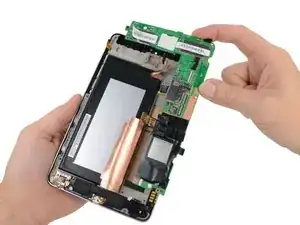
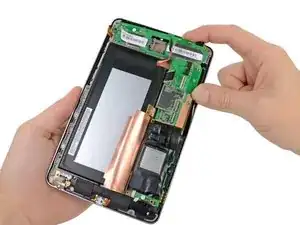
    • Hebe vorsichtig die Hauptplatineneinheit aus dem Nexus 7. Achte darauf, dass sich keine Kabel verfangen.

  19. pX3KN4jHnxTOGQ43
    • Hebele die Frontkamera mit dem flachen Ende des Spudgers gerade aus ihrem Sockel auf der Hauptplatine.

  20. rA1GLBT2SlBaYASs
    rA1GLBT2SlBaYASs
    VCVuSFbqsVJCxS5N
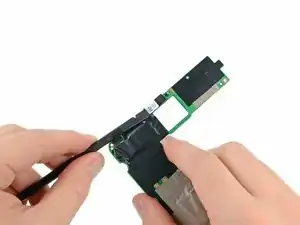
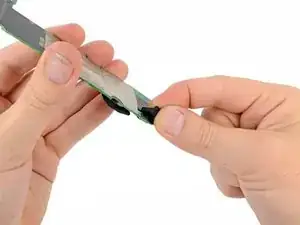
    • Ziehe das obere Mikrofon sorgfältig gerade hoch aus seinem Sockel.

    • Entferne in gleicher Weise die Gummidichtung am unteren Mikrofon von der Hauptplatine.

  21. AHBomDZ3LSYK6HLg
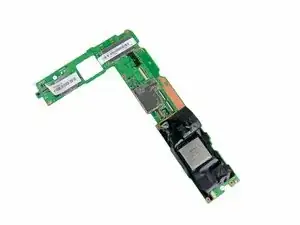
    • Die Hauptplatine bleibt zurück.

Abschluss

Um dein Gerät wieder zusammenzusetzen, folge den Schritten in umgekehrter Reihenfolge.

Brett Hartt

Mitglied seit: 13/04/10

125814 Reputation

16 Kommentare

Very helpful and 100% accurate. Thanks

PC452 -

I agree - very good guide, and perfect to have all those high-res photos! For reassembly, make sure you insert the ZIF cables all the way before locking them - at first try my touch-screen did not work. Another attempt at inserting the digitizer ribbon cable did the trick.

Lars L -

Very good guide.

When peeling back the tape in various steps, it's quite easy to tear it and the replacement motherboard I had didn't come with any new tape. I used electrical tape to secure the cables and components as they were originally and it seemed to work fine.

Additionally, since my broken unit had been unused for a while, the battery was totally dead. It took a while for it to show signs of life (left it plugged in for 30+ minutes) and I found that holding the power button and pressing the volume down button together for a few minutes also helped to bring it back into action.

Tariq Khokhar -

How long did you need to hold down the power buttons? Literally minutes, or was it 1 min or 20 sec or something like that?

My Nexus 7 2012 sat unused for probably 6+ months. I replaced the motherboard following these directions, and have triple-checked that everything is connected correctly. The battery is getting charge--the wall plug and device feel warm when it's plugged in. However, unable to get any response out of the device. I've held all combinations of buttons (I seem to remember getting into boot mode with volume up + power) but nothing happens.

jesvanv -
Worked for me guys. Awesome guide! What do you do with the old motherboard- trash basically?

cfclay -

Great guide.

stefanglavchev -
I noticed that the chassis has what appears to be a mounting point for a rearward facing camera. If my observation is correct, can we 'update' our 2012s' by adding the camera?

tgolightly -

Is the NAND problem the same across all Nexus 7 2012 motherboards? Assuming the NAND flash is attached to the MB. I have a 8gb version that is now excruciatingly slow, factory wipes do not speed it up with no apps installed. Keyboard takes forever to show up. Loading apps and changing apps takes just as long. It is primarily a platform test device so it is handy to know if the app will run on a crazy slow machine. Was toying with the idea of swapping in a new MB to change out the NAND and perhaps get 2012 performance once again.

irongamer -

I had slow N7v1 8GB on my hands. Ordered replacement board with larger capacity, replaced it, and the tablet is still dog-slow.

ebelin -

Is it safe to order motherboard from there website bcoz it says 'used & tested'..??

abhishek -

I just completed this replacement process, and everything went great.

The only variance between this guide and reality was the metal shroud (looks like a sideways Utah) right above the data cable (as seen in step 14 above) did not come on the replacement motherboard, so I popped it off the old one and fitted it to the prongs on the replacement.

Brought my old, dead Nexus 7 back to life, including upgrading from the 16M to 32M.

greykher -

Brilliant guide worked perfectly, thank you for creating and sharing these.

For the screws it is one PH#000 and six PH#00

kateumf -

Wondering about trying this myself as mine is not useless as a result of a software upgrade.

I had heard that it needs some software to get it up and running - or does it just reboot and update itself?

Thanks

Barry Wollaston -

Happy, happy! This was an easy and quick install. Everything matched up and started right up. My only mistake was I signed into my current Google email account and it proceeded to install all the apps from my Samsung Galaxy Tab S. Not a big deal I just deleted them all. I guess when you are starting out new (motherboard) you should create a new Google email account. It also installed 5.1 Lollipop version. Originally I had Kit Kat 4.4.4. So far no issues with this version.

Jan Russo -

My N7/2012 became useless it appears after an update to I think 5.1.1. Wouldn't charge beyond 34% no matter after how much time also would freeze or reboot eventually to just the Google splash screen. Tried hard resets and all. Finally no response no matter how long I hold down the buttons. Already spent for a new battery and charging port (uninstalled) before the complete breakdown. Does anyone know if replacing the motherboard at $40>50 might have any positive impact or should I just trash the thing.

Thanks

rob young -

If I replace the motherboard will that completely wipe the nexus?

Max SinisterFX -