Einleitung
This installation guide will help you remove and replace the LCD screen of your Nikon Coolpix 4600 camera.
Werkzeuge
-
-
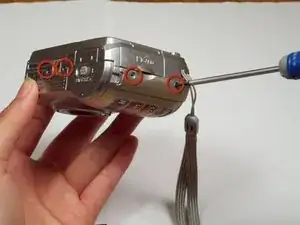
Locate the six screws on the outside of the camera (2 3.3 mm on the bottom, 2 5.25 mm on the left, and 2 5.25 mm on the right).
-
Using a Phillips 00 screwdriver, remove all of the six screws.
-
-
-
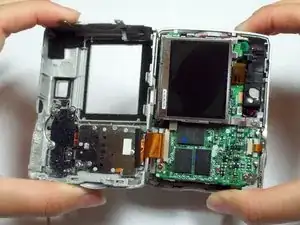
Look closely at the connection between the ribbon cable and the motherboard. Locate the two grey tabs on either side of the connecting bracket.
-
Slide the grey tabs toward the bottom of camera. Gently disconnect the ribbon cable from the motherboard.
-
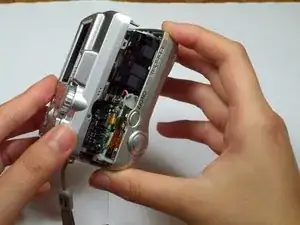
After disconnecting the data ribbon, you can now separate the back case from the front case.
-
-
-
With the lens facing down and the bottom of the camera facing away from you, lift up the right edge of the LCD screen (left side of the screen will be glued down).
-
Insert plastic tool under the screen and gently pry up the left side of the screen until the glue seal is broken.
-
-
-
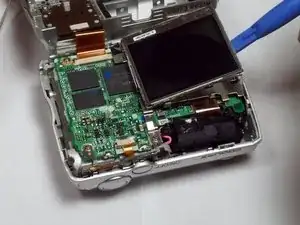
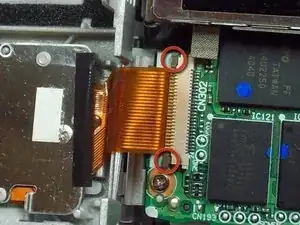
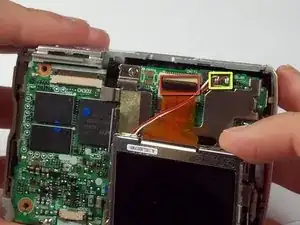
Locate the orange ribbon cable and two wires (red and white) attached to the motherboard.
-
Lift up on the black clamp and pull out data cable.
-
The screen should now be completely free from the camera.
-

To reassemble your device, follow these instructions in reverse order.