Einleitung

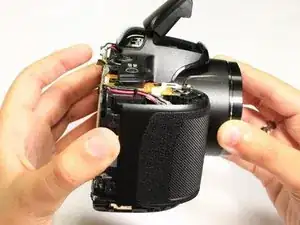
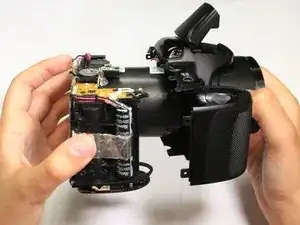
This guide gives a step by step procedure to remove the front housing for internal repairs.

  1. mlISKwgu3mjryn6P
    mlISKwgu3mjryn6P
    1JTPlSUGwCV3jDEd
    RudC4ASCMHyGxVEL
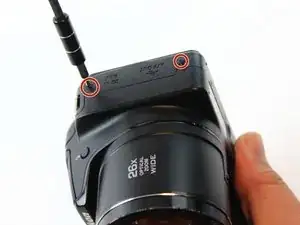
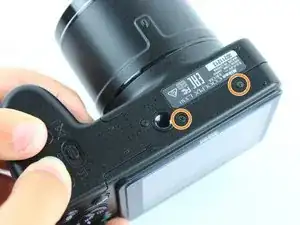
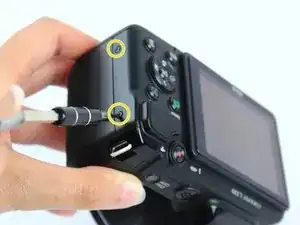
    • There are six screws attaching the back housing to the camera. Remove the screws from the body with a PH000 screw head.

    • Two 1.5x2.5mm screws on the right side.

    • Two 1.5x2.5mm screws on the underside.

    • Two 1.5x2.5mm screw on the left side.

  2. yaW3OYWKDRTxQcUW
    yaW3OYWKDRTxQcUW
    PSDujxKmMkFQBSYo
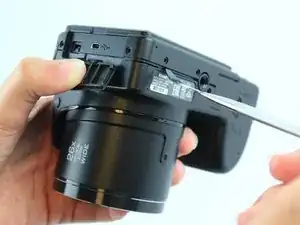
    • After removing the screws, use a metal spudger or plastic opening tool to push the back cover out.

    • The metal spudger can damage the plastic housing, so use caution when applying any pressure to it. Use a plastic opening tool to reduce the risk of damage to the housing.

    • Remove the back housing of the camera by lifting it directly up.

    • The back cover may be slightly tight, therefore more force may be needed to lift it up.

    Note:

    There are 3 locking cam-lugs along the top edge of the back plate. These slot over the top of matching very delicate moulded catches. Carefully lift and lever this top edge first.

    Chris Balchin -

  3. qeRcUOeKPxIlJSfm
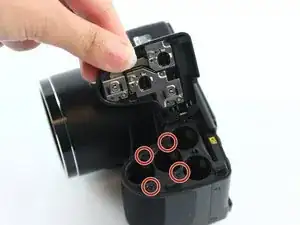
    • Remove the four 1.5x2.5mm screws in the battery housing using a PH000 screw head.

  4. dhfcc4Veo2dTOqkM
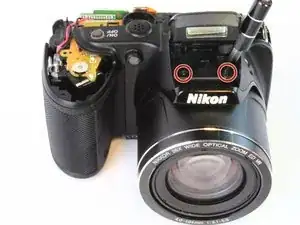
    • Remove the two 1.5x2.5mm screws below the flash unit using a PH000 screw head.

    In this photo, the shutter release cover has been removed, but the instructions do not describe how to remove this cover. My camera has a loose cover, causing the shutter release button and zoom shuttle to be intermittent.

    jtheires -

  5. 2d4bQdvwHoOnVTWX
    2d4bQdvwHoOnVTWX
    XxK23I2CguoAmIAH
    GeoIXCSmNaARJcsF
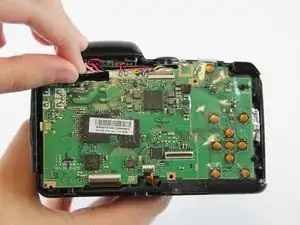
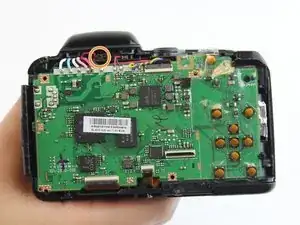
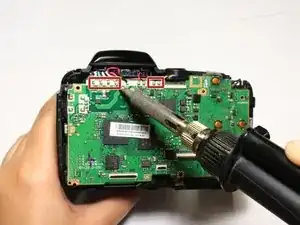
    • Remove the black tape covering the electrical connections.

    • Remove the 1.5x2.5mm screw using a PH000 screw head.

    • Desolder the six marked wires.

    • The screen has been removed as well as the back-plate in this step, however they need not be removed to replace the front housing.

  6. hbAmTKkArLSnZj4Y
    hbAmTKkArLSnZj4Y
    AFxgddVFHGT5ujKN
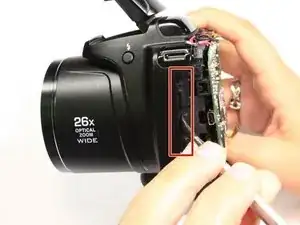
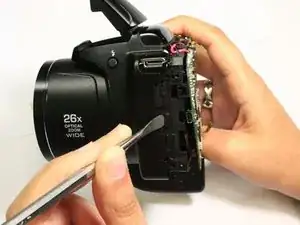
    • Insert a plastic opening tool between the front housing and inner frame.

    • Lever the tool to slide the front housing forward.

  7. mvWEArSydNCOqXI1
    mvWEArSydNCOqXI1
    dxXcEfRtOCH2GJEm
    XEXMC5r4eJnoUfOf
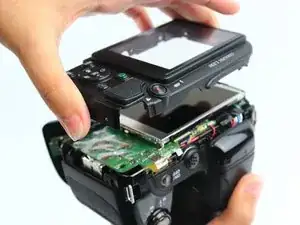
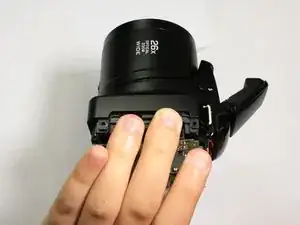
    • Position the fingers of one hand on the inner frame and the other hand around the lens barrel.

    • Pull the front housing away from the inner frame.

Abschluss

To reassemble your device, follow these instructions in reverse order.
Rajeev

Mitglied seit: 10/02/16

569 Reputation

0 Kommentare