Einleitung

This guide details the steps required to replace the lanyard ring.

  1. kFm4vssZdo4cVWDT
    kFm4vssZdo4cVWDT
    EbFFWPXFKa66kVYK
    JmOWaYXQd16xcAU4
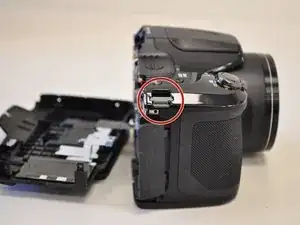
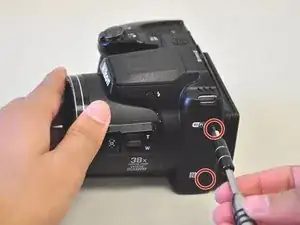
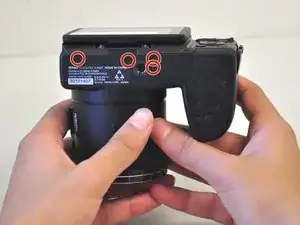
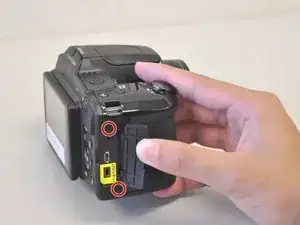
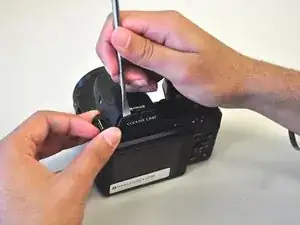
    • Unscrew all eight black, 4mm screws with a Philips 000. (The top-most screw shown in the third image can be accessed by lifting the cover flap off.)

  2. itgQmJJwGeonvGlr
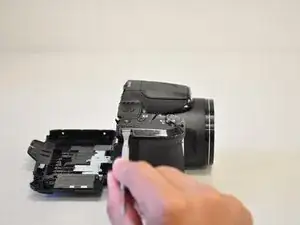
    • Pry case open with a metal spludger by slipping the spludger between the back and front case of the camera and wiggling the spludger forwards and backwards.

    • Be careful not to damage the inner components of the camera when slipping the spludger into the camera.

    Painful to see the damage to the upper housing here done by the spudger. Don't do it this way! There is a hidden ninth screw that you can only access when the flash is opened and you look straight into the flash housing. That ninth screw is what's causing the damage in the picture. You MUST unscrew it to be able to remove the back housing without damage!

    thorsten.stocksmeier -

  3. CYWC1rtDTfx5OnlH
    CYWC1rtDTfx5OnlH
    FZv1MSgITnvCIrKO
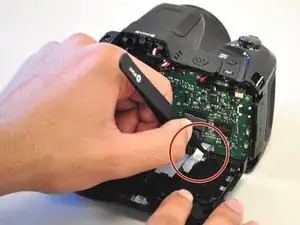
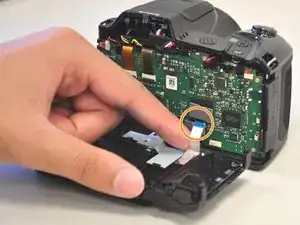
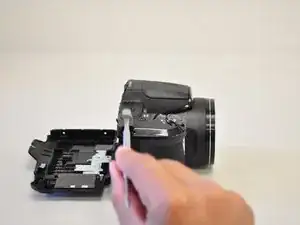
    • Carefully unhook the silver strip with tweezers. Get a grasp of the sides of the silver strip with the tweezers, and pull upwards and out.

    • The strip may also be identified by its blue tip, which becomes more visible once pulled out.

  4. aTPgbYqwHSvgQCdL
    aTPgbYqwHSvgQCdL
    nYgES3I2XtmhQAe6
    • Identify lanyard ring.

    • Unscrew the 4 mm black screw with a Philips 000.

  5. 1kqrSSoD6JslZfiC
    1kqrSSoD6JslZfiC
    To5EYeeiSmj1pZ3E
    • Insert a metal spludger (or another sturdy tool with a thin tip) into the hole of the lanyard ring and lift the ring upwards and out of the camera.

Abschluss

To reassemble your device, follow these instructions in reverse order.

Abraham Lozano

Mitglied seit: 11/04/16

595 Reputation

0 Kommentare