Einleitung

Voraussetzung beim Austausch des Joysticks am Schiebepad

  1. WciIxkCGqqeSwjDE
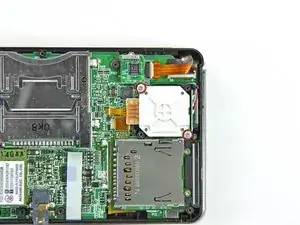
    • Entferne die beiden 7,7 mm Kreuzschlitzschrauben, welche die Rückseite des Schiebepads an der Hauptplatine befestigen.

    my screws wont stop spining what to i do? i have the same problem with other screws and this leavs my joystick very loss and it is dificult to muve it becuase it is aganst the case not lifted up? any sugestions? (sorry for my bad speling jaja im very bad at speling..)

    AppleTopic -

    I think you stripped your screws. I think the best solution is to change the upper cover of the lower assembly and the screws. The fastest, but temporarily is to stick in some way the joystick housing to the cover, but it won’t last long, so do this only if you have to use your console while you wait the cover to come. Anyway, so not overtighten the new screws, or you will be in the same situation once again.

    Daniele Carminati -

  2. bMBnFDhOIiWPDfD6
    bMBnFDhOIiWPDfD6
    E4TVtF3ttsxMSdVm
    X2gZcTXBxZmTrD5t
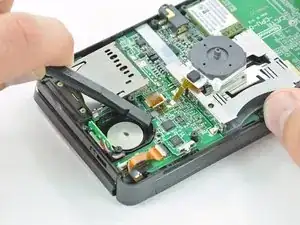
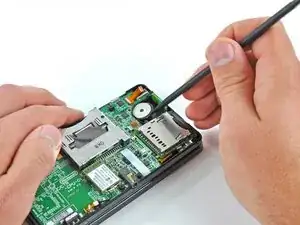
    • Heble die Rückseite des Schiebepads mit dem flachen Ende eines Spudgers von der Hauptplatine weg.

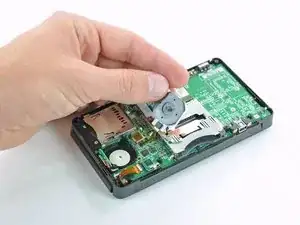
    • Hebe den Joystick des Schiebepads von der Hauptplatine weg und lege ihn auf seine Rückseite, so dass der Verbinder des Flachbandkabels zugänglich ist.

    When reassembling verify that the circle pad control is oriented right. I had to go back in after completion when I realized it wasn't centered.

    Daniel Johnson -

    I would not disable the back side all the way because it could really mess up your 3DS.

    masterspeggy3 -

    From this step, follow this video https://youtu.be/XGdRim2Mvrk?t=627

    you can skipp from step 8 to 20

    lots of unnecessary steps

    Bruno N -

  3. IKPPuB5DIoRiDx2E
    IKPPuB5DIoRiDx2E
    SLSbhMgUFDj5mMLx
    aoqcp6SgbWFZPOht
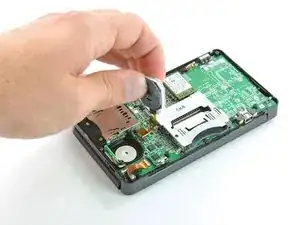
    • Klappe den Sicherungsbügel am ZIF Anschluss des Flachbandkabels zum Schiebepad mit dem Fingernagel oder dem flachen Ende des Spudgers hoch.

    • Achte darauf, dass du nur am scharnierartigen Sicherungsbügel hebelst, nicht am Anschluss selbst.

    • Hebe den Joystick des Schiebepads von der Hauptplatine weg.

    Can you replace a zif socket? The little metal pieces on mine broke off...

    Colton Alverson -

    YOUR &&^&@@ HAHAHAAHA, no you cant you would have to purchase a new motherboard i feek you bro happened in my first time

    vrobinson -

    you might want to find someone who is skilled in component level microsoldering for that

    Samuel Martin -

    The retaining flap on mine broke off, is there any way to fix it?

    Madi Hansen -

    Don't do this step! it is not necessary. you can skip steps 8 through 20

    S Maduras -

    Skip steps 8 through 20. It will save a lot of time. Thanks S Maduras for the warning.

    clarissa.vetintegral -

    Thanks S Maduras! Your tip

    made this super easy. No need for steps 8-20.

    Carl Vero -

    OH MY GOD THANK YOU SO MUCH!!!! I'm sure I would have destroyed my ds if I did all that

    Amber Selley -

  4. avCvIWYWgJyNbmBI
    avCvIWYWgJyNbmBI
    pYrbGImK2u45deHC
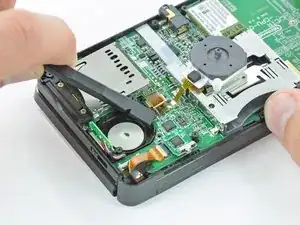
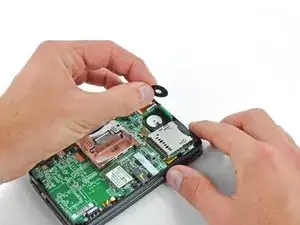
    • Es empfiehlt sich, die beiden dünnen Scheiben unter dem Joystick des Schiebepads zu entfernen, damit sie nicht so leicht verloren gehen.

    • Hebe die beiden Scheiben mit einem Spudgers oder einem Schraubendreher hoch und entferne sie aus dem Gerät.

    When reassembling, you can use the pointy end of the spudger to align the hold again with the joystick. It’ll probably have bounced around while you’re moving other things.

    anthonyhersey -

Abschluss

Um dein Gerät wieder zusammenzusetzen, folge den Schritten in umgekehrter Reihenfolge.
David Hodson

Mitglied seit: 14/04/10

148365 Reputation

0 Kommentare