Einleitung

Be the envy of onlooking gamers with a shiny new rear bezel on your DSi XL.

  1. qD1kXXriJjKTXs4N
    qD1kXXriJjKTXs4N
    nfXjDfdJVldJcxfm
    EQ2VRssTU6XDDXTy
    • Use a push pin to remove the four plastic screw covers on the front bezel.

  2. HuDhEZYSyxQQ55NE
    • Remove four Phillips screws securing the front bezel to the rear bezel.

  3. HyFASKVqEJ1hMpFX
    HyFASKVqEJ1hMpFX
    dFaG3FhAB1K5S1HZ
    • Using two hands, gently slide the rear bezel upwards.

    • The rear bezel will move only about 2 mm.

  4. QhVDB3FIboFDf5Km
    QhVDB3FIboFDf5Km
    5hEWTJ3hAax3csy4
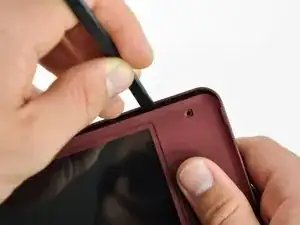
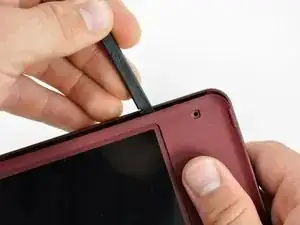
    • Insert a spudger into the gap between the front and rear bezel

    • Rotate the spudger away from the DSi XL, prying the two bezels apart.

  5. ONrY2YYU1HA1YBVm
    • In the same manner as described above, continue prying along the top edge of the front and rear bezels.

  6. ybbhmYo6kLsA3hrB
    • Separate the rear bezel from the front bezel.

    • Do not attempt to completely remove the rear bezel yet. It is still attached to the front bezel by the rear-facing camera.

  7. KcPYMSpvWrB3PfQM
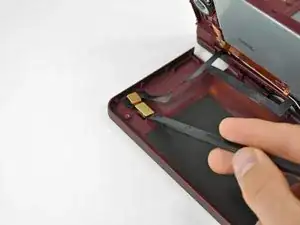
    • Use the flat end of a spudger to pry the rear camera off the rear bezel.

    • Remove the rear bezel.

Abschluss

To reassemble your device, follow these instructions in reverse order.

Matthew Newsom

Mitglied seit: 06/01/10

38178 Reputation

0 Kommentare