Einleitung

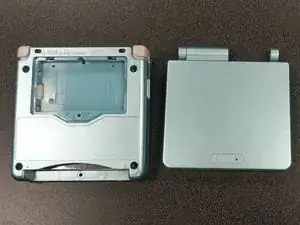
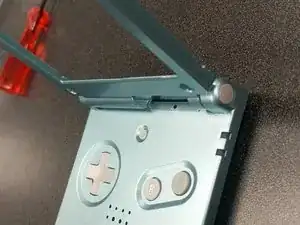
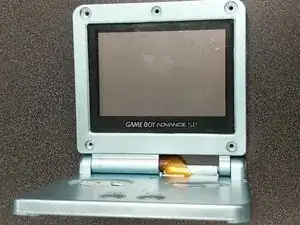
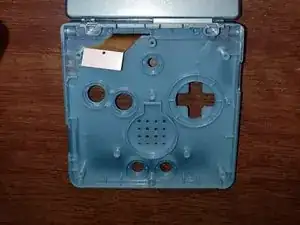
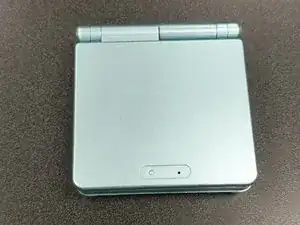
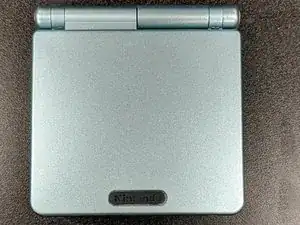
Wenn dein Game Boy Advanced SP AGS-001 oder AGS-101 ein kaputtes Gehäuse hat oder du es austauschen möchtest, kannst du dazu diese Anleitung benutzen.

Bevor du diese Anleitung nutzt, solltest du den Akku für ein paar Minuten aufladen. Wenn der Akku zu alt ist, kann er sich aufblähen und eventuell explodieren. Wenn sich der Akku aufbläht, solltest du vorsichtig sein und einen neuen Akku kaufen, beispielsweise hier:

https://www.amazon.com/Game-Boy-Advance-...

Bevor du mit dem Austausch beginnst, solltest du deine Konsole ausschalten und vom Strom trennen, wenn du sie noch gerade lädst.

  1. SkEV2ReKxqTqWyJp
    SkEV2ReKxqTqWyJp
    fXPoACPeZkIMhIbv
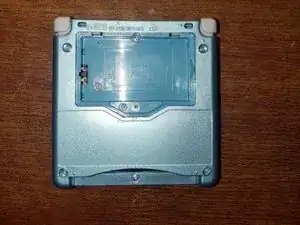
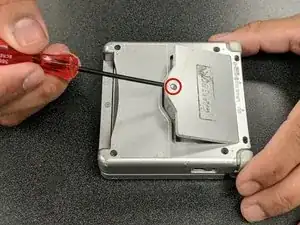
    • Entferne die Schraube des Batteriefachs mit einem Kreuzschlitzschraubendreher #00.

    • Öffne das Batteriefach und entferne die Batterie.

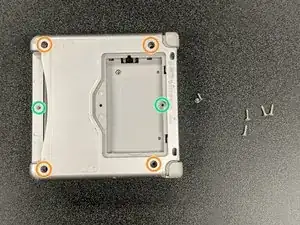
    • Drehe die vier 6,45 mm Tri-Point Y00 Schrauben aus den Ecken des Gerätes heraus.

    • Drehe die beiden 4,6 mm Tri-Point Y00 Schrauben heraus. Sie befinden sich im Batteriefach und im Einschub für das Spiel.

  2. JsNnPmkqq4ZjFUUM
    JsNnPmkqq4ZjFUUM
    rPREXYeaynCrp2lN
    3L1NNjJeegrWOQfk
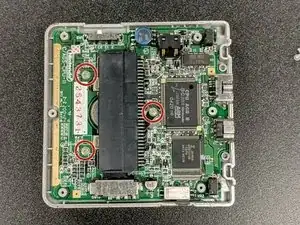
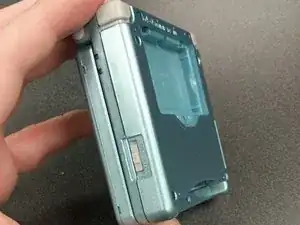
    • Hebe die untere Abdeckung an, um an das Motherboard heranzukommen.

    • Reinige, wenn nötig, den Lautstärkeregler und den Einschaltknopf mit Isopropanol.

    • Drehe die drei 4 mm Kreuzschlitzschrauben #00 aus dem Motherboard heraus.

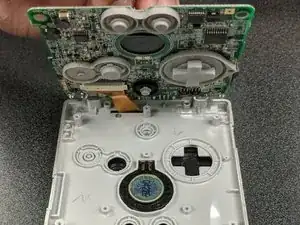
    • Hebe das Motherboard vorsichtig heraus und entferne das Flachbandkabel, indem du die beiden Clips an der Seite vorsichtig in Richtung des Kabels nach oben herausziehst.

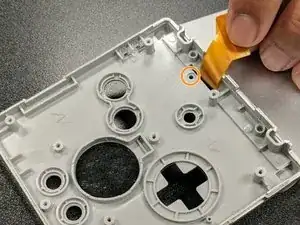
    • Entferne die kleine Kreuzschlitzschraube #00, die sich unter dem Flachbandkabel versteckt. Sie befestigt die Scharnierabdeckung des oberen Bildschirms.

  3. 5NanxmbYjgbPmIsY
    5NanxmbYjgbPmIsY
    YYAFNVWUoMIXG6Rr
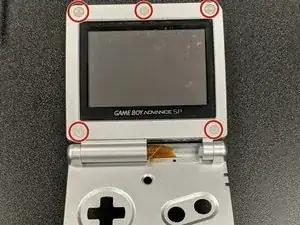
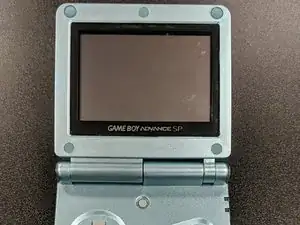
    • Öffne den GBA SP Bildschirm und benutze das spitze Ende eines Spudgers, um die Gummipads um den Bildschirmeinfassung herum zu entfernen.

    • Drehe die fünf Tri-Point Schrauben Y00 heraus, die unter den Gummi-Abdeckungen sitzen.

    • Entferne die Einfassung um den Bildschirm mit einem Spudger.

    • Achte darauf, beim Entfernen der Einfassung nicht am Flachbandkabel zu ziehen.

    are all 5 screws the same size?

    scott lindquist -

  4. GFieZtPwdUqJcNR2
    GFieZtPwdUqJcNR2
    h2v1LCvu1f5riO3B
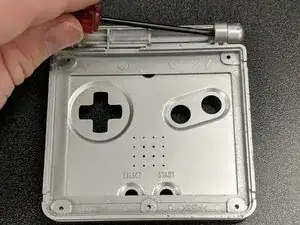
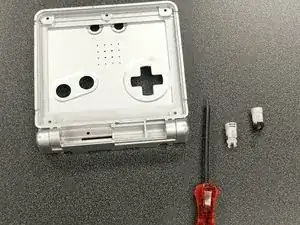
    • Entferne die Scharniere des originalen Gehäuses. Das ist der schwierigste Schritt, da viel Kraft angewandt werden muss.

    • Drücke die Scharniere mit dem spitzen Ende eines Spudgers von innen her kräftig heraus. Dies erfordert einiges an Kraft, und die Scharniere werden wahrscheinlich schwungvoll herausfliegen, aber das ist normal.

    • Wenn die Scharniere entfernt sind, entferne die Kappen an jedem Ende der Scharniere.

    • Sei vorsichtig beim Herausdrücken der Scharniere, da viel Kraft benötigt wird und sie sehr schwungvoll herauskommen. Achte darauf, dich nicht zu verletzen.

    Extremely careful here with the position of your hands as you’re pushing the hinges out. I managed to severely injure myself from the sudden jolt scraping my fingers on the case when the hinges gave in. Preferrably, position your hand and screwdriver around 30 degrees from the horizontal of the case to avoid this and press the case firmly against a table.

    Hector Carrera -

    the easier way to do this is to stand the case on it’s side on the edge of something, I just used my desk mat at the edge of my desk, place your spudger on the inner metal part and tap with a small hammer or something, I used a pair of pliers. Way less likely to hurt your hand because you don’t have to grip the case as hard or push as hard. Work smarter

    Kira -

    Interestingly enough, I found that, if you don't plan to use the old shell for anything else, it may be easier in some cases to cut the plastic around the hinges, which I did with a model kit cutting tool (the old shell was very brittle and broke apart into pieces too small for me to push the hinges out of). Eye protection is recommended.

    Nicholas -

  5. O5jv6yQLDojehilu
    O5jv6yQLDojehilu
    IPNsmvVoyDY1ZJwT
    • Nimm dein Ersatzgehäuse.

    • Drücke die Scharniere aus dem alten Gehäuse etwa zur Hälfte in den Schlitz im neuen Gehäuse ein, während das Gehäuse geschlossen ist.

    • Öffne das Gehäuse und drücke die Scharniere komplett hinein.

    The hinges will need to be slotted into your new end caps before being pushed in

    Peter DeVita -

  6. e2v1XYeoKIg3SaiJ
    e2v1XYeoKIg3SaiJ
    QnhHSVxO6cgaRiCw
    mEqxERI5jJgtnKbE
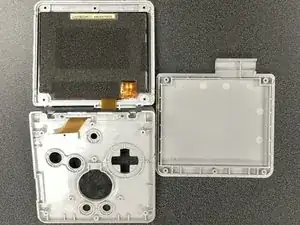
    • Setze den Bildschirm in das neue Gehäuse ein und befestige die Einfassung. Das Flachbandkabel sollte wie im alten Gehäuse durch den Spalt passen.

    • Das Gehäuse sollte beim Zusammenbau einrasten, sodass es auch ohne Schrauben hält. Eventuell ist ein kleiner Spalt zwischen Ober- und Unterseite sichtbar, das ist bei nachproduzierten Gehäusen häufig.

    • Drehe die 5 Tri-Point Y00-Schrauben um den Bildschirm herum wieder hinein.

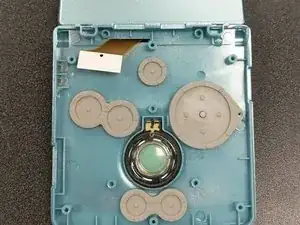
    • Setze die Knöpfe, den Lautsprecher und die Silikonpads in das Untergehäuse ein.

    I found it easier to reattach the screen ribbon cable before adding the buttons and speaker. Additionally, you’ll want to reattach the small half hinge part before the buttons too.

    Peter DeVita -

  7. aFAGoZFKjiMjacxR
    aFAGoZFKjiMjacxR
    OBHZ4Vvgcov6rFrw
    MYKYKJb3DCbxOykB
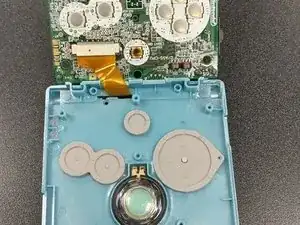
    • Setze das Flachbandkabel wieder in den Anschluss auf dem Motherboard ein und verriegele es.

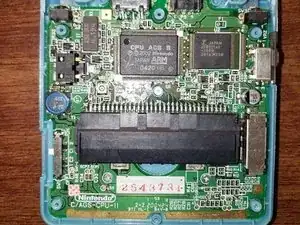
    • Setze das Mainboard in das neue Gehäuse ein und schraube es mit den drei 4 mm Kreuzschlitzschrauben #00 wieder fest.

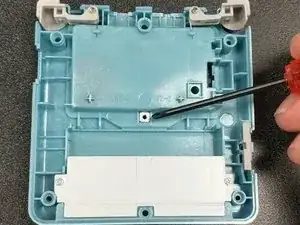
    • Setze die eckige Gewindeunterlegscheibe wieder in der Rückseite ein. Hier wird später das Batteriefach angeschraubt, daher ist sie sehr wichtig!

    There’s no mention of reinstalling the top hinge cover with that hidden little screw! It was important to do this before screwing the motherboard back down.

    Justin Gagnon -

    That’s exactly what I was going to comment. I had to go back and undo it all once I realised that I had left out the hinge cover. I might also suggest hooking in the ribbon before you put in the buttons. Mine fell out anyway. Also… make sure you put the speaker in the correct way. Trust me.

    Jiu Kyung -

  8. nbUvZZAkwIh23bOC
    nbUvZZAkwIh23bOC
    enYKJDoG14PaLTZ6
    EnyDTifANdFElSvS
    • Stelle sicher dass Lautstärke/Einschaltschieber in der richtigen Position sind, bevor du die Abdeckung wieder einsetzt.

    • Setze die Abdeckung wieder ein und drücke sie fest.

    • Schraube das Gehäuse wieder mit den vier 6,45 mm Tri-Point Y00 sowie den beiden 4,6 mm Tri-Point Y00 Schrauben zusammen, setze danach die Batterie wieder ein.

  9. LxuhILpjd632nCE1
    LxuhILpjd632nCE1
    fqXwNDeSrAFBK4vR
    • Setze die Gummipads um die Bildschirmeinfassung wieder ein - sie verhindern, dass das Gehäuse innen verkratzt.

    • Befestige den Ersatzsticker mit dem Nintendo-Logo.

    • Teste den Gameboy, um sicherzustellen, dass alles gut funktioniert!

Abschluss

Der Austausch des Gehäuses kann sehr viel Spaß machen! Es dauert nicht lange und man hat dann ein neues oder ganz individuell gestaltetes Gehäuse.

Rocko Bishop

Mitglied seit: 01/10/20

477 Reputation

6 Kommentare

Excellent guide thank you! My GBA is looking great now :)

Justin Gagnon -

Hello this guide is great but it has some flaws (missing some steps) but I used an eXtremeRate GBA SP shell and they are the best ones to go with because they have It molded in a way to remove the Nintendo logo sticker and so you can put in a ips screen with out needing to trim and it is made out of a high quality plastic and it better than other third party shell and I used purple/blue color

dead -

Thanks for the helpful guide! A couple things of note that I noticed along the way:


If you're replacing the screen lens, make sure you line it up properly so the end result isn't crooked.

Make sure to organize your screws, a mismatched screw can poke a hole through the shell.

Be gentle but firm when tightening a screw. I definitely messed up a screw or two being too forceful.

(I might be stupid) keep an eye on the battery lid screw hole. Mine ended up warping so I had to duct tape the lid to the shell.

If you're doing a button replacement too, be careful with the triggers.

Noah -
Der einzige Grund, warum ein schlechtes Spiel so viel Aufmerksamkeit erhält, ist sein Thema, obwohl es eine wirklich schöne Handlung hat. Das Abheben Ihres Geldes, nachdem Sie einen bedeutenden Jackpot oder einen saftigen Bonus geknackt haben, ist einer der schönsten Aspekte des Spielens in einem Online-Casino. Besuchen Sie https://casinotop.at/schnelle-auszahlung... um mehr über Online Casino Schnelle Auszahlung in Österreich zu erfahren. Aber zuerst müssen Sie den Auszahlungsprozess durchlaufen, um Ihr neu erworbenes Vermögen zu nutzen. Anfänger werden die Vielfalt der verfügbaren Auszahlungsoptionen für die schnellsten Auszahlungen zu schätzen wissen.

Norman GDrum -

Excelent guide, just a quick detail: you forgot to add the part when you put the screw under the screen ribbon, the one that afix the hinge in place. The rest was amazing, thank you very much.

Daniel -

If you have a GameBoy Advance SP AGS-001 or AGS-101 with a deteriorating shell, or if you want to customize it, you can follow this guide to replace the shell. However, before you start, make sure to plug in your console and charge it for a few minutes. By choosing this 토토사이트추천, you can rest assur If the battery is too old, it may start to expand and could potentially explode. If you notice any swelling, it's important to order a replacement battery. You can find replacement batteries online or at electronics stores. It's important to take the time to properly align the screen lens to avoid it being crooked. Keeping track of screws and their placement is also crucial to avoid any mishaps, and being gentle when tightening them is a good practice to prevent damaging the shell or the device. It's also worth noting that the battery lid screw hole can warp over time, so it's important to keep an eye on it during the replacement process. In case of warping, a temporary solution such as duct tape may be necessary.


Crest Pak -