Einleitung
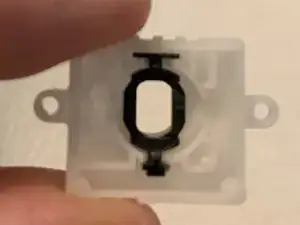
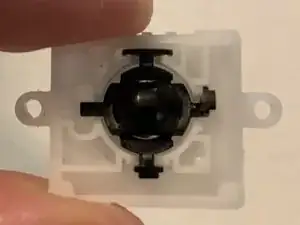
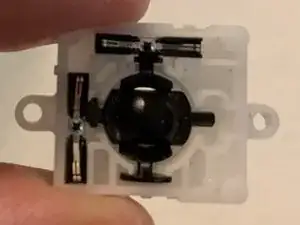
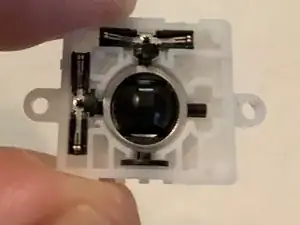
Diese Anleitung zeigt die Schritte zum Zerlegen des Oculus Quest 2-Controllers, um auf den Joystick zuzugreifen und ihn zu reinigen.
WEITER AUF EIGENES RISIKO
Es ist leicht, Teile zu verlieren und das Gerät zu beschädigen. Wenn du es auf diese Weise öffnest, erlischt die Garantie des Gerätes, sofern sie noch gültig ist.
Bevor du dies versuchst, empfehle ich, es zuerst mit Kontaktspray zu probieren.
Drei Tipps zur Anwendung von Kontaktspray:
- Entferne zuerst die Batterie.
- Nur wenig sprühen. Wenn du den Joystick vollständig durchnässt, dauert das Trocknen länger, da er umschlossen ist. Ich lasse den Controller gerne 5-10 Minuten auf dem Kopf stehen, um ihn trocknen zu lassen.
- Stelle sicher, dass du beim Sprühen den Joystick nach unten drückst, damit der Reiniger den Sensor erreichen kann. Bewege nach dem Sprühen den Joystick im Kreis. Dadurch bewegen die zwei Kontaktstücke den Reiniger auf dem Sensor herum, um zu versuchen, ihn zu reinigen. Das Drücken auf den Joystick während der Bewegung macht keinen Unterschied. Tatsächlich könnte es es sogar weniger effektiv machen.
Ich hoffe, das hilft jedem, der abenteuerlustig genug ist, dies zu versuchen. Zumindest wirst du jetzt verstehen, was Drift verursacht, und warum du den Joystick nicht mit Elektrokontaktreiniger tränken kannst, um ihn zu reparieren.
Werkzeuge
-
-
Öffne zunächst das Batteriefach und hole die Batterien mit den Fingern oder einem geeigneten Werkzeug vorsichtig heraus.
-
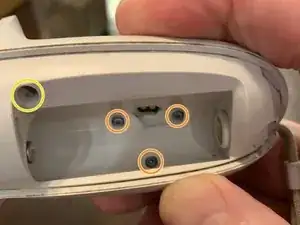
Löse die drei Aufkleber, die die Schrauben verbergen, mit deinen Fingernägeln oder etwas Spitzem wie einer Pinzette ab.
-
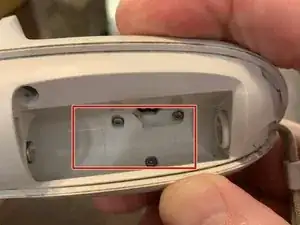
Löse die drei Torx-T5-Schrauben hinter den Aufklebern mit einem kleinen Torx-Schraubendreher.
-
Entferne die vierte Torx -Schraube aus einer Vertiefung oben im Batteriefach.
-
-
-
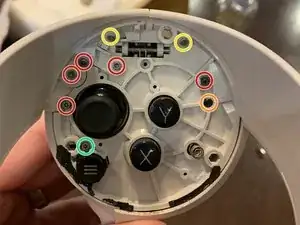
Entferne die fünf Torx T5 Schrauben.
-
Entferne die längere, schwarze T5-Schraube.
-
Entferne die beiden kleineren T5-Schrauben.
-
Entferne die einzelne lange silberne T5-Schraube.
-
-
-
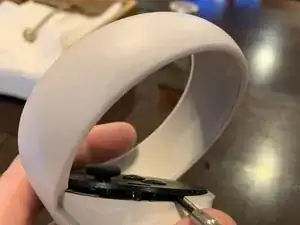
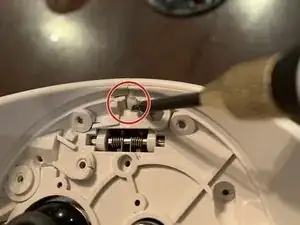
Drücke mit einem Spudger oder einem Schraubendreher auf die Kunststoffraste, bis sie sich löst.
-
Beginne an der Seite ohne Raste und entferne das Gehäuse vorsichtig mit deinen Händen, indem du es von der Mitte der Konsole wegbewegst.
-
-
-
Bewege mit deinen Händen die linke Hälfte des Griffs leicht (0,5 cm) vom Controller weg.
-
Während du die linke Seite wie oben beschrieben hältst, drückst du die rechte Seite in Richtung des Controller-Gehäuses.
-
Jetzt kannst du den rechten Teil nach rechts schieben und entfernen.
-
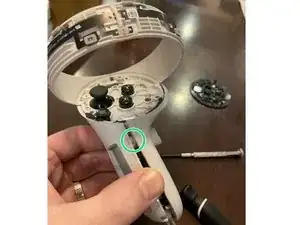
Hier befindet sich der Stift.
-
-
-
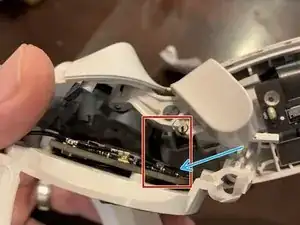
Trenne das Flachbandkabel ab. Auf der Platine befindet sich ein Riegel, den du hochklappen musst (blauer Pfeil). Er ist leicht zu öffnen, aber knifflig zu schließen. Halte für den Zusammenbau eine Spitzzange oder eine Pinzette bereit.
-
-
-
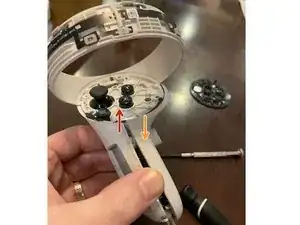
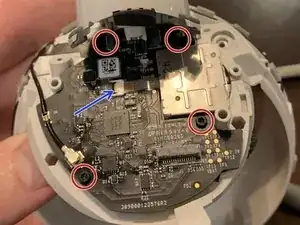
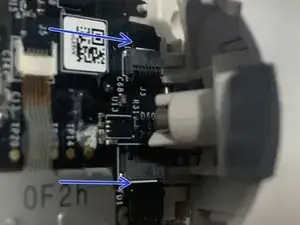
Jetzt mußt du die 4 Schrauben entfernen, mit denen die Platine am Controller befestigt ist. Sie werden NICHT vollständig entfernt, sondern nur hoch genug angehoben, um den Joystick zu entfernen. Er hat auch ein kleines Flachbandkabel (blaues Flachbandkabel). Klappe die Verriegelung nach oben, um den Joystick zu trennen.
-
-
-
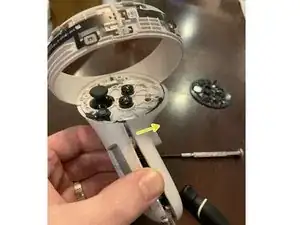
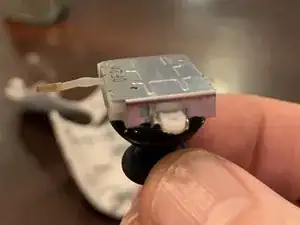
Hebe die Platine an und ziehe den Joystick heraus. Die X-Taste und die Oculus-Taste sind mir beide Male herausgefallen. Keine große Sache, stelle nur sicher, dass du sie wieder einsetzt, bevor du alles verschließt.
-
-
-
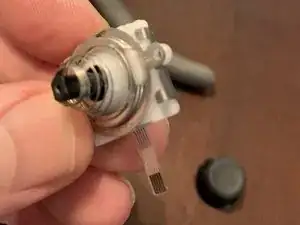
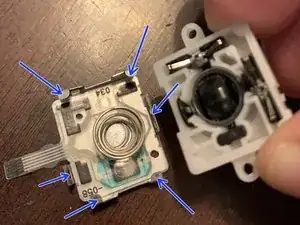
Das Gehäuse wird durch die Laschen an der Bodenplatte zusammengehalten. Biege sie zurück, um sie zu entfernen. Seie dabei vorsichtig, es gibt viele kleine Teile und eine Feder, die herausfliegen können.
-
-
-
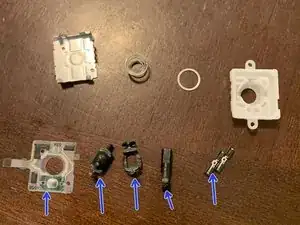
Hier sind alle Teile, die sich innerhalb des Joysticks der unteren Reihe befinden.
-
1 - Der Sensor, der bei Verschmutzung Unbeweglichkeit verursacht
-
2 - Der untere Teil des Joysticks. Hierauf passt der Stab. Dieses Teil bewegt den Sensor nach links und rechts.
-
3 - Dieses Teil sitzt über #2. Es bewegt den Sensor nach oben und unten.
-
4 - Der Stab. Dieser passt durch das Loch in #3 und rastet in #2.
-
5 - Diese beiden Teile stehen in Kontakt mit dem Sensor und werden von #2 und #3 bewegt.
-
FEHLEND AUF DEM BILD - Es gibt ein kleines schwarzes Plastikteil in der Form eines Bogens. Dieses fixiert #2 an der richtigen Stelle im Gehäuse.
-
-
-
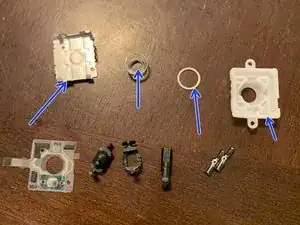
Hier sind alle Teile, die sich innerhalb des Joysticks der oberen Reihe befinden.
-
6 - Metallgehäuse
-
7 - Feder: ermöglicht das Drücken des Joysticks
-
8 - Metallring, um den Joystick am Platz zu halten und Kontakt mit der Feder (#7) herzustellen
-
9 - Kunststoffgehäuse
-
-
-
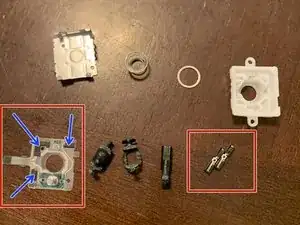
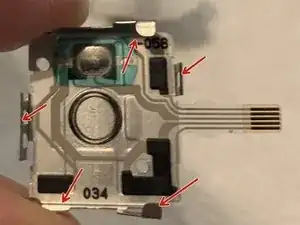
Jetzt da alle Teile zerlegt sind, benutze Kontaktspray um beide Teile in der roten Box rechts und den Sensor in der roten Box links zu säubern. Die Sensorreinigung ist die wichtigste. Nachdem das Kontaktspray aufgetragen wurde, nutze ich einen kleinen Pinsel um die Teile zu säubern.
-
Die drei schwarzen Flächen (blaue Pfeile) registrieren hoch/runter/links/rechts. Verunreinigungen an diesen Stellen verursachen falsche Eingaben (Drift). Je öfter der Controller verwendet wird, desto mehr nutzt sich das schwarze Material ab und lässt Rückstände zurück. Ebenso finden mehr Staub/Dreck etc. ihren Weg ins Gehäuse je öfter ihr spielt.
-
Es besteht eine hohe Wahrscheinlichkeit, dass dieses Teil nach sehr langer Nutzung einen Defekt erleidet, der nicht repariert werden kann. Dies ist ein Problem bei allen Controllern, nicht nur bei Oculus.
-
-
-
Stecke den Stick durch die Öffnung und befestige #2 auf diese Weise an der Unterseite des Sticks. Sowohl #2 als auch #3 können nur auf eine bestimmte Art und Weise im Kunststoffgehäuse sitzen. Wenn sie sich nicht richtig bewegen, ist dies wahrscheinlich das Problem.
-
-
-
Drücke den Stick leicht nach oben, sodass du beide #5 in die Rille legen kannst. #2 und #3 sitzen auf #5. Jetzt solltest du sehen können, wie der Joystick die # 5 bewegt.
-
-
-
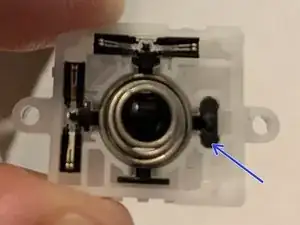
Setze die Feder und das winzige schwarze Teil auf. Das winzige schwarze Teil (blauer Pfeil) verriegelt die #2 an ihrem Platz.
-
-
-
Setze den Sensor auf das Metallgehäuse. Er kann nur in eine Richtung passen.
-
Setze nun das Gehäuse zusammen, ohne dass etwas verrutscht.
-
Biege die Metalllaschen wieder an ihren Platz, so dass es gesichert ist.
-
-
-
Baue es in umgekehrter Reihenfolge wieder zusammen. Seie vorsichtig mit dem Flachbandkabel, das ich in Schritt 6 erwähnt habe.
-
Einige der Teile erfordern ein wenig Fingerspitzengefühl beim Zusammenbau, vor allem das Teil, das um den Abzug herumgeht.
-
Vergewissere dich, dass du keines der Flachbandkabel abgeklemmt hast. Als ich dies das letzte Mal getan habe, habe ich versehentlich eines der Flachbandkabel unter dem Träger (blauer Pfeil) gelockert und es hat sich schließlich gelöst.
-
Um dein Gerät wieder zusammenzubauen, befolge diese Anweisungen in umgekehrter Reihenfolge.
25 Kommentare
i wanna know how the controller worke. infared or bluetooth, or even area positioning system bull $@$*, please help actually sent from my quest 2
The controller uses infared to connect to the quest 2.
Lucas C -
That's BS. It uses Bluetooth 5.0 LE. The Quest 2 has no way to send or recieve IR
Both replies are half right. The controllers use BT to connect to the headset for functionality, but positional tracking is done via infrared in the halos. The 4 cameras on the front of the headset are infrared cameras.
Justin P -
Yeah, a basic inspection of the controller says it does not operate by infrared. Infrared is an optic device, and the controller has no optics. I'll stick with Lucas on this one.
Justin P has the correct answer. Button / Trigger / Analog-Stick / Touch-Sensor inputs are communicated to the headset through bluetooth, while the positional tracking of the controllers is done visually through the headset's cameras which are looking for the (invisible to human eye) infrared spots emitted from ir leds in the controller's ring.
-A VR Developer
BAM5 -
Thank you! This guide saved me from purchasing a new left controller, when it developed at “stutter” or “stumble” when i tried moving forwards. I followed the guide, though i didnt have any contact cleaner. I used isopropylalcohol on cotton swab (cotton bud?) instead with excellent results.
thank you, fixed my controller when adjusting the deadzone and spraying contact cleaner from the outside didnt help.
