Einleitung
Replacing the Display unit Screen is a useful skill when working with the Ohmeda Engström Ventilator. Although this is not frequently needed, the display unit will have to be replaced eventually. This guide is meant to make it easy for anyone to be able to perform this basic task.
For more information on replacing the LCD display, please refer to page 9-23 (section 9.5.5) in the technical manual.
Werkzeuge
-
-
Place the Display Unit face down on an anti-static pad. Make sure that the release tabs are fully depressed.
-
Loosen four screws (L) on each side of the display unit.
-
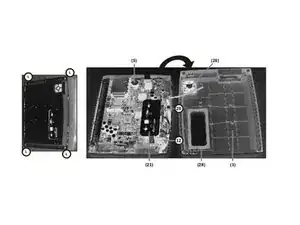
Remove the rear enclosure and you will be able to see: the fan (26), the connector panel assembly (21), the encoder assembly (12), the battery (5), the speaker (20), and the gasket(28)
-
-
-
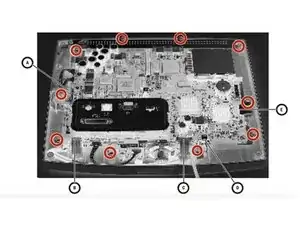
Next, unplug all five wires from the display unit screen. These wires are labeled A, B, C, D, E.
-
Unscrew ten screws that are circled on the image.
-
-
-
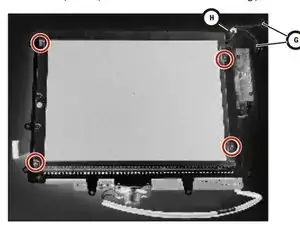
Disconect the backlight harness (G)
-
Slide Grommet (H) out of the mounting plate slot
-
Remove four screws that support the mounting plate
-
-
-
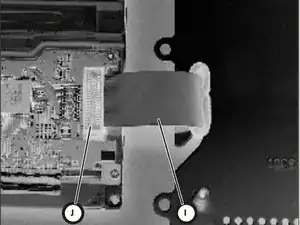
Lift the the LCD display away from the mounting plate. Pull some of the display ribbon cable (I) to the top side of the plate. Flip the LCD over to the left of the assembly
-
Disconnect the ribbon cable (J)
-
To reassemble your device, follow these instructions in reverse order.
