Einleitung

  1. 1JoWRDvIihjF3KXx
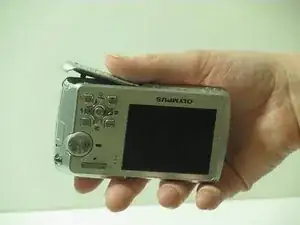
    • Slide the door located on the bottom of the camera in an outward direction

  2. b6Q2YkrMcsAKHXRr
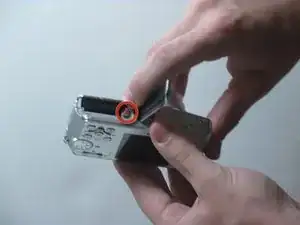
    • Pull back on the red release tab located on the left side of the battery.

  3. fsM5asvfhPMNsXr4
    • Slide battery out of camera

  4. ClQH3w5mGTALi3C6
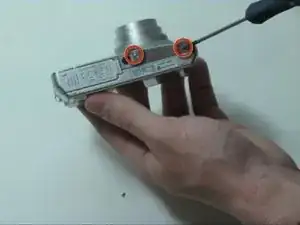
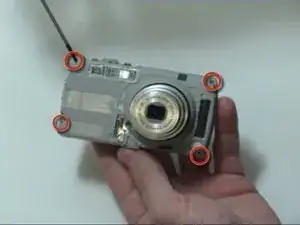
    • Remove the 2 screws from the bottom of the camera

  5. Q42SqCNLdqhNJgJI
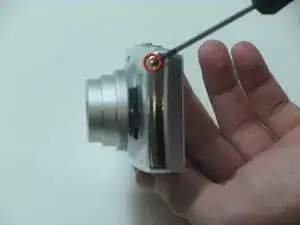
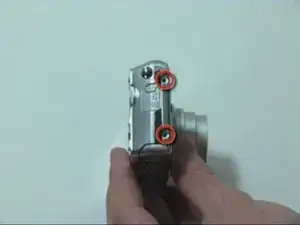
    • Using a Phillips head size 0 screwdriver, remove the screw from the right side of the camera

  6. qSfHX1ILutW1T2kq
    • Remove the 2 screws from the left side of the camera

  7. OUGCNhLGWFhWZnDk
    OUGCNhLGWFhWZnDk
    ErVpZxKZYS16XYmU
    iq6ugfOQdDvf3XQW
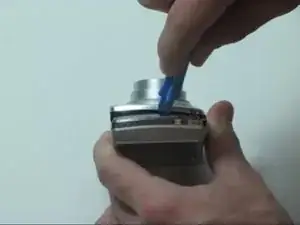
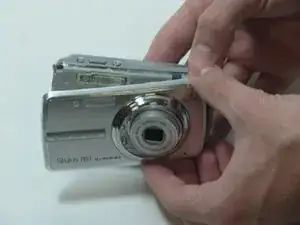
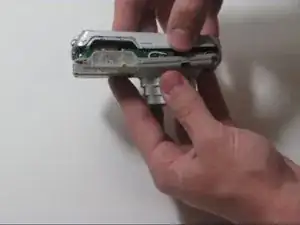
    • Separate the front casing from the back using a plastic opening tool, gently.

    • Silver band and buttons will become loose when you remove the two pieces.

  8. jYfajVgGTBZEK2tE
    jYfajVgGTBZEK2tE
    31CCacaoaEebxYwC
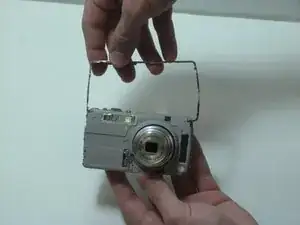
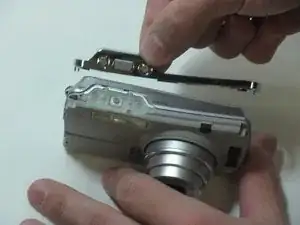
    • Pull the silver bracket off of the camera

  9. DtnjujhNAALGVtJ5
    DtnjujhNAALGVtJ5
    vSTILK3HpsfTWKW1
    hKaJjEPpBQLgXEhC
    • Remove the 4 screws on the inner face of the camera.

    • Circuit ribbon is attached at the top left of the camera. Be careful when separating the front and back of the camera.

    • Pull the camera apart into 2 separate pieces.

  10. b4nFWKchFiTXVneM
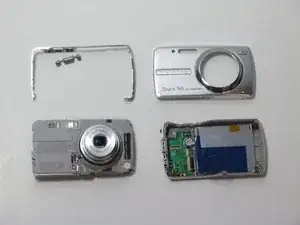
    • You should be left with 4 large pieces, the outer case, inner lens piece, outer silver band and back case containing the LCD display.

  11. mTGVrYG5DF5aD1HJ
    mTGVrYG5DF5aD1HJ
    sxbOXPZoSLXgjS5M
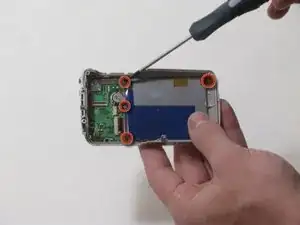
    • Remove 4 screws holding the LCD screen in place.

    • Be cautious of the brackets that come loose when you remove the 3 screws on the right side of the camera

    • LCD Screen is attached to 2 ribbon wires

  12. uPygFPq6HrQrSjIL
    uPygFPq6HrQrSjIL
    FuKBfOrsCcRdILGQ
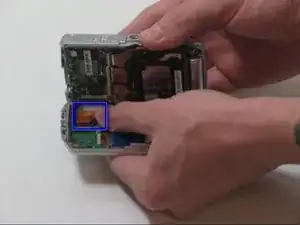
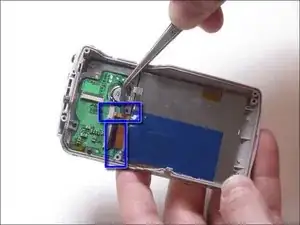
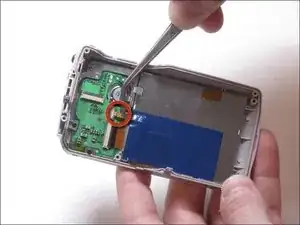
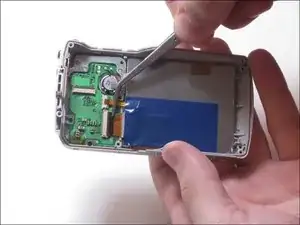
    • Pull up on the small ribbon wire to disconnect it from the circuit board

    • Flip the little black clip up to remove the larger ribbon wire from the circuit board.

  13. WDmnnrQrMNPTldr4
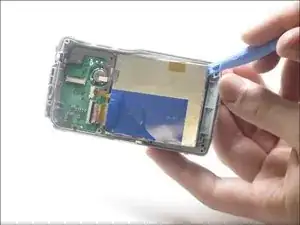
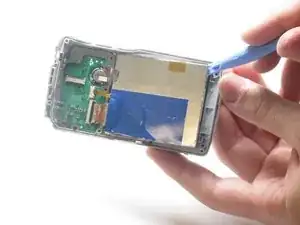
    • Using a plastic separating tool, remove the LCD screen from the plastic casing.

Abschluss

To reassemble your device, follow these instructions in reverse order.
Ryan Cosgrove

Mitglied seit: 10/02/12

39 Reputation

0 Kommentare