Einleitung

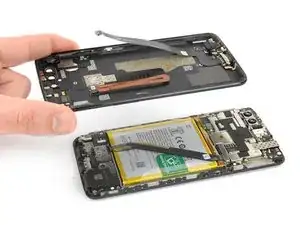
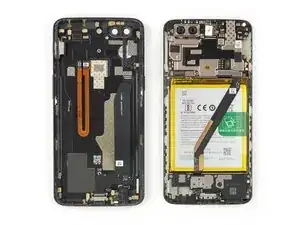
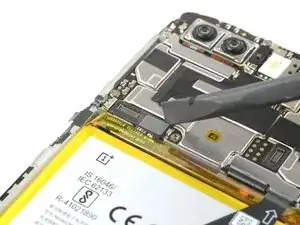
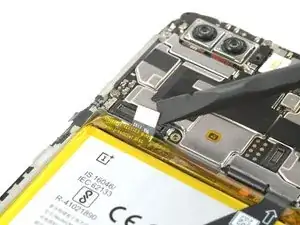
Diese Anleitung zeigt, wie der Lautsprecher im OnePlus 5T ausgetauscht werden kann.

  1. LxHSKiiRcjM1dTpR
    LxHSKiiRcjM1dTpR
    cw15dPAlaDVS2Uqj
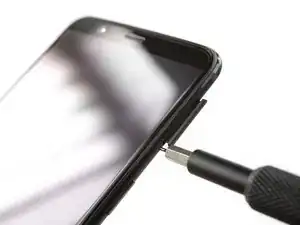
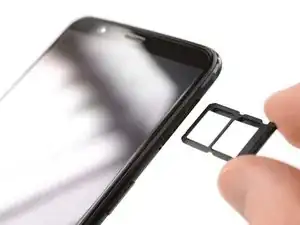
    • Schalte dein Gerät aus, bevor du loslegst.

    • Entferne den SIM Einschub aus deinem OnePlus.

  2. ARneM6bQboVSGvf6
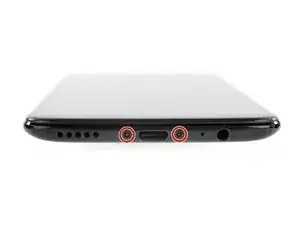
    • Entferne die zwei Torx T2 Schrauben (2,5 mm Länge).

    • Das OnePlus 5T verwendet nicht viel Klebstoff, um die Rückenabdeckung zu befestigen, allerdings sind die Klammern sehr stark und erfordern während des Öffnungsvorgangs einen gewissen Kraftaufwand.

    Could you clarify the statement “The OnePlus 5T doesn't use a lot of adhesive“? Do you mean that it uses adhesive, but only a little? Or do you mean that it doesn’t use any adhesive at all to secure the back, just the clamps?

    Avram Grumer -
    Hi Avram,

    there is a little bit of adhesive underneath the edges of the back cover, however it doesn’t require heating to soften it. In case the back cover doesn’t come of straight away it won’t help to apply an iOpener to further soften the adhesive but requires a little bit more force to open the plastic clamps.

    Dominik Schnabelrauch -
    i have tried t2 srewdrivers multiple times but they doesn’t seem work, could those be different screws?

    Mr Kono -

    I had the same problem. I tried a T1 screwdriver, that fit perfectly.

    That said, the 'tools' section of this repair doesn't mention any torx screwdriver. That should be updated to include the T2 (or T1, for me!) screwdriver.

    Akka -

    I purchased the entire kit to do my battery replacement and found the opening tool was not capable of opening my One Plus 5t phone. I tried the tool for at least 30 minutes and couldn’t even get it started. Luckily I had a set of “plastic tools” for removing door panels from cars while doing stereo work. These tools have nice sharp points and are much longer and thicker, providing much better grip and leverage. With these tools, I had the back off the phone in just a few minutes. All the rest of the process was easy to follow and everything worked out great.

    David Dery -

    I have all of the necessary parts/tools for replacement. Upon removing the two screws from the bottom, one came out no problem first try. The second bolt slipped andbis now completely stripped out. Any advice?

    Derek Basham -

  3. Wvq1Uels1ydD4gHO
    Wvq1Uels1ydD4gHO
    EsjxRGZy351XTSZT
    5NDh6rBZGUSlZZdL
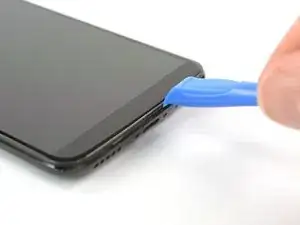
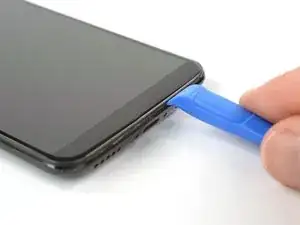
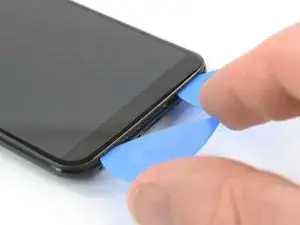
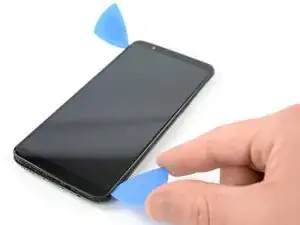
    • Setze ein Öffnungswerkzeug zwischen Display und Rückabdeckung an der Unterkante deines OnePlus ein.

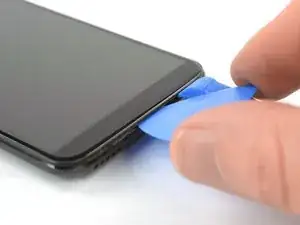
    • Verwende das Öffnungswerkzeug, um eine Lücke zwischen Rückabdeckung und Display zu erzeugen.

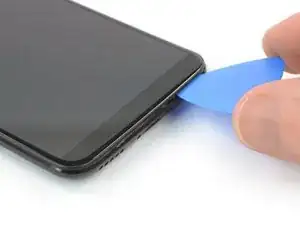
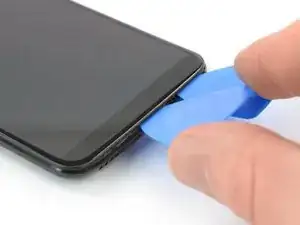
    • Setze nun ein Plektrum in den Spalt ein, den du gerade geöffnet hast.

    Don’t make the same mistake as i did and put the opening tool between the screen and glass rather than the screen and body. Make sure its the second line from the top where you insert your tool

    Hayden Rooney -

    This part is very difficult, i have been trying to open the phone up, still cannot.

    Taz -

    The easiest way to open the back cover, is by starting from the bottom right corner, try find a plastic tool that is slim enough to go through the display and back cover.

    Taz -

    I too had troubles with this step. I recommend having a look at the guide for opening up the back cover of the Oneplus 5 before proceeding. It has a lot of helpful images and the instructions go into far more detail than this one does.

    OnePlus 5 Rückabdeckung austauschen

    Iceblade02 -

    This step was the hardest step for me. I could only succeed with suction cup pliers and a metal pry tool, which unfortunately scratched the device’s edges a little.

    Haggai Eran -

    I found this hard. Look carefully and use a bright light. There are two small ridges. I worked ages on the top one which isn't actually a gap. You need to work on the bottom one of the two. I used a very small metal screw driver with a thin flat blade. I pushed this in to open the gap a fraction then put a plastic tool in the now slightly opened gap and worked it round.

    Duncan Putman -

    For opening up the device, OnePlus 5 Rückabdeckung austauschen that Iceblade02 mentions is excellent. The tools in the kit also correspond to it since the new kit that I received last week had no guitar picks and instead had the suction cup.

    Anirudh Ramanathan -

    Be sure you are getting below the screen's LOWER lip, as in the photo, as HaydenRooney mentions.

    Try to minimize flexing of the screen when you are wedging, the clamps (like snaps or tabs) will demand force and you want to avoid turning that into screen flex. There are several forum posts here about device working-but-dark after a repair. Too bad user input is rather folded away on ifixit, and few will see these.

    Professor Z -

  4. uGVHiIEDn6ZXv4AU
    uGVHiIEDn6ZXv4AU
    5FQouJJstYPBjhfc
    1GkhVTDislVhWL2J
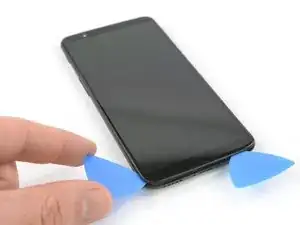
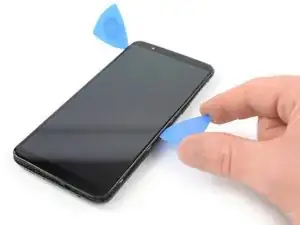
    • Schiebe das Plektrum zur rechten, unteren Ecke deines OnePlus.

    • Setze ein zweites ¨Plektrum ein und schiebe es zur linken, unteren Ecke deines OnePlus.

  5. SGpZYRjercLcF1kD
    SGpZYRjercLcF1kD
    hDWgumDbhAII5RC2
    v6UHrvDAUFN4axMf
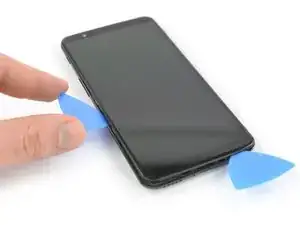
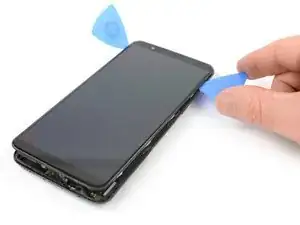
    • Schiebe das Plektrum um die untere linke Ecke herum und entlang der linken Kante des OnePlus nach oben und trenne so die Plastik-Klammern auf, mit denen die Rückabdeckung befestigt ist.

  6. EOVFtIPUeUWATCE2
    EOVFtIPUeUWATCE2
    My66WfLlkrWZtmTa
    XVdrfYDR4LOF3b5c
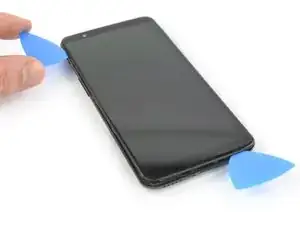
    • Schiebe das Plektrum um die untere rechte Ecke herum und entlang der rechten Kante des OnePlus nach oben und trenne so die Plastik-Klammern auf, mit denen die Rückabdeckung befestigt ist.

  7. 2WWFDdfylDZArCP3
    2WWFDdfylDZArCP3
    fQ5VpDSOAVyfdcF1
    vl6Yusv6DqyKEPyn
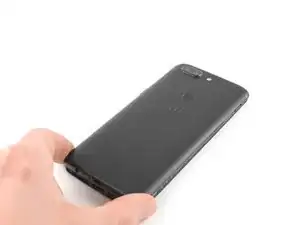
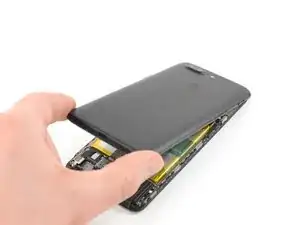
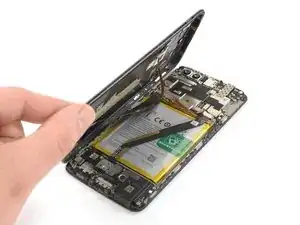
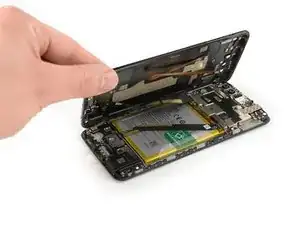
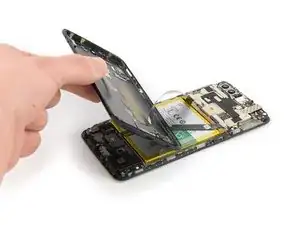
    • Versuche noch nicht, die Rückabdeckung komplett abzulösen. Die Flachbandkabel zum Fingerabdrucksensor, zum Akku / USB-C Port und zur Kopfhörerbuchse sind noch immer noch mit dem Motherboard verbunden.

    • Drehe dein Gerät und hebe vorsichtig das untere Ende deiner Rückabdeckung an. Klappe sie vorsichtig nach links und halte sie so in einem 80°-Winkel.

  8. 1vqeLDjxS6hguE5r
    1vqeLDjxS6hguE5r
    NBYCODIFvIMf5MjR
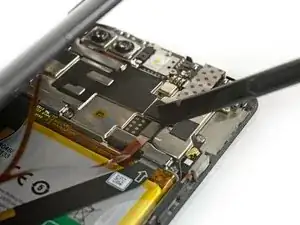
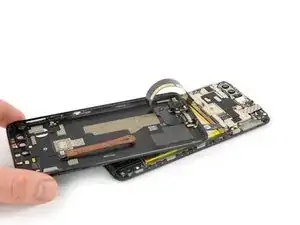
    • Heble den Fingerabdruck-Kabel mit einem Spudger aus seinem Anschluss auf dem Motherboard.

  9. 6QaItEJdF5IifEVy
    6QaItEJdF5IifEVy
    LylHAFPItwWiVTJU
    LXMDDG3UPRUMkCvO
    • Drehe die Rückabdeckung um 180° und lege es so hin, dass ihre untere Kante auf der oberen Kante des Akkus aufliegt.

  10. ROi1WRDSSVb2UJDA
    ROi1WRDSSVb2UJDA
    vKwBpmUQsokoKi6D
    gpM4gOVAUoEdUygt
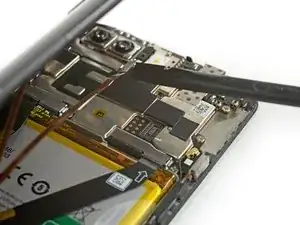
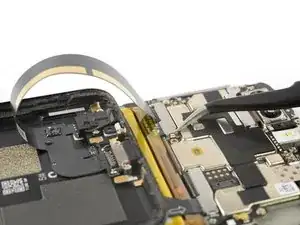
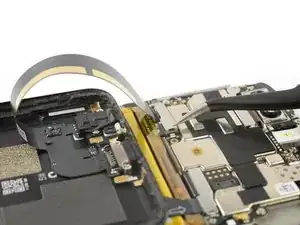
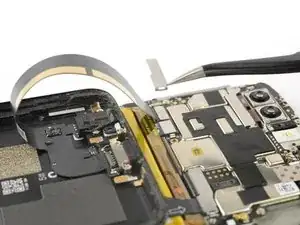
    • Verwende eine Pinzette, um die kleine metallene Abdeckung, die die Stecker für den Akku / USB-C Port und die Kopfhörerbuchse schützt, zu entfernen.

  11. ULkBQEMD2kiPwPqh
    ULkBQEMD2kiPwPqh
    xhaBK12Vd4EyIyQ4
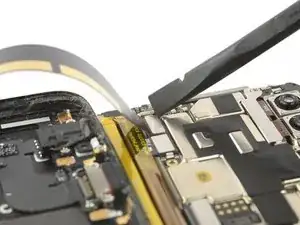
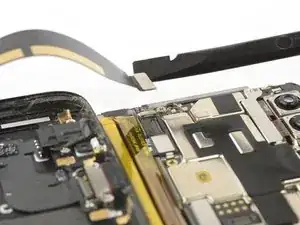
    • Löse mit einem Spudger den Stecker am Kabel für den Akku / USB-C Port und die Kopfhörerbuchse.

  12. XZ51MpYgIbIC5Yys
    XZ51MpYgIbIC5Yys
    EeOXNPsJYVhxN5w1
    • Entferne die Rückabdeckung.

  13. gBIlbZyL2MPVojvO
    gBIlbZyL2MPVojvO
    gFbQKWFGlQR3cVs6
    • Heble mit Hilfe eines Spudgers den Stecker des Akku-Flachbandkabels hoch und löse ihn ab.

  14. KkV1iu4JlswdUSnv
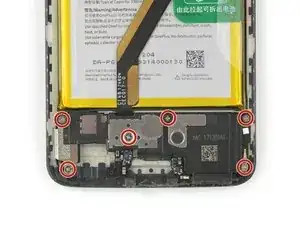
    • Entferne die sechs Kreuzschlitzschrauben #00 (Länge 2,9 mm).

  15. c1kWxSTB3J4sxn3O
    c1kWxSTB3J4sxn3O
    PKLlmZIUsCsFri6N
    BC2XTDBOuipwSiMZ
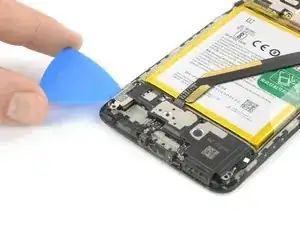
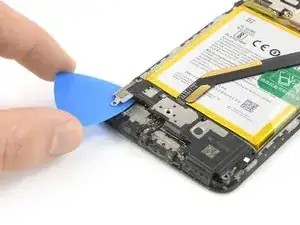
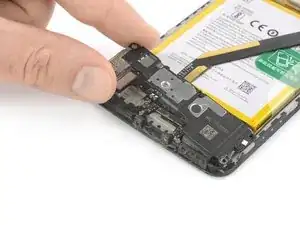
    • Schiebe ein Plektrum unter die linke Seite des Lautsprechers.

    • Heble den Lautsprecher mit dem Plektrum aus seiner Vertiefung hoch.

  16. NixSfUTRjbhiXVCC
    NixSfUTRjbhiXVCC
    igHciUTnooU3T61f
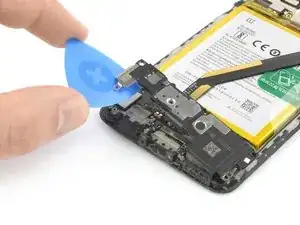
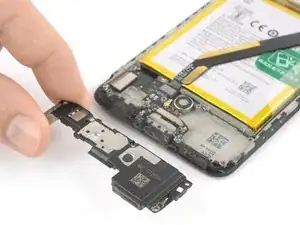
    • Entferne den Lautsprecher.

Abschluss

Folge den Anweisungen in der umgekehrten Reihenfolge, um das Gerät wieder zusammenzubauen. Trage gegebenenfalls neuen Klebstoff auf, nachdem du die betreffenden Bereiche mit Isopropylalkohol (>90%) gereinigt hast.

Entsorge deinen Elektromüll  fachgerecht.

Verlief die Reparatur nicht nach Plan? In unserem Forum findest du Hilfe bei der Fehlersuche.

Dominik Schnabelrauch

Mitglied seit: 23/11/16

167812 Reputation

Ein Kommentar

Following water damage the loudspeaker stopped working. I changed it out (twice) and the flex cable but still not working. Any ideas?

Daryl -