Einleitung

Wenn sich der Akku deines OnePlus 6T schnell entlädt oder nicht mehr laden lässt, dann kannst du ihn mit Hilfe dieser Anleitung austauschen.

Entlade zur Sicherheit den Akku unter 25%, bevor du die Reparatur beginnst. Dadurch wird die Brandgefahr reduziert. Wenn der Akku aufgebläht ist, dann beachte unsere Warnhinweise.

Zum Abschluss der Reparatur benötigst du Ersatzklebestreifen.

  1. QnG4LXYaqLslvlYd
    • Schalte dein OnePlus 6T aus und lege es mit der Rückseite nach oben auf eine stabile Arbeitsfläche.

  2. GlmtQ2lbErO6W4Wy
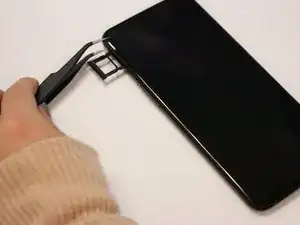
    • Setze ein Werkzeug zum Öffnen des SIM-Karteneinschubs in das kleine Loch in der oberen linken Seite des Smartphones ein. Lasse den Einschub herausspringen.

    • Entferne behutsam den SIM-Einschub.

    Remove the SIM card tray from the phone. Don't need to remove the actual card from the tray, just be careful you don't lose it…

    SayIDidIt™ -

  3. SEOAbe1VJT4htmt4
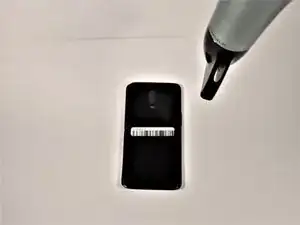
    • Weiche den Kleber am Smartphone mit Hilfe eines iOpeners oder eines Haartrockners auf.

    • Wenn du mit einem Haartrockner arbeitest, dann halte ihn mindestens 20 cm vom Smartphone entfernt. Bewege ihn in kreisender Form um die Kanten des Gerätes.

  4. ZFfAKQo3yDUUuVSa
    ZFfAKQo3yDUUuVSa
    rNJyYyGSscfBUtvq
    D6Nmxbmo3tiaMNsO
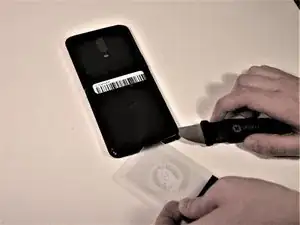
    • Setze einen Jimmy in eine der erwärmten Ecken ein und hebe sie ein wenig hoch.

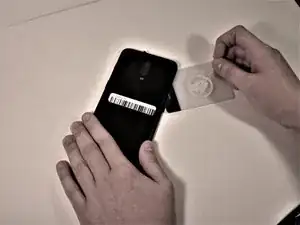
    • Setze eine Plastikkarte in den Spalt ein und lasse sie vorsichtig unter dem Gehäuse entlanggleiten.

    • Beim Ablösen wird sich die Karte etwas schwer bewegen lassen, aber das ist normal.

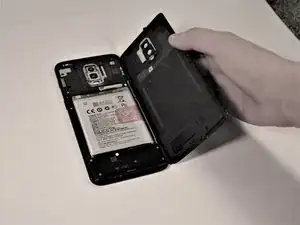
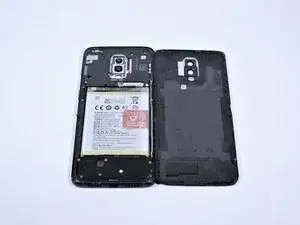
    • Entferne die Rückseite vom Smartphone.

    • Beseitige alle Kleberreste von der Rückseite und vom Rahmen. Benutze dazu hochkonzentrierten Isopropylalkohol (mindestens 90%ig) und ein fusselfreies Tuch.

    Do you need to replace the glue when reassembling?

    S Marlin -

    It was sufficient for me to re-heat the adhesive from the phone.

    Also, I used a pair of tweezers to lift the initial corner, which was a breeze compared to the Jimmy’s as suggested by the guide.

    Michel Rummens -

    The gaps were very tight. After warming the adhesive, it was helpful to have a helper use a suction cup to tug on the back to enlarge the gap for the jimmy.

    tbrannam -

  5. oObUqGCSMwuZm1Dr
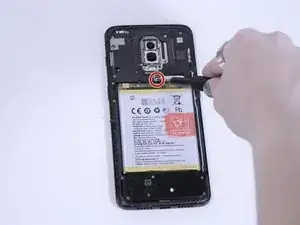
    • Entferne die einzelne 3 mm Kreuzschlitzschraube #00 vom Akku.

  6. hKHQKsAN4YUiK4Sm
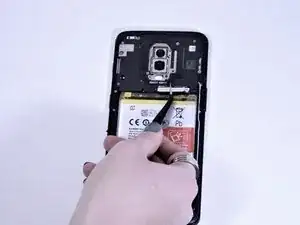
    • Nimm Pinzette und entferne damit behutsam die kleine Metallhalterung, welche den Akkustecker bedeckt.

  7. BRHRLwXLaP6e2uQC
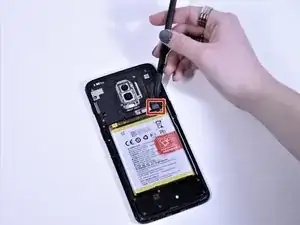
    • Hebe den Akkustecker vorsichtig mit einem Hellebarden-Spudger an und löse ihn ab.

    • Benutze für diesen Schritt kein Metallwerkzeug. Du könntest damit den Akku beschädigen.

    The given picture is of a one plus 6T. The steps for a one plus 7 are slightly different . Need to get a lot more screws out to access that connector!!

    Naveen Kusumanchi -

  8. VXAjhNaMiJTgfJSH
    VXAjhNaMiJTgfJSH
    26TL5a1P5KMXMZrA
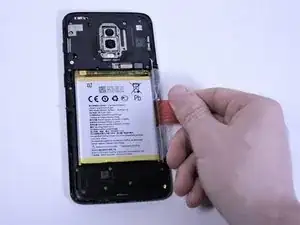
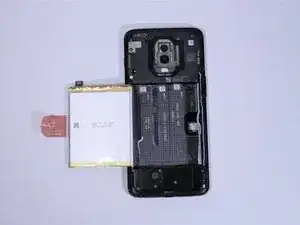
    • Fasse die rote Lasche rechts an und ziehe daran, bis der Akku herauskommt.

    • Es wird etwas schwer gehen, da der Akku mit Klebeband befestigt ist. Entferne nur den Akku und achte darauf, dass das Klebeband verbleibt. Der Ersatzakku muss damit wieder festgeklebt werden.

    • Verwende den alten Akku nicht mehr, das ist ein Sicherheitsrisiko. Baue einen neuen Akku ein.

    the battery requires the strength of a god to pull out. any tips for getting it out for normal people?

    pancakehiatt -

    This is very true! that red ribbon was a joke! i cant even get a grip...

    Naveen Kusumanchi -

Abschluss

Um dein Gerät wieder zusammenbauen, folge den Schritten in umgekehrter Reihenfolge.

Entsorge deinen Elektromüll fachgerecht.

Lief die Reparatur nicht wie geplant? Versuche zunächst einige grundsätzliche Lösungen bei Problemen, oder frage in unserem Forum nach Hilfe bei der Fehlersuche.

Kira D'Agostino

Mitglied seit: 15/10/19

1363 Reputation

10 Kommentare

Does the adhesive for the back cover need to be replaced? Should I heat the phone and back glass for re-assembly?

Mark Bugajski -

Good questions. I think “reassembly is the reverse of these instructions" is a bit simplified. I think the heat is only for removal, but perhaps it would cause the adhesive to rebond after reassembly? Can an ifixit tech comment?

Justin Allen -

Just wondering if anyone can clarify the reattachment of the rear panel, as far as whether it is recommended, or necessary, to heat it again, or get a new adhesive gasket. Thanks.

Scott Sparling -

Good question! You should replace the back cover adhesive with either a custom-cut adhesive or double-sided tape such as Tesa tape. You can choose to reheat and reuse the existing adhesive, but there may be a chance that the back cover will fall off. If you’re reusing adhesive, be sure to remove any uneven adhesive chunks.

Arthur Shi -

What width Tesa tape would work for the replacement of the back cover?

Jamie Wright -

Just look for phone repair adhesive tape - I believe it is 2mm

Farheen Ali -

Personnally, I did warm it again and it looks to fit. I did use the heating bed (90°) of my 3D printer to heat it before and after mounting. But without puting the camera on the bed.
Pascal Lhoas -

The first step should be expanded upon. Using just a jimmy tool dings up the casing. Heat up the bottom with a hairdryer or a heat gun and use a suction cup tool and pull on the backing enough to create a gap big enough to slip a pick into (having a second person slip the pick in makes this easy) and get the process started. Using the iOpener the rest of the way to heat up each edge and pull it away with the suction cup a bit in combination with a picker tool leaves the adhesive intact enough to re-heat and create a decent and even seal when putting the rear plate back on. This battery change out is about as easy as it gets aside from getting started.

Josh Landis -

Excellent guide, battery replaced in my OnePlus 6T.

lightbulbhead1 -

What is the thickness of the tesa tape which is required for the battery and back cover?

davidvelladingli -