Einleitung

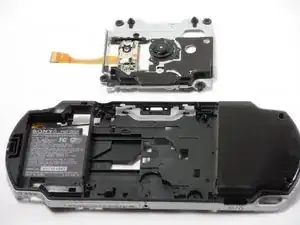
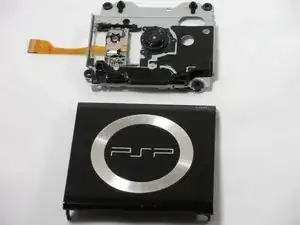
Having trouble reading discs? This guide is for you!

  1. XO6sdwqRCRycqiIA
    XO6sdwqRCRycqiIA
    4mRegB1VDoLKyWtR
    xTyAXH3XLXD1Om1M
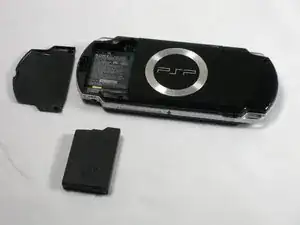
    • Place PSP face down, so that the UMD Drive is facing upwards.

    • Locate the battery door and open.

    • Remove the battery from inside.

  2. Dikdo3qUVr2t1ZtY
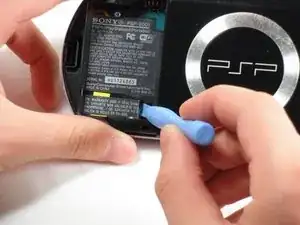
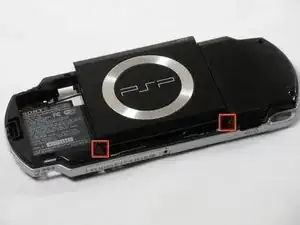
    • This step requires the removal of the warranty sticker. Removing the sticker will void the warranty. According to the FTC removing this will not void your warranty.

    • Locate the sticker in the battery compartment labeled: "En: Warranty Void if Seal Damaged."

    • Remove the sticker using the PSP Opening Tools.

    • Under the sticker is a 5mm Phillips screw needed in the next step.

  3. RtxXG3POPjorw1TF
    RtxXG3POPjorw1TF
    tnMbdLQBL4qTOENO
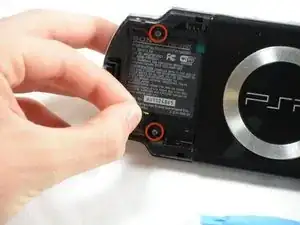
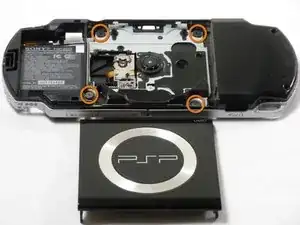
    • Remove four 5 mm Phillips from the case.

    • If the screws stick in the case, you can use a magnetized screwdriver to draw them out.

  4. h1nV2UQrXMyUapF1
    h1nV2UQrXMyUapF1
    qtbUK1Df5oACJZna
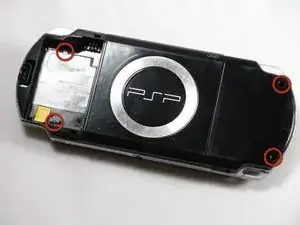
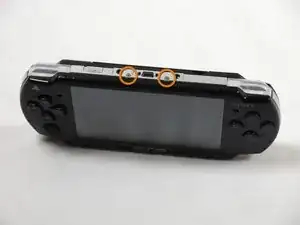
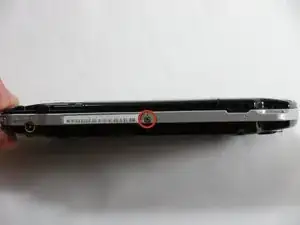
    • Remove the following screws from around the bezel:

    • Two 4 mm Phillips

    • One 5 mm Phillips

    • The two shorter 4 mm screws are on the top of the PSP; the longer 5 mm screw is on the bottom.

    Beware that some models of PSP 2000 (mine is a limited edition Crisis Core FF7 silver version, so I suppose it is related to it being a japanese PSP) have 2 minute TORX screws (T1? T2?) instead of the 2x 4mm Phillips pointed in orange around the USB port.

    Mighty Sashiman -

  5. ahAccPrwEVo2ZT1M
    ahAccPrwEVo2ZT1M
    NOktUSHuGnXItXUT
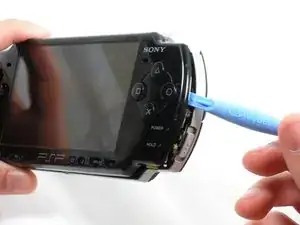
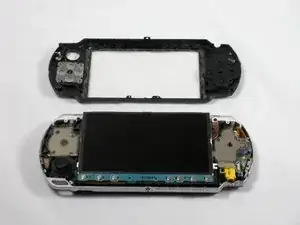
    • Gently pry the front bezel away from the casing using a PSP opening tool.

    • Start on the right hand side of the PSP bezel, and carefully work the tool around the side.

    • If you want to clean the control buttons or D-pad, you can easily pop them out once the faceplate is off and wipe them clean.

  6. fg3PHuHeHOFiGxEp
    fg3PHuHeHOFiGxEp
    CXeGrqO4NpcsVEUH
    eFKUMBU2fNchJRFr
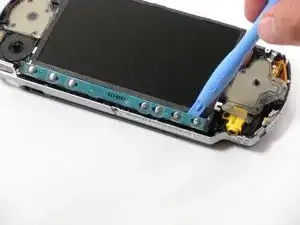
    • Remove the home bar by gently prying on the left and right sides of it with the opening tools. Lift the bar out of the device.

    • A ribbon cable connects the home bar to the logic board. Be careful not to damage the cable when removing the bar.

  7. qDeeW61mKA1fBXQs
    qDeeW61mKA1fBXQs
    DLyAgIMf2gQwJg5R
    IfB5EGOmIkujyCbe
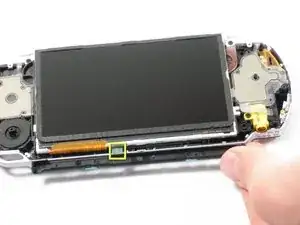
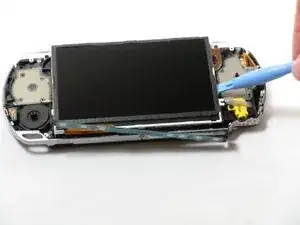
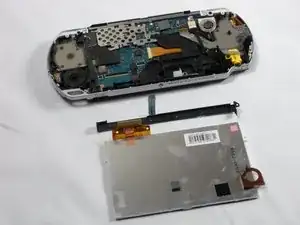
    • With the home bar out of the way, gently pry up the display using the opening tools.

    • There is another ribbon cable attached to the bottom of the LCD. Be careful not to damage either of the connectors when removing.

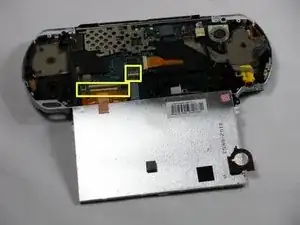
    • Lift the black tabs of the ribbon cable connectors using a opening tool. Pull the ribbons out towards the bottom of the PSP to disconnect.

    • Gently lift out the display.

    There are 2 ribbons connected to the screen. Both of them have to be disconnected in order to remove the screen.

    Ovismue Veholkin -

  8. OCBkGTtsmP5MfbyJ
    OCBkGTtsmP5MfbyJ
    s1WhYbfcnjXLE2FL
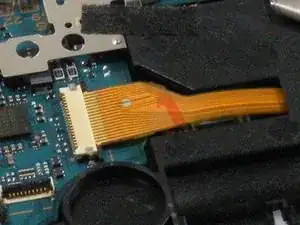
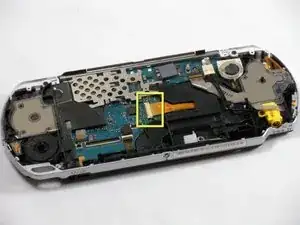
    • Carefully disconnect the UMD drive ribbon cable from the logic board. Use the PSP opening tools to push the black tabs on the connector horizantally to free the cable.

    • This connector cannot be removed vertically. Doing so will damage the connector and/or ribbon cable.

    • At this point it is useful to tape the loose metal parts with some masking tape so they don't fall out whilst you have the PSP the other way up.

    There is a 2nd ribbon for the UMD drive that has to be disconnected sitting directly between the screen and home bar ribbons. Just lift the black tab to release it like you did for the screen and home bar ribbons.

    Ovismue Veholkin -

  9. JiXc1yG1Xvot6jaY
    JiXc1yG1Xvot6jaY
    2oZVhZtrb5uUkWB5
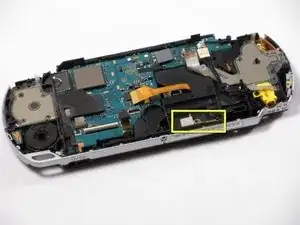
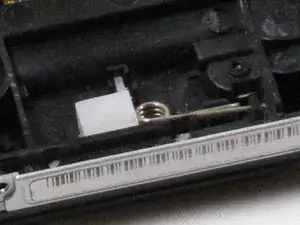
    • With the front side of the PSP facing you, locate small white plastic box with metal spring attached.

    • Remove the white plastic box and spring from the PSP.

    • If you do not fully remove the spring, there is a risk of breaking the UMD Drive door while disassembling.

  10. hxvB1kD2fmvISrLV
    hxvB1kD2fmvISrLV
    iqmeoR3QYiChnXXA
    J5kKfRfZgsFaVOyZ
    • Position the PSP so that the UMD Device is facing upwards.

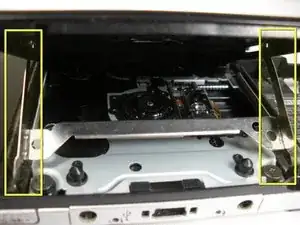
    • With the UMD drive open, locate the aluminum UMD eject bracket. Pinch upper arms inwards to dislocate them from the UMD door.

    • The UMD eject bracket can now be easily pulled out.

    • Gently pry on the left side of the UMD door to remove it.

    • Be careful not to break off plastic knobs that secure the door in place, otherwise the UMD Drive will not open properly.

    On the front, bottom right-hand side, next to where you remove the spring on the previous step, there is the hinge for the UMD door. You can use a plastic pry tool and move it to the left while pushing back to release the door without breaking off the plastic knobs.

    Sergio Hernandez -

    Thank you for that information. I surely would have broken the knobs had you not pointed this out. Although, it took a fair bit more force to push the hinge over enough than I expected.

    Ovismue Veholkin -

    "Gently pry on the left side of the UMD door to remove it." This doesn't really help.


    It doesn't describe where to pry it or what direction to pry it in. Might as well just say "just fix it," because this is a complete gamble on whether or not you break the hinge. If you already have knowledge on which direction is best to pop it out, why wouldn't you specify it?

    Justin Ok -

    The correct way to do this step is as follows:

    With the PSP rear facing you, torque/bend the plastic frame slightly around the left hinge of the door by using your hands to bend the frame to the left of the pin slightly while pushing the door to the right. This will bend the plastic pin away from the door and let you get the door hinge off. The eject bracket is then trivial to remove.

    It is NOT desirable or necessary to remove the UMD eject bracket first. That makes no sense as the UMD door is clearly designed to go on AFTER the bracket arms have been inserted into it.

    Richard Kuo -

  11. owxkqLWmGjQiZs5X
    owxkqLWmGjQiZs5X
    ObrwU3YR3d3CXPny
    • With the UMD door off, locate and remove the four 4mm Phillips screws that hold in the UMD Drive in place.

    • If you have not disconnected the UMD ribbon cable, do so now, as to not damage it when removing the drive.

    • If you have not disconnected the UMD ribbon cable do so now, as to not damage it when removing the drive.

    As the comment in Step 8 says, there are TWO ribbon cables from the UMD drive to disconnect, not just one. Very important!

    Richard Kuo -

  12. Ia1oGcAkgR2aBFHV
    Ia1oGcAkgR2aBFHV
    nYomNsI3EUSkwTIY
    • With the four screws unscrewed, the UMD Drive can be removed. Gently lift the drive from its housing.

    • Make sure as to not damage the UMD ribbon cable (connecting it to the logic board) as you remove the drive.

    • This may be a good time to clean the laser head or any of the components inside the UMD Drive.

Abschluss

To reassemble your device, follow these instructions in reverse order.

pepe32290

Mitglied seit: 20/10/09

1483 Reputation

2 Kommentare

I've used this guide multiple times and it is simply the best out there. You should simply title it "PSP disassembly" as I have used it just to take the 2000 apart and not just replace the UMD drive.

Lisa Lemons -

This guide was very helpful in replacing the UND drive in my 2000. Unfortunately, it turns out that the UMD drive was not causing the issue it is having.

Ovismue Veholkin -