Einleitung

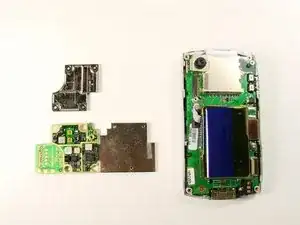
If your camera doesn't work and it needs to be replaced, this guide will come in handy.

  1. obnTCBVjIWtTQTIZ
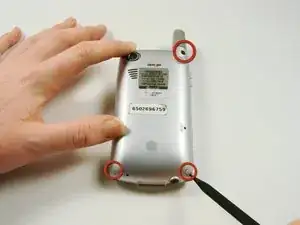
    • On the back of the device, locate the 3 rubber plugs, and use a plastic spudger to remove them.

  2. YAem6KvW6JpdEyP3
    YAem6KvW6JpdEyP3
    AloIJ1q3GPojNAxU
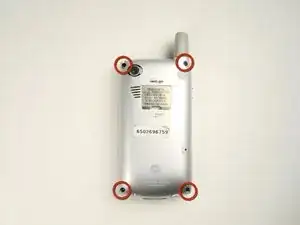
    • Use the T6 Torx Screwdriver to remove all 4 screws.

    • You have to first remove the Stylus to access the 4th screw.

  3. VIXJeTyoDDosj5KB
    VIXJeTyoDDosj5KB
    UFI6ndJ5KKRBCNdA
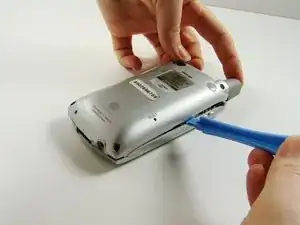
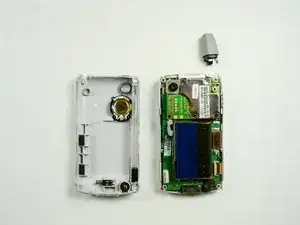
    • Using a plastic opening tool, carefully separate the front and back cases.

    • Note: The antenna will detach from the phone.

  4. RmKfMrbSlfk5xHgk
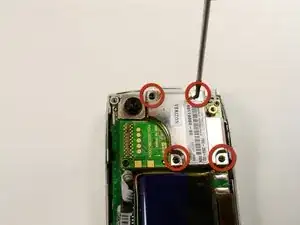
    • Using the Phillips #00 screwdriver, unscrew the 4 screws holding the silver casing down.

  5. LDCbRjDaWrlGXU1O
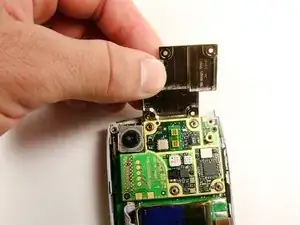
    • Lift up the silver casing.

    • Careful! The casing is connected to the body. Pull the casing up.

  6. OQlBV1YQakVPsasr
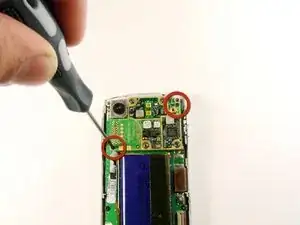
    • With the silver casing removed, unscrew two black screws with a #00 Phillips Screwdriver.

  7. WqKeHKHROLvIEKAF
    WqKeHKHROLvIEKAF
    xLFFYUtKIWSnRkAi
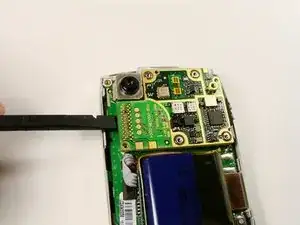
    • Use the spudger to lift the logic board from its socket. Remove it from the rest of the phone.

  8. k65ZqHQXC1OWPFab
    k65ZqHQXC1OWPFab
    jYNZdIyS5D5pHdwP
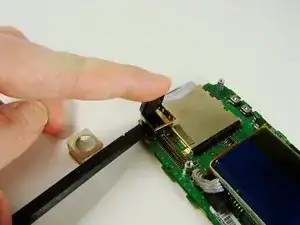
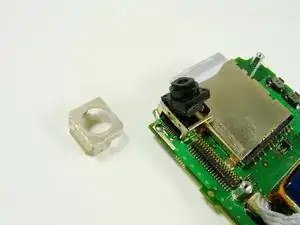
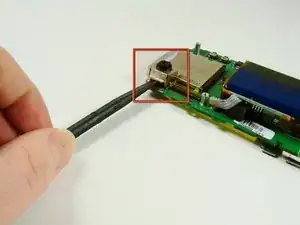
    • Using the flat end of the spudger, lift the metal case off of the camera.

  9. LlFQV53OAcnXJb4h
    LlFQV53OAcnXJb4h
    w22pnrSxGlUvwi1o
    FrGGhQmALWgXfWvh
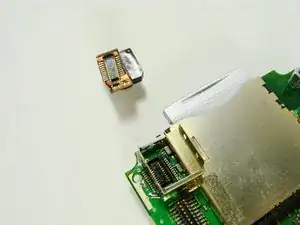
    • Slide the flat end of the spudger between the printed circuit board and metal holder.

    • Pop the camera up

Abschluss

To reassemble your device, follow these instructions in reverse order.
Clement Poisson

Mitglied seit: 26/01/10

24 Reputation

0 Kommentare