Einleitung
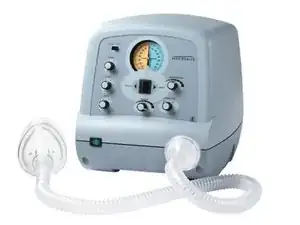
If your CoughAssist ventilator is not properly regulating pressure, your valve actuator motor may be to blame. The guide presented below shows you how to replace this integral part of the ventilator. All you’ll need for the replacement is a Phillips head screw driver in order to remove all the screws, and replace the motor.
Werkzeuge
-
-
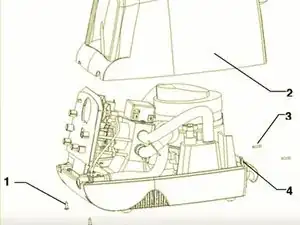
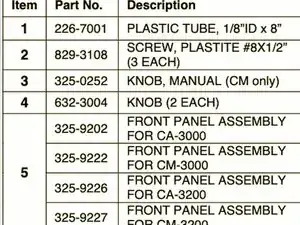
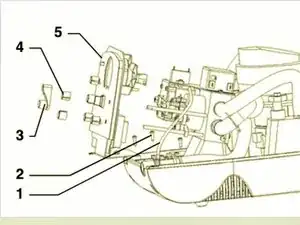
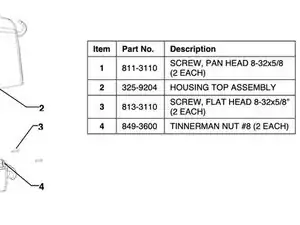
First, remove the two 16mm pan head screws (1) directly under the front panel of the ventilator. (Page 3).
-
-
-
Next, remove the two 16mm flat head screws (3) from the back panel of the ventilator. (Page 3).
-
-
-
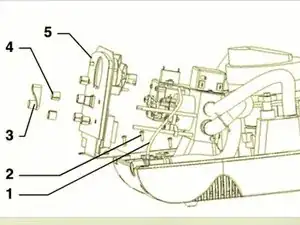
Now remove the "Inhale flow" control knob (4) and "Inhale pressure" knob (4), by loosening the setscrew on each before pulling off. If you have a CM model, carefully remove the Manual Control Lever (3) by prying it off with the screwdriver. (Page 3).
-
-
-
Unscrew the three 12.7mm plastite screws ( 2) holding the panel assembly to the lower housing. A long Phillips screwdriver is very helpful for access to the three screws. (Page 3)
-
-
-
The front control panel (5) should now be loose. Carefully slide it forwards to remove. (Page 4).
-
-
-
Position the ventilator so the pressure gauge is facing right to your right.
-
Follow the Preliminary Disassembly Guide to remove the top cover and the front panel.
-
-
-
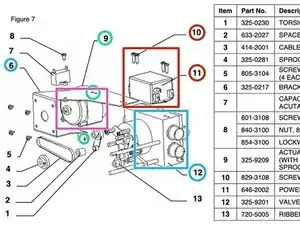
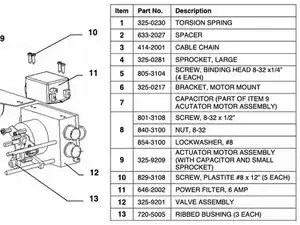
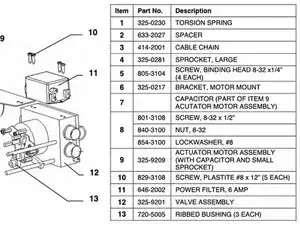
Remove the two 12.7mm plastite screws (10) as shown, and remove the Power Filter (9). (Page 7)
-
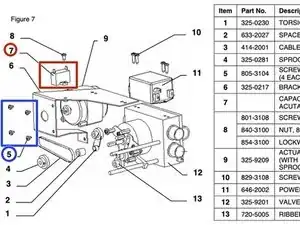
Remove all screws holding the Bracket (6) to the Valve Assembly (12). (Page 7)
-
Remove the two 12.7mm plastite screws above and the one screw beneath the Actuator Motor (9). (Page 7)
-
Take out the Actuator Motor (9) while it is still attached to the Bracket (6). (Page 7)
-
-
-
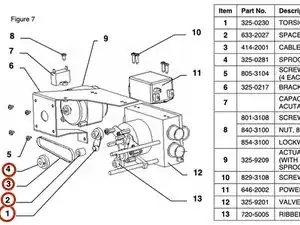
If you notice other parts are damaged or faulty, replace them. These parts include the torsion spring (1), cable chain (3), larger sprocket (4), or the spacer (2). (Page 7).
-
-
-
Disconnect the two motor terminals from the motor capacitor (7). (Page 7).
-
Remove the 4 6.4mm binding head screws holding the motor to the bracket. (Page 7).
-
Remove the motor. (Page 7)
-
To reassemble your device, follow these instructions in reverse order. After reassembly, check that the cable chain(3) is tensioned properly. This means that the two sides of the chain can be pinched together almost half way, but not able to touch. If you need more detail or looking for more information on this repair, please refer to the Service Guide attached, page 7.
