Einleitung

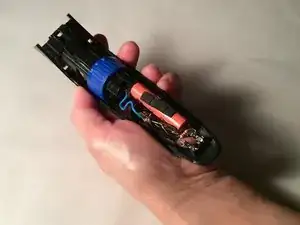
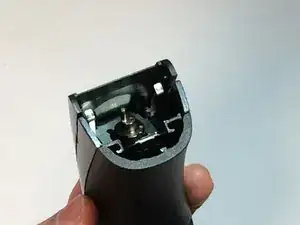
When the battery dies completely and no longer holds a charge, this guide will illustrate the proper way of removing the battery for replacement. CAUTION. Please do not throw away the dead battery in the trash. See a proper disposal center for any handling of dead batteries.

  1. ps1N3YWvlwoPCJvo
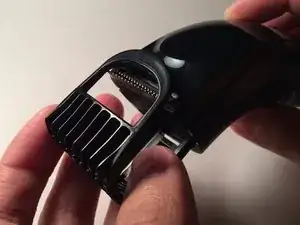
    • Remove the comb from the top of the trimmer.

  2. eWQbEBL2MbNQaiaR
    eWQbEBL2MbNQaiaR
    kbvAaUieps43ysO4
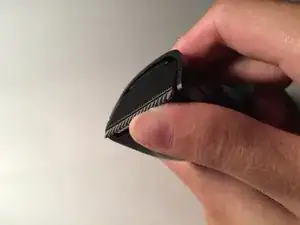
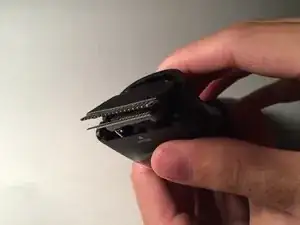
    • Place your thumb underneath the blade and push upward to remove it.

  3. lVGTxMvTcYJPYLAe
    lVGTxMvTcYJPYLAe
    mq6tULvJ6OD4DjgN
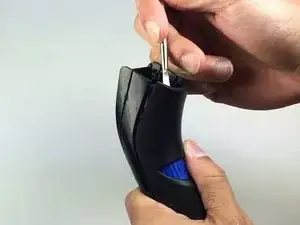
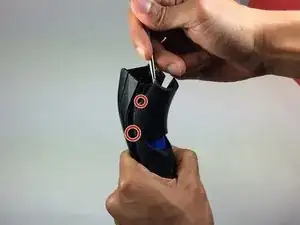
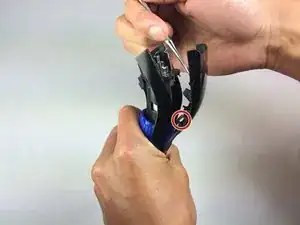
    • Hold trimmer towards you as shown in the diagram.

    • Insert your prying tool/metal spudger into the marked area.

  4. PyQBCnwgBZjlEY6p
    PyQBCnwgBZjlEY6p
    chtavHQsCaY14o3X
    pLwivUBPFMW3mFmp
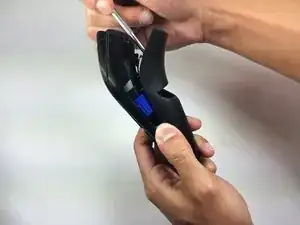
    • Apply gentle pressure and begin prying open the back panel.

    • Separate the panel one notch at a time. Listen carefully as you're prying the panel apart and notice each individual notch release.

    Thank you for this part!

    Direct Heart lines -

  5. MMUXStWQGDTBaKbC
    MMUXStWQGDTBaKbC
    hY5PunLkluK6VEIQ
    JNLcLtJvguk4iQlj
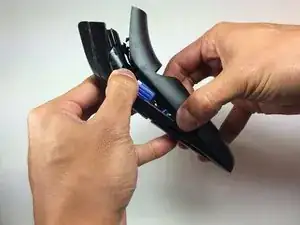
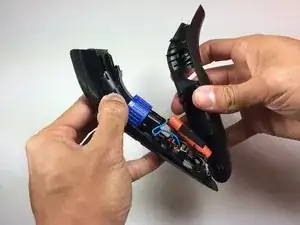
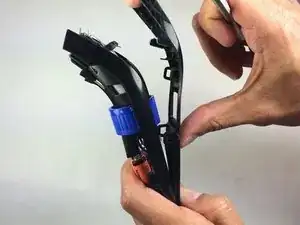
    • Pull the trimmer apart using your hands once the panel is at least halfway apart.

    • Pull the wires attached to the battery off of the power connectors before completely removing the back panel.

  6. MOxZtp6gKieGEJnB
    MOxZtp6gKieGEJnB
    icvoWOSdPOiwnlgD
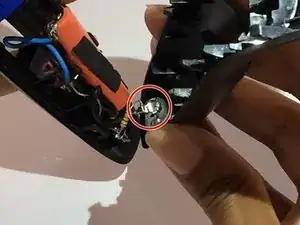
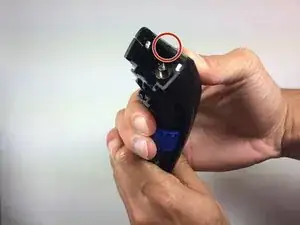
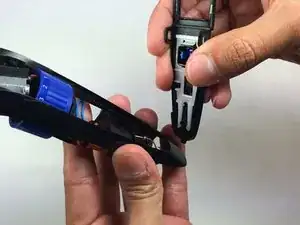
    • Hold the trimmer towards you.

    • Place the metal spudger tool in the marked area.

    Removing this front panel isn’t necessary to replace the battery. This step is a waste of time.

    michaelwmudd -

  7. MYDRKIAt2KXshLhT
    • Apply gentle pressure and begin prying the front panel.

    • Separate the front panel one notch at a time.

  8. iiU3TiCxTTRNsxJQ
    iiU3TiCxTTRNsxJQ
    HrL2Pxf2C2SAbxeE
    • Pull the trimmer apart using your hands once the panel is at least halfway apart.

  9. YWBLUqYSCZA5m4sV
    YWBLUqYSCZA5m4sV
    VfmoHjaKfAILRRyk
    lNK32VNDL5XCTRyi
    • Face the battery towards you.

    • Locate the power connectors on the bottom of the trimmer, pull them from the base with your spudger.

  10. eMyWFhqVeOilT1jk
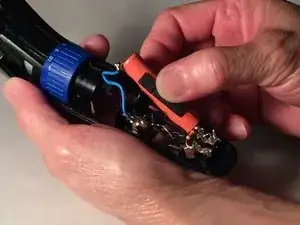
    • Grab the battery by its sides, pull it upwards out of the base of the trimmer.

  11. QNUqKjSFx2CgtNq4
    QNUqKjSFx2CgtNq4
    1RfKB6iLA1GVBCDW
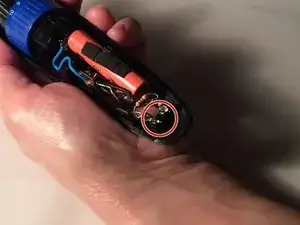
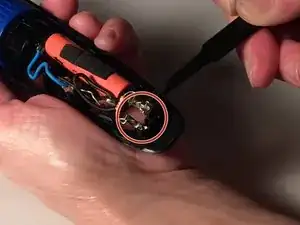
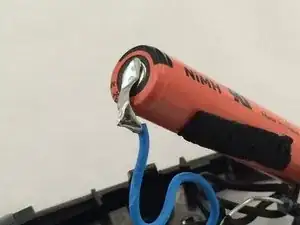
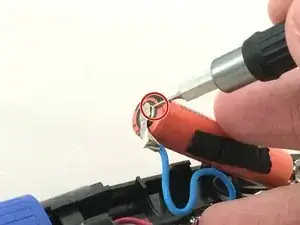
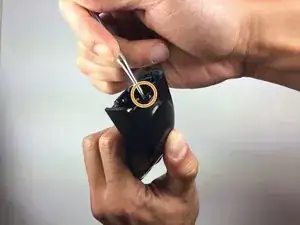
    • Locate the connection between the blue wire and the battery. Melt the solder and completely remove the battery.

    • Be careful when dealing with solder. The metals will become very hot and can cause damage to skin/clothing.

    what power does this battery hold

    Shubham Sharma -

    Would be nice to have some specs for the battery here so we can buy a replacement before we open it up.

    James Almeida -

    Looks like a triple A NiMH battery, I'm going to try and replace it with a Sanyo Eneloop pre soldered battery tip.

    Maher Salti -

    I have this trimmer and recently replaced the battery. It is a NiMH 750mAh AAA 1.2V.

    michaelwmudd -

    This also works for BT405 hope this helps

    Mike -

Abschluss

To reassemble your device, follow these instructions in reverse order.

Darren Chu

Mitglied seit: 03/09/15

1490 Reputation

19 Kommentare

Hi, what are the specs on the NiMh battery?

Eric Nguyen -

NiMh AA 1650 mAh 1.2V rechargeable battery. Search Amazon.com for philips norelco qt4022 battery. One result is UPC 737212062822

galligant -

I think you can simply use a AA battery, 1.2V

Olivier Lefaux -

Note: AA Alkaline battery is 1.5V and not rechargeable.

galligant -

Awesome work.very helpful
Himanshu sahrma -

can I use the electric adapter in place of battery?

Avijeet60 -

Hey!! Whats the mah of battery??

ashish -

HI Darren,

I’ve to say this is a cool work. You’ve done an extra-ordinary support for Philiphs Norelco users. As a beard style lover I’s thinking of buying a new Philips one instead of my old remington MB320C. I have already visited online websites like https://trendyseekers.com/best-beard-tri... to learn different model - Panasonic ER -GB 40s, Bruan BT 5070 and more. I have also seen philips norelco beard trimmer 3100. online. But I was curious about blade replacement and battery durability, charge capacity and of course battery replacement. My pleasure I found your post link on the fist page of google; simply hit on and discover your brilliant post. The 3 lines introduction has made a long expression to understand I do think. All the 11 steps you mentioned with nice images really amazing and useful for the users. I would love to say thanks for your awesome work and will be highly appreciated if you let me know how long does the charge remain after a single charging please.

Randy G

Randy Gardner -

The battery I took out of my QT4000 is EXACTLY the size of a TRIPLE A (AAA) battery - a bit shorter than a AA and much smaller diameter.

jdenny -

My battery is not charging(the indicator on charger doesnt glow).

I tried other chargers also.

What should I do?

if not repairable, can i charge the battery by removing it?

Sanku -

Great tutorial. Saved me $75.

Removing the cover is a bit of a PITA.

Rather than ordering one from Amazon, I just used an existing Energizer AAA rechargable battery. It holds2300 mAh vs the 1650 mAh of a similar 1.2v battery on Amazon.

I tore off the metal tabs from the existing battery and soldered the tabs to ends of my AAA battery with solder and flux.

Curtis Patrick -

it is NiMH AAA 0T750 1.2 Volt GS YUASA battery.

madniit_007 -

Jst tell me which diaode and resistance use in it?

Sanket gawas -

thanks so much for the info, i did exactly what you said and now my old QT4000 works like brand new. Fantastic. Such a good little unit and even better as its so easy to replace parts, rather than just get another something else. I did oil the moving parts in the blade area as well, which increased its overall cutting power. Many thanks, Cheers Michael

michael midnight -

I have this model and it worked fine for 6 years. Then one day, it wouldn't turn on. I pushed the button, saw a brief vibration, and then nothing. I thought it was busted and was about to buy another when I checked this guide and removed the blade as in step 2. Turns out it was just clogged with 6 years of stray beard hairs 🤦🏼 Thanks for the guide, I didn't realize that I should be cleaning UNDER the blade every once in a while. Now I know!

Duder -

Can you replace existing NiMH battery with a Li-Ion one? Or use a AAA Li-Ion?

Vivek Shah -

Excellent tutorial I didn't buy a battery off amazon tho I used an ikea ni-mh AAA rechargeable battery instead works like a dream again thank you

Mike -

My local Batteries Plus had an almost identical replacement for the original Ni-MH AAA. Here's the link for their battery: https://www.batteriesplus.com/productdet...

I even asked them if they could ask solder tabs and they gladly did so, free of charge!

Juan J. -

Muito Obrigado

Carlos Sá -