Einleitung

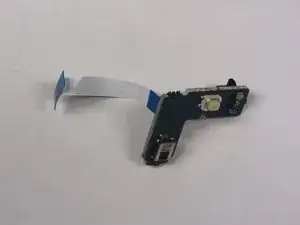
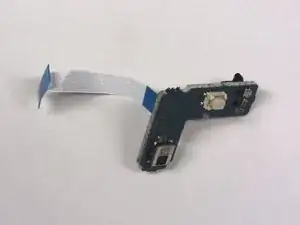
This guide will show you how to locate and replace the Infrared Sensor in the Playstation 2 Slimline. The IR sensor reads wireless signals so PS2 controllers and remotes function as if they were plugged into the unit.

  1. ZMfGOB2GQsDFm5Xa
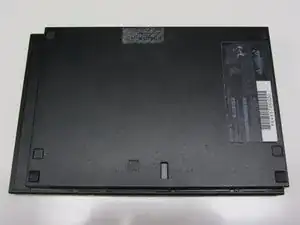
    • Disconnect all cables from the console and flip the unit over to reveal its base.

  2. GpHh4vJkT4rb1u6P
    GpHh4vJkT4rb1u6P
    TbnIWfeRsUP3f51M
    Jjufdtb2FQgwhDpC
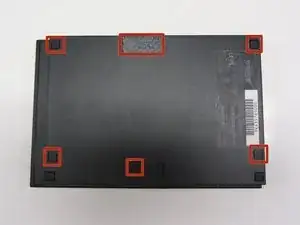
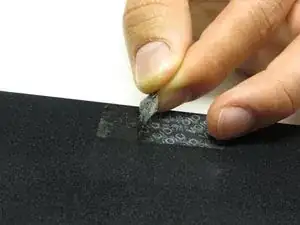
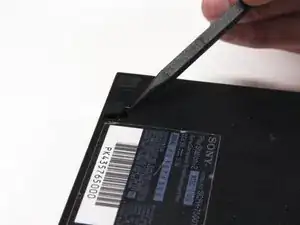
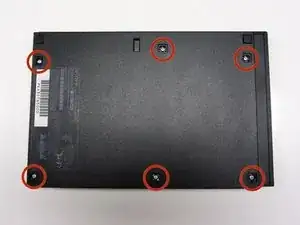
    • Locate the 6 feet on the base of the unit. Pry them off using a spudger to reveal the screws.

    • Note: One of the feet is located under the sticker shown in the photo. Removing this sticker will void any warranty with Sony.

  3. bD3xeHvpxvOPuvEb
    bD3xeHvpxvOPuvEb
    gcqGAEtP3TxJD6TR
    BFwQXecMxnMYCNP6
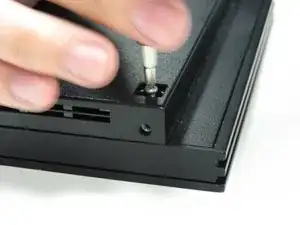
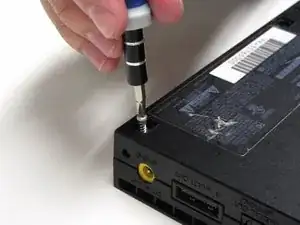
    • Remove all six 4.0 mm screws from the base of the unit using a #1 Phillips screwdriver.

  4. OfZZaEZHxVHRoHOC
    OfZZaEZHxVHRoHOC
    J4eXd2UCJPHsOvX2
    jWXnr4HfnRw5I5AK
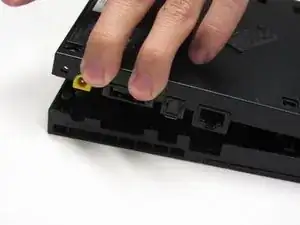
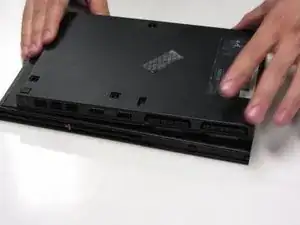
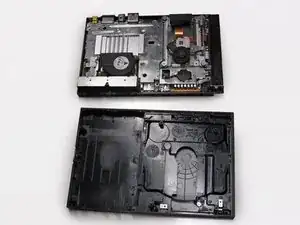
    • Starting at the corner at which the power and Ethernet ports are located, pry open the outer shell using a spudger and continue around the entire unit.

    • Note: You may use your hands for additional force to separate the two pieces of the outer shell.

  5. QDPw36tFwMrOp2qd
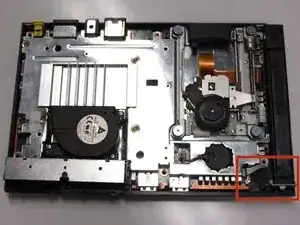
    • Locate the IR sensor at the front, right corner of the unit.

  6. wDUNev1t3byocJMV
    • Gently detach the ribbon cable connecting the IR sensor to the motherboard.

    • Caution: Always remove ribbon cables by the plastic handles located on either end. Gripping a ribbon cable anywhere but the provided handles can damage the cable and render the component useless.

  7. GESwsIXkB6RuSZXV
    • Gently lift and remove the IR Sensor from its designated slot.

Abschluss

To reassemble your device, follow these instructions in reverse order.
Thomas Sullivan

Mitglied seit: 23/10/13

3669 Reputation

0 Kommentare