Einleitung
The time and date, as well as other settings, are kept by the PRAM battery when your machine is off.
Werkzeuge
Ersatzteile
-
-
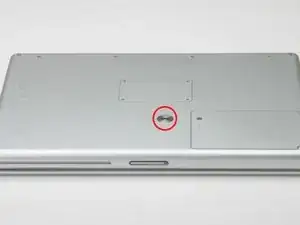
Use a coin to turn the battery locking screw 90 degrees clockwise.
-
Lift the battery out of the computer.
-
-
-
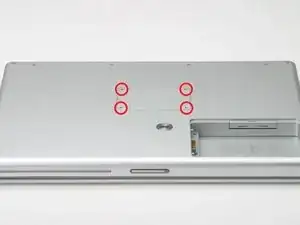
Remove the four Phillips screws from the memory door.
-
Slide the memory door away from the memory compartment.
-
-
-
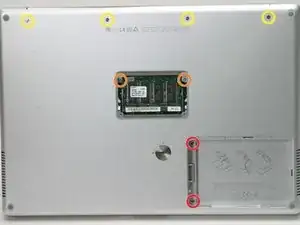
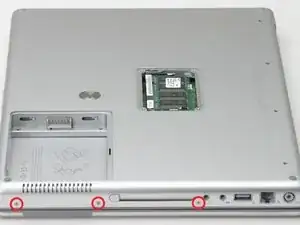
Remove the following 8 screws:
-
Two 3 mm Phillips in the battery compartment, on either side of the battery contacts.
-
Two 9 mm Phillips on either side of the memory compartment.
-
Four 16 mm Phillips along the hinge.
-
-
-
Rotate the computer 90 degrees clockwise, so that the power receptacle faces you.
-
Remove the three 3 mm Phillips screws.
-
-
-
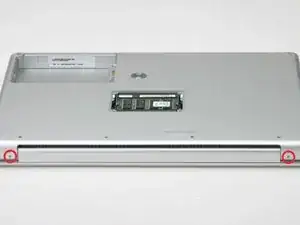
Turn the computer 90 degrees clockwise so that the hinge faces you.
-
Remove the bottom 5 mm Phillips screw on either side of the hinge (two total).
-
-
-
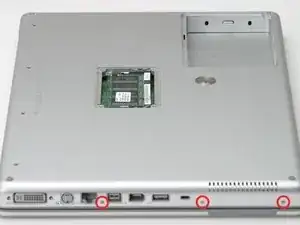
Rotate the computer 90 degrees clockwise, so that the ports face you.
-
Remove the three 3 mm Phillips screws.
-
-
-
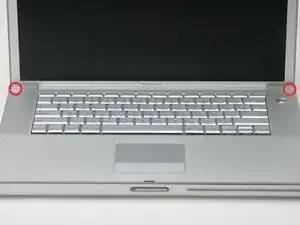
Turn the computer over and open the display.
-
Remove the 4.2 mm 1/16" H 1.5 hex screws in either corner, next to the display (a T6 Torx driver will also do the job nicely).
-
-
-
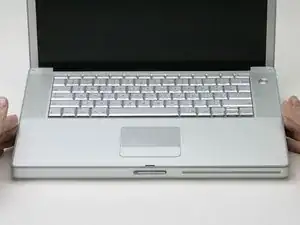
Grasp the back corners of the upper case and pull up, disengaging hidden tabs on the sides. Do not pull the upper case off yet; you still need to free tabs in the front of the case.
-
-
-
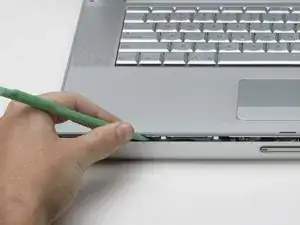
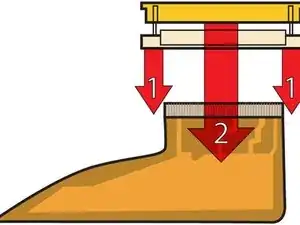
Pry up the left side of the upper case slightly with your hand and wedge a spudger into the seam between the upper case and lower case.
-
Leave the tool in place applying pressure to the upper case for the next step.
-
-
-
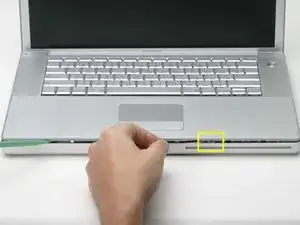
Place enough pressure on the upper case to allow you to slide a tool just within the seam between upper case and lower case as shown in the picture. A dentist's hook, push pin, or similar tool will work.
-
Delicately slip the tip of your tool behind the silver metal latch and pull it forward while pulling up on the case. This may take some effort.
-
Alternatively, you can free the clasp with a small flathead screwdriver through the CD slot. The clasp is 1-3/16 in (3cm) from the left side of the slot. Use the screwdriver to lift out (or press back) the felt lining; then use the screwdriver to pull the clasp (shiny metal) forward to free it from the catch behind it (dull metal).
-
-
-
Lift the back of the case up and work your fingers along the sides, freeing the case as you go. Once you have freed the sides, you may need to rock the case up and down to free the front of the upper case.
-
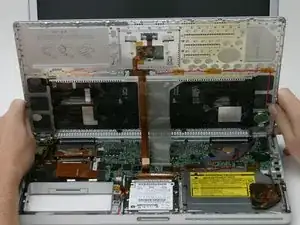
Rotate the upper case up and toward the screen, so that the upper case rests against it.
-
-
-
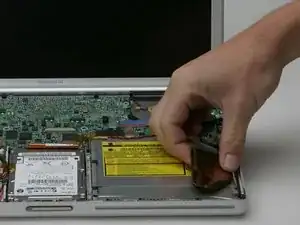
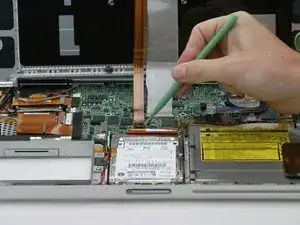
Remove the orange tape securing the trackpad ribbon to the logic board.
-
Disconnect the trackpad ribbon from the logic board.
-
-
-
1) With your fingernails, grasp the locking bar on either side and pull up a small amount (about 1/16" or 2 mm).
-
2) After disengaging the locking bar, slide the cable out of the connector.
-
-
-
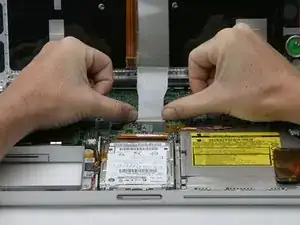
Loosen the keyboard ribbon clamp by pushing the thin black piece toward the screen, using the tips of your fingers.
-
Slide the grey keyboard ribbon out of the loosened connector.
-
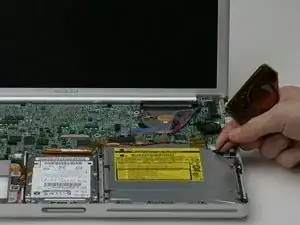
Remove the upper case from the computer.
-
To reassemble your device, follow these instructions in reverse order.
4 Kommentare
For those that are trying to do this in 2021, when new replacement parts are basically unavailable — you can replace just the cell itself with a new unit — Panasonic actually still makes these 3032 rechargeable cells. The part is here: https://www.digikey.com/en/products/deta...
The new ones are a 3V cell; the Apple spec’d battery is 3.7V, but it seems to work fine. You’ll need basic soldering skills — take the old unit out, unwrap it from the kapton tape, unsolder the old one and solder in the new one. Make sure to use a hot iron and spend a minimal amount of time heating (not more than a second or so). You want to heat the terminal, but not the battery itself.
When I did this, my old Apple OEM battery was reading a 1.03V charge; the new one was a full 3.05 volts.
david -
An update 3 weeks later — the cell above did NOT work. Battery stopped holding a charge and was leaking badly; I think this may be because the new cell was only 3.0V and the original was 3.7V, and possibly the charging circuit was overcharging it.
I have found a 3.7V cell on ebay, so I’m going to try that next.
david -
SUCCESS! The 3.7V battery worked wonderfully, and has held a PRAM charge overnight twice now. Charges back up fine too; no leaking.
I purchased this one from eBay: https://www.ebay.com/itm/Cgl-3032-3-7-v-...
If you’re reading this in 2025, I’m sure that link will be dead — you’re looking for a 3.7V (NOT 3.0V) 3032 LIR (Lithium Ion Rechargeable) battery with solder tabs.
david -
Thanks for the detailed information, david (from another david)! I’m searching here in 2021 (in Canada) and that eBay option is unavailable to ship here, sadly. Doesn’t seem to be options for 3.7V of the 3032 LIR - but searching like crazy to avoid paying $100 from Apple dealers here who somehow have private stock for old PB G4s. Would really love to find one to do repair myself on my otherwise great condition PB G4 15” that kept freezing up (most likely dead PRAM - but haven’t been able to test / discover that).
David -
