Einleitung
Want more storage capacity? Replace your hard drive with a higher capacity unit.
Werkzeuge
Ersatzteile
-
-
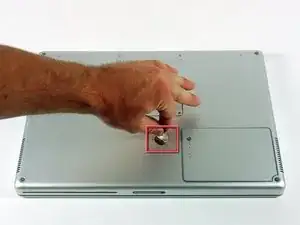
Use a coin to turn the battery locking screw 90 degrees clockwise.
-
Lift the battery out of the computer.
-
-
-
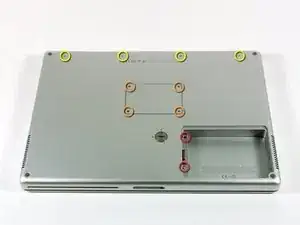
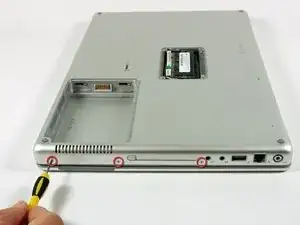
Remove the following 10 screws:
-
Two 3 mm Phillips in the battery compartment, on either side of the battery contacts.
-
Four 3 mm Phillips around the memory compartment.
-
Four 16 mm Phillips along the hinge.
-
-
-
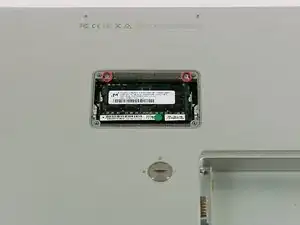
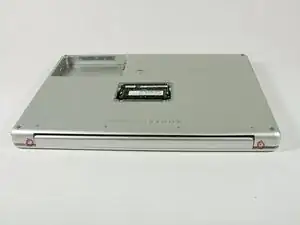
Remove the memory compartment cover.
-
Remove the two 12 mm Phillips screws on the Aluminum bracket at the top of the memory compartment.
-
-
-
Rotate the computer 90 degrees clockwise so the power receptacle faces you.
-
Remove the three 3 mm Phillips screws along the edge of the lower case.
-
-
-
Turn the computer 90 degrees clockwise so the hinge faces you.
-
Remove the lower 5 mm Phillips screw on each side of the hinge (two total).
-
-
-
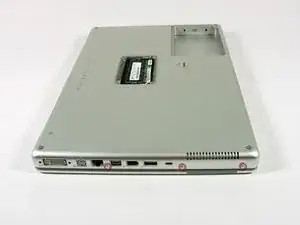
Rotate the computer 90 degrees clockwise so the ports face you.
-
Remove the three 3 mm Phillips screws along the edge of the lower case.
-
When replacing these screws, you must install them in the correct order. Begin by installing the screw closest to the display hinge, then work your way toward the front of the computer. Also, be careful not to put the screws in the two holes on either side of the video out port.
-
-
-
Turn the computer over and open the display.
-
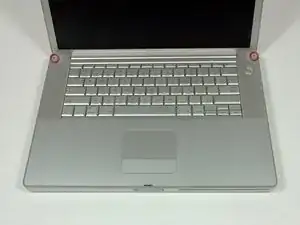
Remove the two 4.2 mm long, 1.5 mm hex screws at the top corners of the upper case (two total).
-
-
-
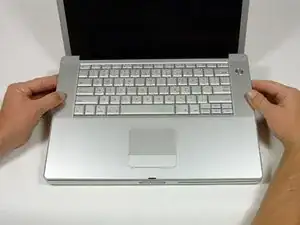
Grasp the back corners of the upper case and pull up.
-
Lift the back of the case up and work your fingers along the sides, freeing the case as you go. Once you have freed the sides, you may need to rock the case up and down to free the front of the upper case.
-
-
-
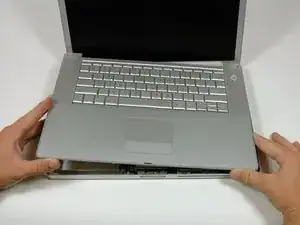
Remove the amber tape securing the trackpad ribbon to the logic board.
-
Disconnect the trackpad ribbon from the logic board by pulling up on the connector.
-
Remove the upper case from the computer.
-
-
-
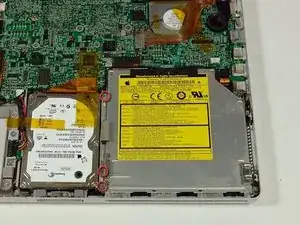
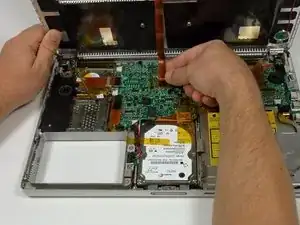
Remove the three 6 mm long silver Phillips screws from the retaining bracket on the left side of the optical drive.
-
-
-
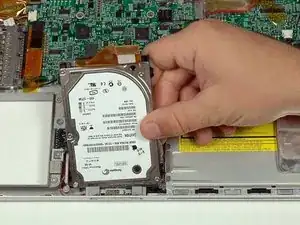
Disconnect the large orange hard drive cable from the logic board, removing tape as necessary.
-
-
-
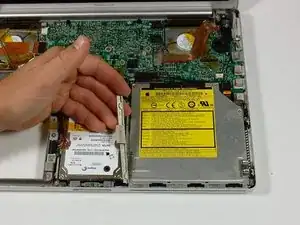
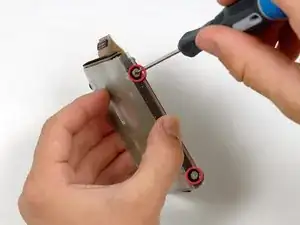
Remove the two silver Phillips screws and black rubber bumpers from either side of the hard drive (four sets of screws and bumpers total).
-
-
-
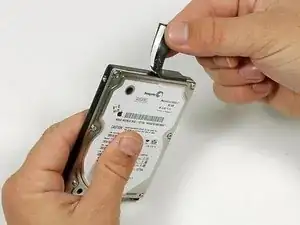
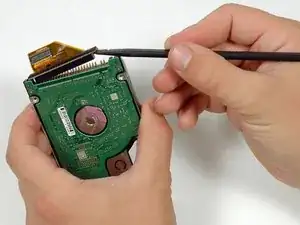
Disconnect the hard drive cable from the hard drive using a spudger by gently loosening one side at a time. (Be careful not to pry to hard or you may bend the pins.) You may need to remove a piece of orange tape attaching the ribbon cable to the hard drive.
-

To reassemble your device, follow these instructions in reverse order.

3 Kommentare
Easy enough to follow. The clips at the front of the drive bay are rather delicate and tricky to re-install properly. The spudger helped with that too.
I have a 15 inch powerbook g4 with 1,67ghz and I after installing 160gb ATA drive I only had 149,69 gb left before installing os and stuff. My question is: Does powerbooks have any hardware limitations that makes us unable to install more storage?
If you try to install an SSD via SATA-IDE-adaptor, please make sure it works before re-assembling the PowerBook - this saves you a lot of time. I did this four times in a row, just to see that it didn’t work out well. May be it’s the quality of the SSD, or of the adaptor. But note two things: use the “flat” version of the adaptor; and if Leopard’s disk-utility outputs and “Input/Output-Error”, try Tiger’s disk-utility for the first initializion of the SSD. Btw. the manual here is great! Thank you!
atarixle -