Einleitung
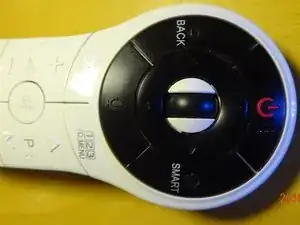
The remote I have is for a 47LA690T LG TV bought in Phuket Thailand. It came with a "Magic Remote" that is mostly white with a black circular part at the front which has a rubber wheel in the centre. I also have a one year newer version TV with a different "Magic Remote" which is all black and oval shaped. The wheel on that one does not suffer from this problem.
The wheel is used to change analogue channels on the TV and so gets used a lot. After time, the rubber becomes loose and slips on the plastic gear on which it is mounted.
There is another guide on iFixit by "Schdeffan" titled "Repairing LG Television Magic Remote Control AN-MR 400 Scrollrad". You can also have a look at his method. It was his method for a slightly different remote that allowed me to fix my remote about two years ago. Now, today, I had to repeat the process that I used and decided to share the photos that I took at that time.
Werkzeuge
-
-
This is the Magic Remote. Remove the batteries and leave the battery lid hanging loose.
-
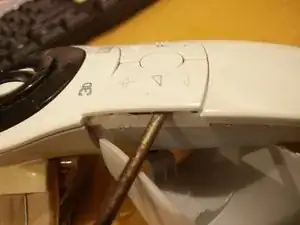
Remove the Volume up/down and Channel up/down plastic pieces by inserting a small screwdriver in the edge to prise off each plastic piece.
-
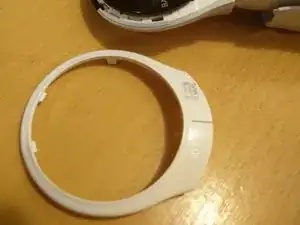
The white plastic ring that surrounds the black control buttons can be removed after the Volume and Program up/down pieces have been removed. Start at the edge nearest to the Volume and Program controls and gently lift the edge up. You can use a thumb nail inserted between the ring and the grey base to release it all around the top.
-
-
-
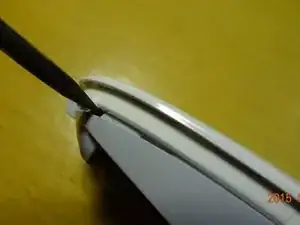
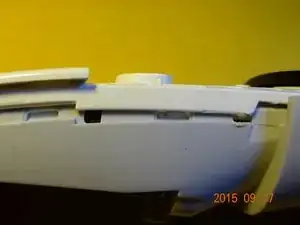
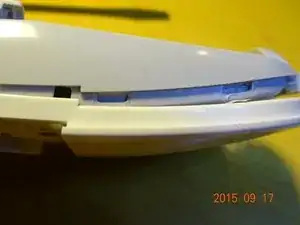
Separate the white upper plastic piece from the lower grey plastic base using a sharp screwdriver to get between the two layers. There will be some worrying cracking noise as the plastic clips come free and the parts separate.
-
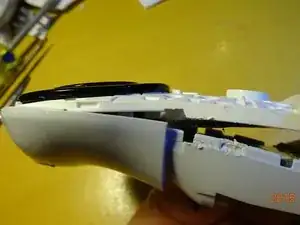
Do it slowly, watch what is happening and carefully separate all around the remote. As you can see in the second picture, there will be damage to the edges as they are separated, but this is covered up by the battery lid when it is pushed back in place.
-
-
-
As you pull apart the narrow end, the other round end will also separate. There are some clips holding the top and base together which can be eased apart by moving the white top from side to side. Also, you can pull the grey plastic away from the white plastic to help the clips become free.
-
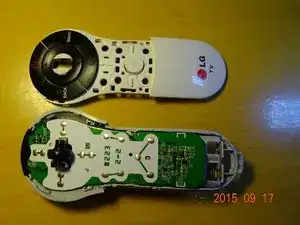
When the two parts are separated, do not let the rubber keypad separate from the front white plastic, and make sure the small red plastic on/off button stays in place. If either does happen, they can be easily replaced.
-
-
-
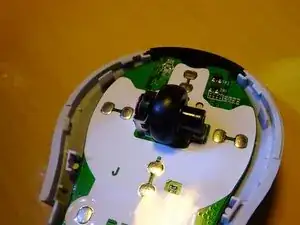
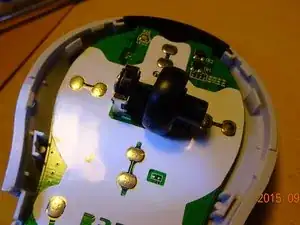
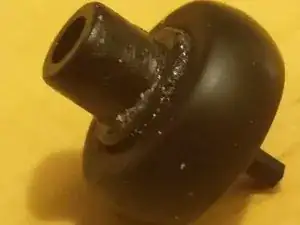
The black rubber and plastic wheel is now visible attached to the base of the remote.
-
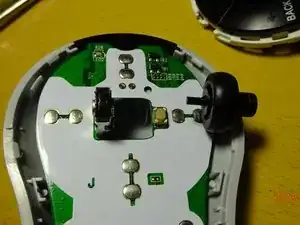
The left side of the wheel is attached to a small axle that is square in cross section. This axle engages with a device that detects when the wheel is rotated.
-
The right side of the wheel is attached to a much wider axle that operates a micro-switch when the wheel is pressed.
-
The wheel can be removed by pulling sideways on the large axle shown on the right side of the picture. Gently pull it sideways to the right and wiggle it so that the the smaller axle comes out of the rotation detector device..
-
-
-
The rubber can be slipped off the wheel either side. I found the best way was to pull it off onto the small axle. Then apply some glue, e.g. UHU glue, sparingly to the other side of the wheel so that it will stick the rubber to the wheel when the rubber is pushed back.
-
The other guide by Schdeffan says to inject the glue through the rubber into the wheel using a syringe, but as I don't have such a syringe I simply applied some glue carefully around the wheel on the side of the larger axle.
-
I used a toothpick to wind the sticky glue around the wheel, trying hard not to get it on the large axle because that needs to be free of glue and smooth so it can glide over the micro-switch that it operates,
-
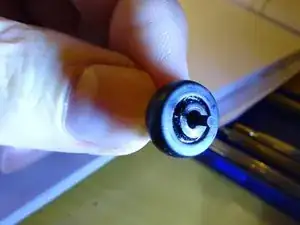
Having pushed the rubber back onto the wheel, some glue will ooze back onto the large axle - the one shown in the second picture. Make sure you clean off the excess with kitchen paper so it is at least as clean as in my picture.
-
-
-
Reassembly is simply the reverse of what was done to take it apart. So just review the guide and perform each step in reverse. Don't force the pieces together too hard - they should go together easily. Look for all the small clips that have corresponding holes for them to fit in.
-
Good luck!
-
I will update the guide if a comment suggests an improvement.
-
To reassemble your device, follow these instructions in reverse order.
5 Kommentare
I just ADD one drop with my small gule tube when i push the rubber to onside using a paper clip it took 10 sec without having to disasambel the Remote
thanks for the guide mine fell in water so had to disassemble it to let it dry out, i gave it a IPA bath then let it dry for 36 hours , now it works fine.
thank you for the guide.
Subra -
I didn't take mine apart I just lifted the rubber with the smallest precision screw driver n applied a minute spot of super glue remote still working after 7 years. But can anyone tell me where I might buy the complete wheel for my other remote has it's smallest end has snapped off i glued that but i dont think it will last very long
That sounds a good idea - lifting the rubber to one side!
Regarding the small broken part, you might have to drill it out and insert/glue in a replacement axle
Baht -
