Einleitung
This guide will explain how to remove and replace the internal battery in the Puritan Bennett 560 ventilator.
Warnings:
- Ensure the ventilator is powered off and AC power is disconnected
- Do not try to open the battery itself under any circumstances
- Cover the battery terminals with a non-conductive material when not in use to prevent short-circuiting.
The repair information is also available on pages 143-144 (Section 5, Pages 13-14) of the Service Manual that is linked in the documents section.
Werkzeuge
-
-
Using the T10 Torx screwdriver, remove the three 8mm screws on the battery cover.
-
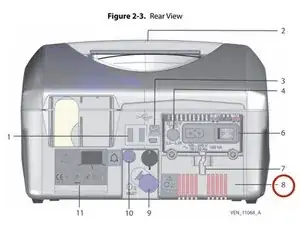
Two screws are located on the rear of the ventilator, and one on the bottom.
-
Slide the battery cover out of the ventilator.
-
Remove the battery from the battery cover.
-
-
-
REPLACEMENT
-
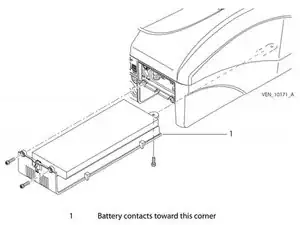
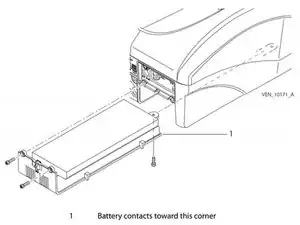
Install the battery into cover, as shown in figure.
-
Make sure the contacts on the battery line up with those in the ventilator.
-
Slide the battery and cover together into the housing.
-
While applying pressure to the cover, install the two rear screws.
-
Install the screw at the bottom of the cover.
-
Be careful not to over-tighten any screws.
-
Ein Kommentar
I can’t seem to edit the step titles. They should show:
Step 1: Battery Removal
Step 2:
Step 3: Battery Replacement


