Einleitung
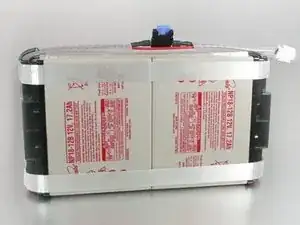
It is important that the backup power service (BPS) of the Puritan Bennett 840 ventilator is fully functional in the event that the ventilator loses power while providing for a patient.
The BPS battery pack can be found in one of two places. If the ventilator stands on a pole connected to four wheels, it does not have a compressor, and the battery is located directly above the wheels. If the ventilator does not stand on a single pole, the battery is located in the compressor mount cart. This guide covers the replacement of the BPS battery in ventilators with compressors.
For more information on replacing the BPS battery, please refer to page 8-114 (section 8.18.3) in the service manual.
-
-
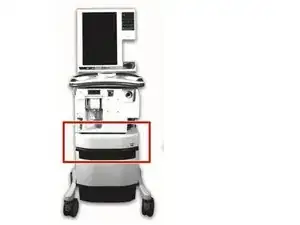
Locate the breath delivery unit (BDU) shelf on the ventilator.
-
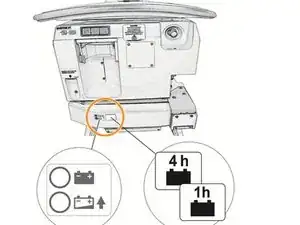
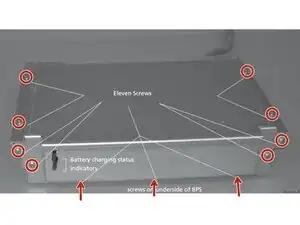
Locate the battery indicator label on the shelf to determine whether the BPS battery holds a one-hour or four-hour charge - the default for this guide is a four-hour battery.
-
-
-
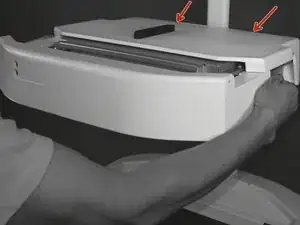
Grasp the sides of the front bezel of the BPU and gently spread them away from the ventilator.
-
Pull the bezel outward to remove it from the cart.
-
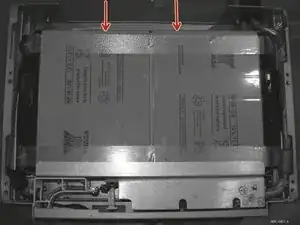
Use a Phillips screwdriver to remove the two screws that connect the BPS to the BDU shelf at the back of the cart.
-
-
-
Using a Phillips screwdriver, remove the eleven screws securing the BPS top and front metal covers.
-
Pull the covers away from the BPS.
-
-
-
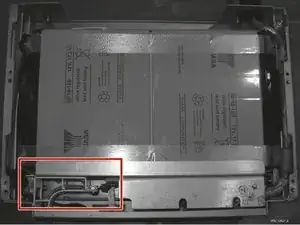
Locate the battery indicator bracket.
-
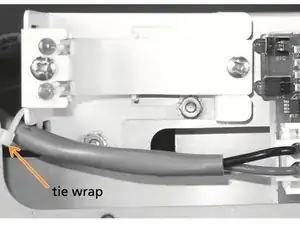
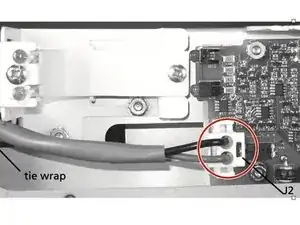
Cut the zip tie connecting the battery harness (bundle of wires coming from the battery) to the battery indicator bracket.
-
If the ventilator contains a one-hour battery, simply disconnect the battery harness from the battery cable and lift the battery out of the BPS.
-
-
-
Use a Phillips screwdriver to remove the two screws securing the battery retaining bracket to the rear of the BPS.
-
-
-
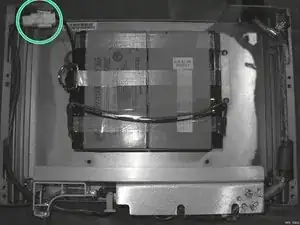
Disconnect the battery connector from J2 on the circuit board next to the battery indicator bracket.
-
-
-
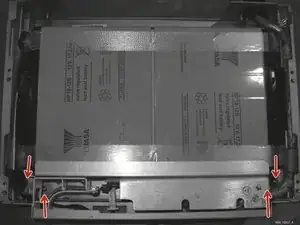
Using a Phillips screwdriver, loosen the two side screws and the two base screws holding the BPS front bracket.
-
Carefully lift the battery out of the BPS.
-
To reassemble your device, follow these instructions in reverse order.
