Einleitung

To avoid damaging the LCD, this guide removes the screen/digitizer from the rear of the device. This replacement requires patience as removing the screen can be tedious. Along with the listed tools, thin, sturdy wedges such as playing cards or guitar picks can greatly simplify and expedite screen removal.

  1. SqIQTywc4FfRLKpQ
    SqIQTywc4FfRLKpQ
    dBaCpRdiIDY1aTIi
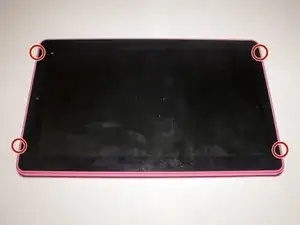
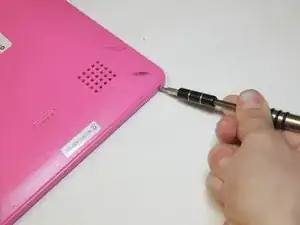
    • Remove these four 4 mm Phillip's #00 screws.

  2. ejbaWI3NSrP11x6P
    ejbaWI3NSrP11x6P
    SXR2BRUTxWb2S4Vl
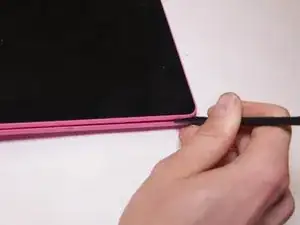
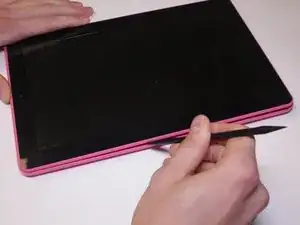
    • Run a spudger tool around the edge of the screen to loosen it and begin to pry upward.

    • The screen will be able to be removed once you see it pop up like it has in the photo.

    • There are wires attached to the back cover and screen so be careful not to pull them apart.

  3. JuuRUiZodvT3JZHA
    JuuRUiZodvT3JZHA
    4qXcSLHXFNvhOA5b
    v36UktVbmqNyFPvl
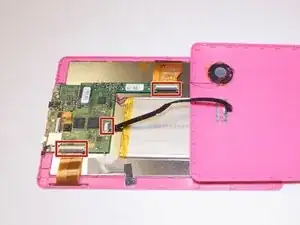
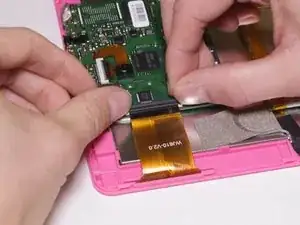
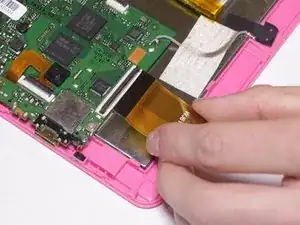
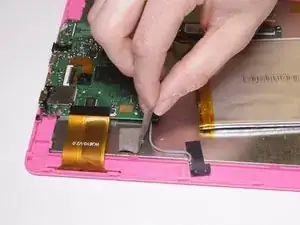
    • Unclip the three ribbon cables from the motherboard by lifting up on their latches (the black portions that the cables feed into) and gently pulling the cables.

    • The process is the same for all three ribbon wires.

    • Do not forcefully try to remove the cables. The latch may not be lifted up all the way, and using force can separate the cable from its connector, which can damage important components of the tablet.

  4. jjO3hZycVpAqGRXB
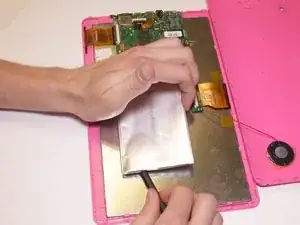
    • To remove the battery, gently pry underneath it and around the edges with your spudger. This will pull it off of the adhesive keeping it on the case.

    • The battery will slightly deform while trying to remove it. This is normal, though try to limit the amount of deformation.

    • DO NOT puncture the battery as this may cause fire or explosion.

  5. Gm3PvYjYWaBYqtCU
    Gm3PvYjYWaBYqtCU
    5LTilagQEKhmLaYJ
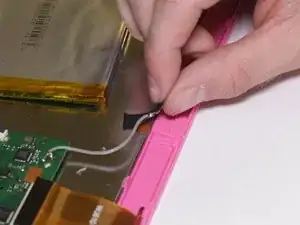
    • Carefully peel off these two pieces of tape to remove the antenna.

  6. miRdCDBMTiGlGct4
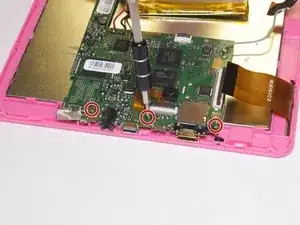
    • Remove the three 4 mm Phillip's #00 screws from the motherboard. Then carefully lift off the motherboard from the screen.

    • You may need to use a prying tool to lift the motherboard off the screen, though using your fingers should work.

  7. YIeAGcCb4mcYKchU
    YIeAGcCb4mcYKchU
    PRZYs2DbPvVu1DNp
    AeIdoUFj1GTUK5dS
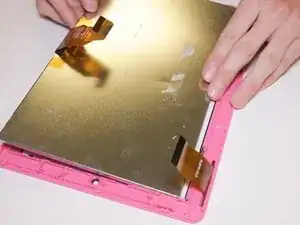
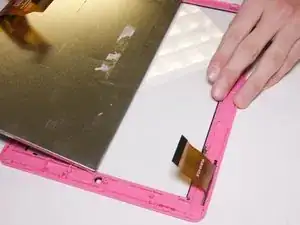
    • To remove the LCD from the screen casing, gently pry it out of the clips that are holding it in place.

    • If possible, use a plastic spudger. However, since the clips are tight, a metal spudger may be necessary.

    • Use of playing cards or guitar picks help to keep the clips from reattaching themselves to the device.

    • Focus on one half of the LCD, as the other half will come out easily when the first half comes loose.

    • Be careful not to damage the clips or LCD when prying.

  8. TZelVMCRUSUCndBI
    TZelVMCRUSUCndBI
    RWiGqgYSFoRHWina
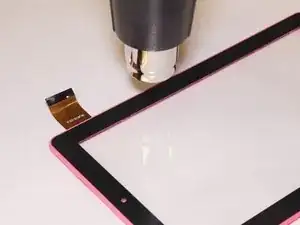
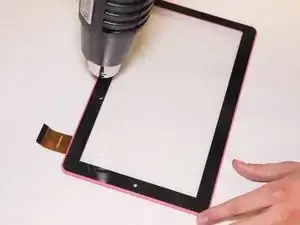
    • With a heat gun, heat along the border of the screen and case to weaken the glue.

    • Do not leave the heat gun pointed in one spot for long. This may warp or melt the plastic and make reassembly more difficult.

  9. DusOmsAXOQtUQ1kU
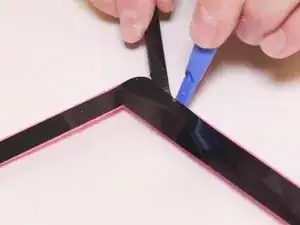
    • Slide a spudger around the edge of the screen. This will disconnect the black edge from the frame.

    • A plastic opening tool may help insert the spudger between the frame and the screen.

    • You may need to reheat sections of the border if sliding the spudger becomes difficult.

  10. mtTZmt2dnvyeIauG
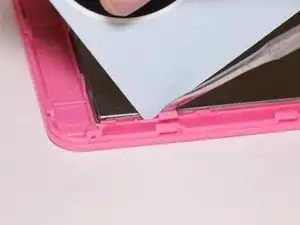
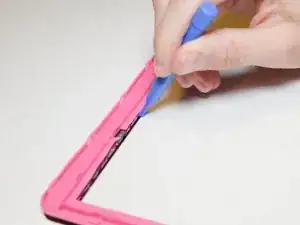
    • Starting from one end, use a plastic opening tool to lift the frame away from the screen.

    • As before, you may need to reheat sections to weaken the glue.

Abschluss

To reassemble your device, follow these instructions in reverse order.
Alexis Roberson

Mitglied seit: 21/09/16

344 Reputation

0 Kommentare