Einleitung
-
-
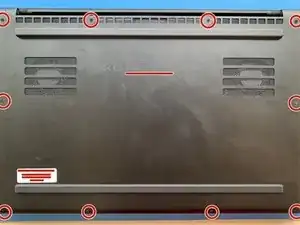
Flip over to the back side of the laptop
-
Remove the 10 screws at the bottom of the Razer using a T5 screwdriver head
-
-
-
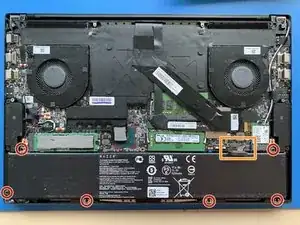
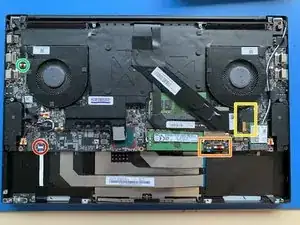
Unplug the battery and wear the anti-static band before proceeding
-
Unscrew the six Philips screws around the battery and lift the battery
-
-
-
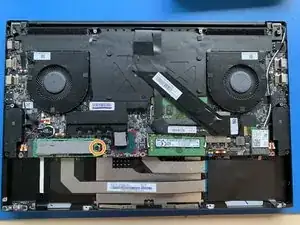
Find the SSD and unscrew the single screw
-
Once it is unscrewed, the SSD will pop up on one side
-
Carefully remove the SSD and place it to the side
-
-
-
Locate the two display cables to the left of the left speaker and disconnect both. (one is underneath the other)
-
Locate and disconnect the four cables
-
Disconnect one cable that is underneath the SSD
-
Disconnect another cable that is next to the right fan
-
Disconnect the final two cables that are to the left of the battery connector
-
-
-
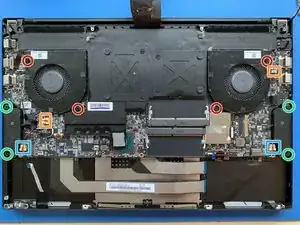
Unscrew the four screws on the fans (two screws on each)
-
Make sure to unplug the connector on each of the fans. Lift and remove the fans
-
Unscrew the four screws on the speakers (two screws on each)
-
Make sure to unplug the connector on each of the speakers and place them to the side
-
-
-
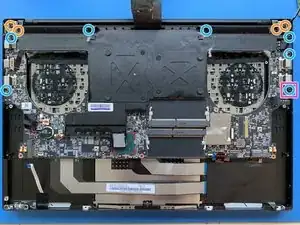
Remove the two screws on each hinge and pick up the black pieces
-
Locate the seven screws holding down the motherboard and remove them
-
Remove the plastic headphone jack cover
-
Lift up the MOBO and place it to the side
-
-
-
Unscrew the LCD
-
Slide the LCD connectors through the opening at the top when removing the LCD
-
Slide the LCD connectors of the new LCD through the opening at the top
-
Screw the new LCD back into the bottom case
-
-
-
Make sure all of the cables are in sight once the motherboard has been placed down
-
Screw in both the motherboard screws and the hinges
-
Reconnect the motherboard connectors
-
Place and screw in the fans and speakers
-
Make sure the SSD has been reconnected and screwed in
-
Screw the battery back in and reconnect the battery
-
Make sure the new LCD is working properly. Once done, call the user to pick up their laptop.
2 Kommentare
From picture seven to 6 there is a black flat cable that isnt mentioned in pic 6 its unplugged whats it for? It broke on mine
Cheeso -
So I I have a faulty camera (which seems to be a big issue with this year) will replacing the LCD also replace the camera? I’m not sure where the connection for the camera is.
