Einleitung
Werkzeuge
-
-
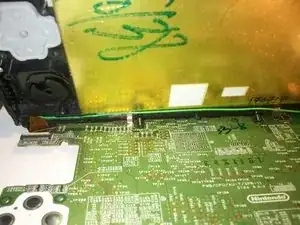
Lay the motherboard flat on the table, as shown.
-
On the chassis, make sure that the green antenna wire is in its slot, and that the touchscreen ribbon cable is properly positioned.
-
Lay the opened chassis on a table near the motherboard and gently separate the upper and lower motherboard ribbon connectors.
-
Still holding them separated, slide the motherboard into that separation, so that only one ribbon connector is above the motherboard, and the 2 plastic pins are resting in their holes.
-
-
-
Now you can grasp the uppermost ribbon connector gently with tweezers, and guide it into its socket without having to also wrestle the motherboard and the chassis.
-
Proceed with reassembly of your 3DS XL.
2 Kommentare
Dan, I recently replaced the rubber ABXY pad (user reported XY did not function but the unit otherwise worked fine. Though I thought I was careful during reassembly, it seems I was not: the unit, when turned one ahs the blue LED power light on for a few secs then goes out with the unit not powering up. The is my first 3DS repair so I do not have a huge amount of practical experience here. Are there any common ‘gotchas’ when doing 3DS disassembly ?
I just did the one repair, and managed to recover from one error (a problem with the gold Kapton insulating film on the LCD, I think). I didn’t encounter your problem. Check all the ribbon cable connections and scrutinize your mechanical alignments around the ABXY pad.
And remember to take a break. Maybe sleep on it. We’re all better after we have had some rest. Sorry I can’t help more.
Dan -
