Einleitung

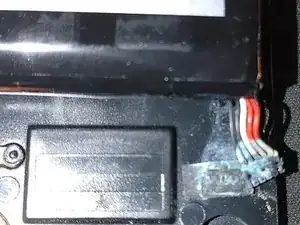
If the Ring video doorbell battery dies, you connect it to a charger, and it quickly claims to be fully charged but then dies shortly after being removed from the charger you may need remove some corrosion from the battery terminals, or other areas of the PCB.

  1. pXvOdS6NO5khj4CJ
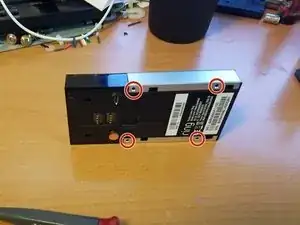
    • Start by removing the 4 screws to take off the aluminum face-plate.

  2. fdeYPZCm2yqeWpaw
    fdeYPZCm2yqeWpaw
    qc3bynXAkCsfcXCM
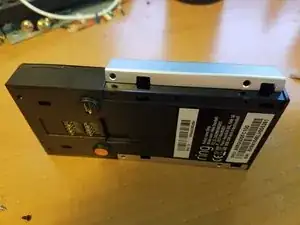
    • Pry the aluminum face-plate carefully using a plastic spudger while applying gentle pressure. This will reveal the 4 black screws underneath.

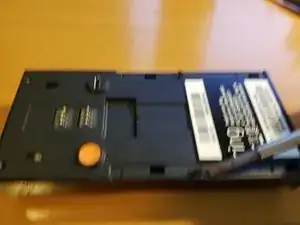
    • You will need a micro phillips screwdriver to remove these tiny screws. You will find that it requires considerable torque to loosen them, so to avoid stripping the head, really push in with the screwdriver while applying torque.

    I found these screws to require a lot of torque to remove. To void stripping the head, push the screwdriver in very firmly to begin the initial removal.

    dkoegler -

  3. YFZ1IAu3XhpmVbPu
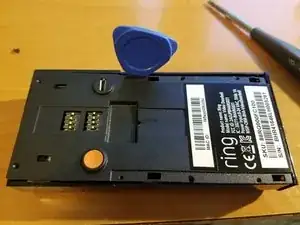
    • Carefully pry the plastic coverwith a pick to pop the insert out. Watch the micro USB port that is sticking out.

  4. mvCY23QwtcQeuSem
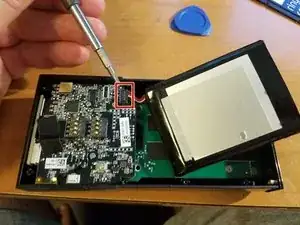
    • Gently pry up the battery from underneath the connector. But remember the orientation, red wires to the outside exposed wire on the connector facing upward.

    • The battery MAY still be attached to the plate. Buy some double sided tape, because disposal of the old battery will likely include the existing tape.

    I noticed some slight bulging of the battery at the bottom of the unit. Can this happen? It may be due to cold weather, but I noticed that even with an a/c trickle charge, the battery has still been running down too often. We really don’t get very much motion or door rings and have set

    Patrick Canady -

    Look closely at the positioning of the connector, the red wires to the outside. It is quite fiddly to get it back in, and it required several tries, finally snapping in with downward pressure.

    dkoegler -

  5. nKTNoyJwlCim1mlB
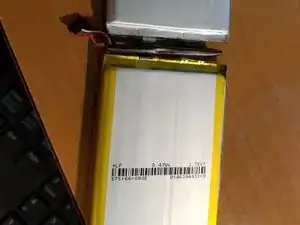
    • Two Lithium polymer batteries are connected back to back and in parallel to the regulator. The batteries are rated at 9.47w @ 3.75v each.

    • When you are satisfied that the battery is properly installed, the new battery should have enough charge that you will see at least one of several LED's light up. You can then close up. But if not, charge the unit via USB to see if the LED's are functioning. If not, check the battery connection.

    Hallo aus München, ich bräuchte auch diese Akku, hattest du schon erfolg beim suchen, wo gibt es ihn zu kaufen Danke Sepp

    Josef Heckmeier -

    Ich benötige ebenfalls diesen Akku und kann Ihn leider nicht finden im Netz. Es wäre schön wenn du eine Lösung hier posten könntest. Im Voraus vielen dank

    P.S. ist eine super Anleitung

    Thomas -

    ja, ohne einen Tip, woher man die Akkus bekommen kann, ist die Anleitung nur gut gemeint. auch wäre die genaue Akkugröße wichtig, wenn man sich den Akku zusammenstellen muss.

    Klaus Juchert -

    Die Akkus gibts anscheinend nur in USA , wenn man „Akku B15169“ googelt. Der Akku hat 3,75 Volt, 5000mAh und 18,75 Wh.. Das mit den 2 Akkus stimmt wohl nicht immer. Das Problem ist, dass der Akku relativ klein ist und um die 45.- Euro kostet plus USA-Porto (nochmal 40.-!) , auch aus China über 40.- Euro bei keiner Sicherheit. Da die 1 Version technisch überholt ist, wird sich diese Investition m.A. kaum lohnen.

    Klaus Juchert -

    Have a look at this site https://www.bonanza.com/items/like/10206... not sure how international it is, but it looks OK for UK use, although I haven’t tried it yet.

    Bernard Cadogan -

  6. MpHCCoQ3exVDQgtI
    MpHCCoQ3exVDQgtI
    t4TSQUCISVRtqW2B
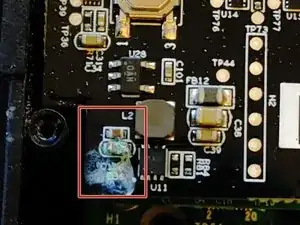
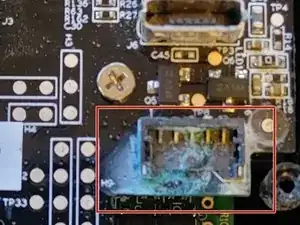
    • Examine your ring video doorbell motherboard for corrosion on any resistors, capacitors, or battery terminals.

  7. bYocpVivMxCXdcxL
    • Disconnect the battery by lifting the connector straight up.

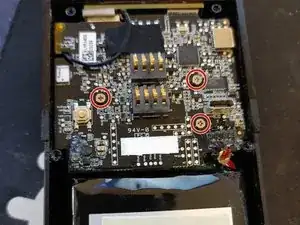
    • Remove the three philips size 0 screws

    • Lift the board carefully and rotate it to the right so as to leave the camera connection alone.

    • Examine the rear of the top pcb, and the face of the lower pcb.

  8. BvyKmYAL6toxLBQ3
    • Using white vinegar, clean any corrosion off of the battery terminals or anywhere else you find it, including the battery cables.

    • Then use isopropyl alcohol to clean the vinegar off of the pcb.

    • Coat the problem areas you just cleaned with dielectric grease of your choice.

    • Reassemble in reverse order.

Abschluss

Once complete, follow the battery removal guide in reverse order to reassemble.
JACOB SCHRIER

Mitglied seit: 02/05/20

97 Reputation

0 Kommentare