Einleitung
One of the banes of battery powered devices is leaky batteries that emit a fluid that gets all over the insides of your device and then dries brittle, white and granular. Your Apple Magic Mouse might stop working after a bad battery leak.
As far as I can tell, a battery leak causes the mouse to fail in one of three ways.
- First, the fluid may dry on top of the battery contacts, preventing a new battery from touching the bare metal of the battery contact.
- Second, the leaky fluid may cause the battery contact to corrode, and the corrosion can prevent a new battery from touching the bare metal of the battery contact.
- Finally, leaky battery fluid can jam the spring-loaded posts that push against the negative contacts of your AA batteries; with little or no pressure on the new battery, it doesn't establish an electrical connection to power the mouse.
While the disassembly procedure is a little tricky, it isn't too difficult for you to remedy the fault caused by any of these three causes. All it takes are some simple tools, a little time, and some manual dexterity.
-
-
Let's not neglect the obvious. First make sure that your mouse has fresh batteries in it and that the batteries are in the correct orientation. Slide the switch on the bottom of the mouse to see if the green light comes on. If it does, the electrical contacts are good and you're done.
-
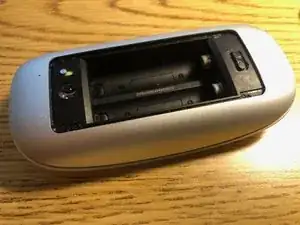
If no joy, examine all four battery contacts inside the Magic Mouse's battery compartment. Scrape off any brittle white material or corrosion until the metal contacts are mostly shiny where they contact the batteries.
-
Reinsert the batteries to see if that fixed the problem. If that doesn't work, carefully check the negative battery posts.
-
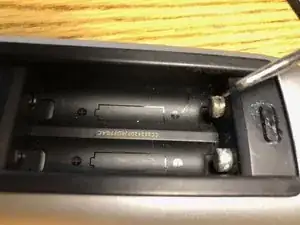
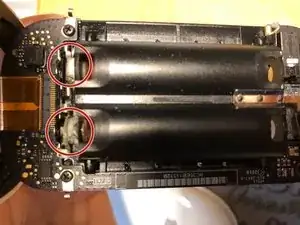
The negative end of the AA batteries are supposed to press firmly against shiny, spring-loaded metal posts. If there's too much dried battery leakage gumming up the posts, they might be partially or fully stuck under compression. If so, weak or absent spring action will cause the battery contacts to fail.
-
To deal with this, carefully scrape all of the visible dried battery residue off of the posts. Press the posts and release them several times, trying to free them up until they pop up vigorously.
-
If that doesn't work, try shooting a very small amount of WD-40 at the base of the battery posts to see if that frees them up.
-
-
-
If previous efforts to free the springs have failed, you need to open up the mouse to get at the hidden parts of the metal posts. Check out the separate teardown guide that someone else wrote, showing how to open up an Apple Mouse. Then come back to my guide for, well, guidance.
-
Our goal is to remove the aluminum shell covering the bottom of the mouse. Begin by removing the battery door. The two black plastic glide rails should pop right off. Remove the batteries.
-
The aluminum shell is lightly glued to the black plastic part that holds the batteries. Use a heat gun or a hair dryer set on low, to warm up the aluminum and soften the glue. Take care not to apply too much heat or you might melt the white plastic top of the mouse or the black plastic underneath the aluminum shell.
-
When the aluminum shell is warm, gently pry it up, with a plastic lever or your fingernails. Pull gently and steadily, with patience, until the aluminum shell pulls away from the black plastic base.
-
-
-
You have removed the aluminum shell that was glued onto the bottom of Apple's Magic Mouse.
-
What you have left with are the upper and lower halves of the mouse. They are held together by four tiny black plastic posts on the bottom half, that are inserted into plastic loops on the top half. WARNING: Proceed with caution. If you break any of these black plastic posts or loops, it might be game over.
-
The two halves are connected by a wide ribbon cable that is somewhat fragile. WARNING: If you tear this cable it is game over for this mouse.
-
Proceeding with caution, take a small pry tool and pry one of the plastic loops off of its black plastic post. Pry the loop in the outboard direction while applying gentle pressure separating the upper and lower halves of the mouse. The loop should pop off the black plastic post.
-
Continue to release each of the remaining three black plastic posts. Remember that on the Apple logo end of the mouse there is a fragile ribbon cable that you dare not tear.
-
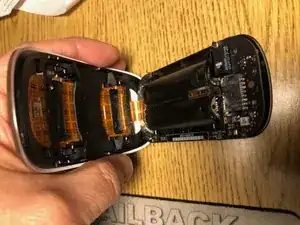
Once you release the black plastic posts, the only thing holding the mouse together is a very fragile ribbon cable [see second photo]. WARNING: You don't want to tear the cable or pull it out of its socket (because it is tricky to put it back into the socket). Proceed with care!
-
-
-
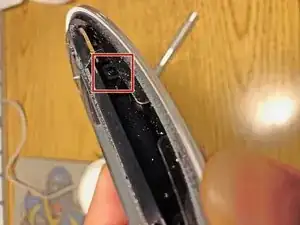
Now that you have access to the inside part of the spring-loaded battery posts, you can easily push them all the way in. From the inside of the battery compartment, scrape all of brittle white reside off of the metal posts.
-
You may also need to scrape the brittle white reside off of the other ends of these posts that are outside the battery compartment. Carefully spread the mouse "jaws," taking care not to stress the ribbon cable. Scrape the posts completely clean.
-
Your goal is to get the spring-loaded posts moving completely freely. If they still hesitate, work them back and forth a few times, then check to see i more of the brittle white reside needs to be scraped off. Repeat this step until the posts move freely.
-
-
-
At this point you are ready to test. Insert two AA batteries into your Apple Magic Mouse. Turn the power switch on. After a brief delay, the green power light should appear on the bottom of the mouse.
-
If you see the green light, you are good to go reassembling the mouse. If the light remains dark, you need to scrape the battery contacts more thoroughly, until the contacts are clean and bright. They must be free of any white battery residue or dark corrosion.
-
-
-
Once your mouse powers on again, you should confirm that it indeed works. Use Bluetooth to pair it to your computer. Confirm that the computer's cursor tracks the mouse. Make sure it registers mouse clicks
-
Reassemble the mouse. First I removed all of the glue residue stuck to the aluminum bottom shell of the mouse, and on the black plastic lower half of the mouse.
-
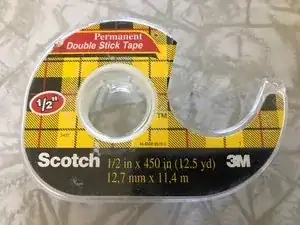
You could use glue, but I had good success using double sided sticky transparent tape. Be sure to cut it in half lengthwise, so that it covers the part of the black plastic that contacts the aluminum shell.
-
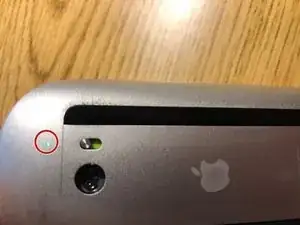
When you place the aluminum shell back on, be sure the line up the tiny hole with the green Power LED on the black plastic bottom half of the mouse.
-
After the aluminum shell is in place, you can slide the black plastic mouse glides in place, prior to replacing the battery door on the bottom of the mouse.
-
When it works, congratulate yourself on a fun and educational repair that saved you $50-$100 for a new Apple mouse.
2 Kommentare
Something is broken on the ifixit site. The introduction of my newly-completed guide appears for an instant and then vanishes, leaving the reader at Step 1. Site support should look into this. A possible cause is that this guide used to refer to another guide, but now my guide is fully self-contained.
Excellent 👍🏻 explained
