Einleitung
MacBook Air didn't start up, probably due to some liquid spilled on the keyboard above on/off key.
The pushed key exhibit an on resistance > 70kOhms. I decided to use the on/off pads on motherboard to add a dedicated push-button.
- Got a small aluminum piece from a used Mac battery A1175
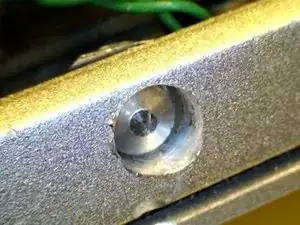
- Grind both upper and lower side off the piece so it fit just against the right wall off MacBook
- Drilled Ø 4 mm (better measure your own piece) and glued with cyanoacrylate the very far of the small metal tab.
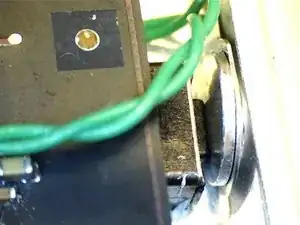
- Get a push-button small enough to fit below the mother board (beware of a thick piece (maybe transformer)) that can avoid placing your switch. My switch come from www.conrad.fr with ref n° 705325 (perfect fit at the chosen place)
- Solder two thin wire ~ 4cm very close to the switch body, routing them so they don't touch the motherboard.
- Test the on/off with ohmmeter, adjust the hole eventually the alu piece move well.
- Glue the switch behind the alu piece on the top case of MacBook (used a small drop of silicon Bostik MS117) 8- Wait few hours until the glue is completely solid (better than having to undo all the work)
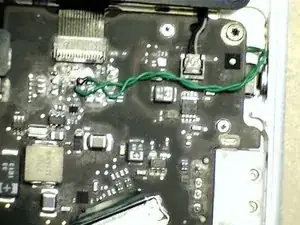
- Cut the two wires 1cm longer than the distance to the on/off pad.
- Solder the wires on each on/off pad.
Good Luck!
Werkzeuge
Ersatzteile
-
-
Got a small aluminum piece from a used Mac battery A1175
-
Grind both upper and lower side off the piece so it fit just against the right wall off MacBook
-
Drilled Ø 4 mm (better measure your own piece) and glued with cyanoacrylate the very far of the small metal tab.
-
Get a push-button small enough to fit below the mother board (beware of a thick piece (maybe transformer)) that can avoid placing your switch. My switch come from www.conrad.fr with ref n° 705325 (perfect fit at the chosen place)
-
Solder two thin wire ~ 4cm very close to the switch body, routing them so they don't touch the motherboard.
-
To reassemble your device, follow these instructions in reverse order.
5 Kommentare
Hi, do you think the connectors on the IO board is identical of the A1369? My power button doesn't work either.
Here is a picture https://d3nevzfk7ii3be.cloudfront.net/ig...
Thanks for the guide, but that's a really bad soldering job, and the kind of wire used is totally wrong.
Bridging those jumpstart mobo pins (maybe at the ends of the power button on the plastic sleeves with a really thin copper wire) would be a way, way better done job.
Wow, this is so unnecessarily convoluted, why not just replace the keyboard?
Sam -
Hello Sam, did you replace your keyboard ? If yes, did it work as well ? (Repairing MacBook Air 2011 A1370 On/Off switch.
I fink this is the right procedure to put your MacBook on the way again !
2. Just as a contribution to Apple lovers, here in Brazil Apple representatives doesn´t makes any repair in Apple products with 5 ou more years of use , because this is the legal statement here. In case of malfunction, just discard and buy another, is the Apple answer to your customeres…just like that. No comments.
Best Regards, JARI.


