Einleitung

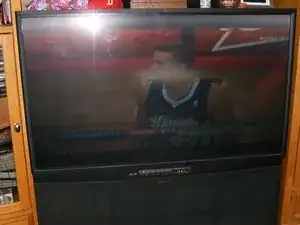
After a thunderstorm the TV did not turn back on. It displayed a continuous blinking green light. No other function would work, the reset did not accomplish anything. I did some research and learned that this is a common failure on this TV. this particular TV is 10 years old, but had never given any trouble. So I felt it was a worthwhile project.

  1. YrvRAWyP3bo5pZIW
    YrvRAWyP3bo5pZIW
    UWOZfPgyisd3XcUG
    • Unplug the set. disconnect the coax cable and any other device plugged into the TV.

    • Remove the back panel

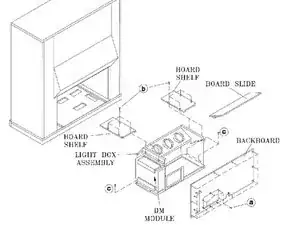
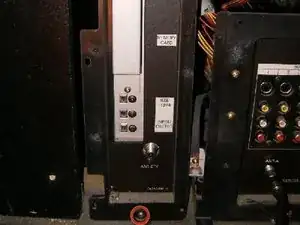
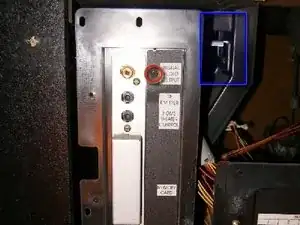
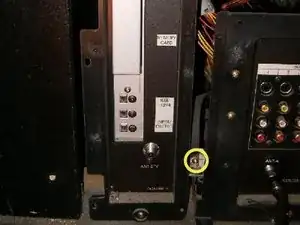
    • The antenna coax cable as well as other device connect directly to the DM module which is enclosed in a metal case.

  2. ZtYEFPpGREEykcXw
    ZtYEFPpGREEykcXw
    bNhsbBViMJMECoyb
    23eVkQBiFHXmbnD5
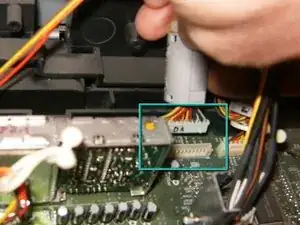
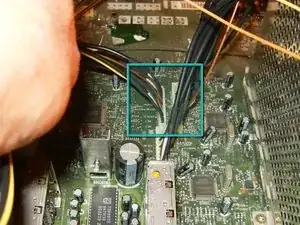
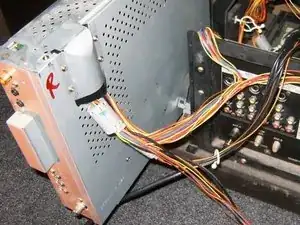
    • Disconnect the wiring coming off the DM board to the main chassis. On this TV there were four separate wiring harnesses: DA,VA,DB and PF. These markings are not of importance to this repair. But they all are clearly marked on the connectors as well as the logic board they connect to. This will help to identify their proper position for the re-assembly.

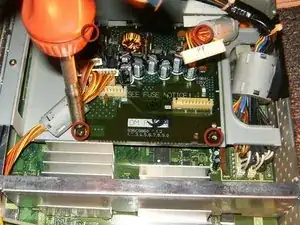
    • Undo the two screws that hold the plastic cover to the DM board.

  3. vQFbGeVC4XJu1Gby
    vQFbGeVC4XJu1Gby
    mwiC3mKuNQDbiNjY
    aKxtGCVTWmKndPqX
    • To the bottom right is a screw that connects a ground strap and holds the board to the chassis, undo that.

    • With all the connector disconnected, the ground strap removed, pull the DM board carefully from the chassis. Some models have a small tab stop that you must push down to release the board.

    Might be helpful to note here that this is the point where you'll remove the lid from the DM module. There are 8 screws along the sides of the top edge that hold it in place. You'll also need to remove the 4 screws that hold the molded piece in place where the wires feed through. It will make removing the lid piece so much easier. Once you remove all of those screws, you'll have access to the DM POWER board for step #4, where you'll make the repairs.

    Debbie Thompson -

  4. MFhhNQgBIGsBNjrv
    MFhhNQgBIGsBNjrv
    fVDQdpVqcokZ2DuE
    EGe2FDWh44u6y6Sc
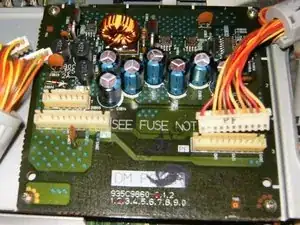
    • Remove the wiring attached to it (PD,PE,PF). These are simple connector and can just pulled of. These markings are not of importance to this repair. But they all are clearly marked on the connectors as well as the logic board they connect to. This will help to identify their proper position for the re-assembly.

    • Remove the four screws holding the board on.

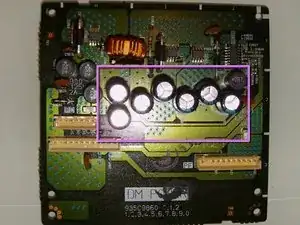
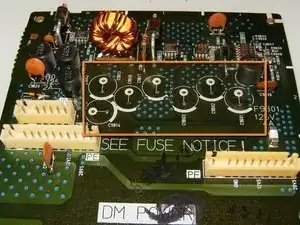
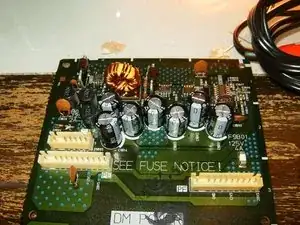
    • This board has 7 1000uf 16Volt capacitors. These are the ones that have a tendency of failing. Inspect those for bulging tops as well as leakage. In this case, one capacitors was sligthly bulged.

  5. L4wKOvoUw3oyvKOP
    L4wKOvoUw3oyvKOP
    JYw4GSxXyVoNf3xy
    4FPeC3TdFKHPCPFH
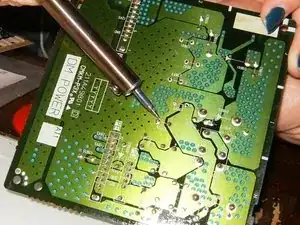
    • Unsolder all the capacitors and remove them. In this repair a 30watt soldering iron and solder sucker was used. The solder sucker can be substituted with soldering wick.

    • Solder all the capacitors in their respective places. On the logic board, where the capacitors are located, is an outline of a circle with one part of the circle being heavier. It corresponds with the negative lead of the condenser.

    • Once all the capacitors are replaced, double check the board to make sure everything is properly mounted.

    Additional note that I noticed. Make sure all the excess wire is trimmed back as close to the board as you can to avoid a short on the metal mounting plate. There is very little clearance. I used the receipt from the store I got the capacitors at under the board and pulled it out once the board was in place to see if anything was touching.

    xjagman -

  6. rLv2Ax5GQDXuNqOA
    rLv2Ax5GQDXuNqOA
    IU2diAtGiAJkZh2y
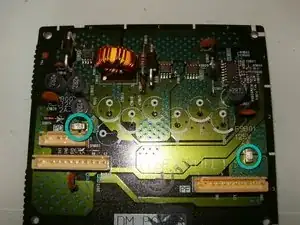
    • While the board and the DM power module are accessible check the SMD fuses for continuity. There are two on the daughter board. In this case, the fuses had continuity and were functioning.

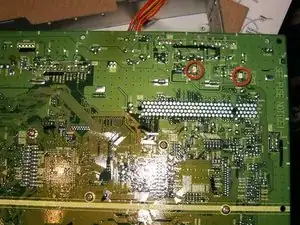
    • The main PCB has two fuses on the underside. In order to get to it, one will have to disassemble the module further. This was skipped in this repair.

  7. VHmF6MuWDdfNDdOy
    • With the repair completed, everything should be double checked for proper soldering and proper polarity. The unit was re-assembled in reverse order. Reconnect all the wiring connectors. Double check for proper positioning and that all the connectors are properly seated.

    • The TV was plugged in and after a minute of the green light flashing,.....IT WORKED. Total cost of repair was $13 dollars for the UVK1C102MPD capacitors, which includes $7 for shipping.

Abschluss

To reassemble your device, follow these instructions in reverse order.

oldturkey03

Mitglied seit: 29/09/10

734536 Reputation

23 Kommentare

I want to thank oldturkey 03! My ws-65511 had a blinking green light after a lightening storm, & wouldn't come on. We looked up this guide that you put online. We followed it exactly. I ordered the exact parts you listed, for $14 from Mouser Electronics. I got the capacitors in a couple of days. My wonderful Dad came over and completed the repair according to your instructions. We plugged it in, and it works like new. Even better than before, because while we had the back off, I cleaned the lenses, which made a huge improvement. I can't thank you enough for unselfishly spending your time to put this online, to help other people. Your expertise saved me over $1000, by not having to buy a new TV. That is worth a huge and heartfelt THANK YOU! THANK YOU to my Dad too, since he actually did the repair. :) I will make this note for anyone else that wants to try it. Our capacitors did not look bubbled, or blown, and weren't leaking. We replaced them anyway, and it worked beautifully. HAPPY DAY!!

Lori -

Great instructions. It cost me $20 to fix, which was the cost of the fuses plus freight. Thank you very much.

Bruce -

Worked for me too!!!

Same problem, followed instructions and "WOW" watching my HD tv again!!

Thanks a million, Digikey parts under $10--I owe You!!!

Elvis 3/23/14

Elvis -

I had the same issue and replaced the capacitors and it worked for about 3 hours and backed to flashing any ideas ?

Jeff -

Well it worker for us, thank you, thank you thnak you. SAved us a whole bunch of cash and I'm not an electronics person. I bought the capacitors, sodering iron, all for about $20 with shipping. Thanks again oldturkey03!

kevin -

I followed this to the T.., I wasn't that good at soldering but went to radio shack and bought smaller gauge solder wire. I also you tubed a few learn how to solder.

Solder sucker sucks! I just melted the solder and cleaned solder wand. With a piece of metal...

My tv works hooray

toddhartog -

Dusted off my soldering skills and followed your directions to the letter. My old $3,000 dinosaur is living again. was beginning to wander what I was going to do with this 65" monster. I took others advice and cleaned up the interior while waiting on parts to arrive. It looks as good as new. Just for the record my capacitors showed no visible signs of swelling or damage.Thanks for the informative video.

paulc -

I need the video does anyone have a link? I got the green blinking light of death on my Mitsubishi 2010 projection screen.. HELP!!

Nikki Frederick -

BIG THANKS to the author of this document. I had my doubts at first but I decided I would give it a try. I'm a computer technician so I figured if I can build a computer, this shouldn't be that difficult. I ordered the parts that were suggested and they were here in 3 days, purchased a soldering iron from Home Depot and went to work. Toughest part was the soldering but that wasn't that difficult. I followed the instructions and with a little prayer finished everything up and when I plugged the TV back in, the green light flashed for about a minute and then went out. Powered the TV back on and I'm back in business. I'm old school and if I can do it myself, I will cause I love to learn new things. Fan for life of this site!

Wayne Eldridge -

When I tried to pull the connectors off of the DM board, I slightly bent one of the pins as i was pulling it off. Is that going to cause me a problem ? Also, is it ok to replace the 1000uf 16v capacitors with 7 new 1000uf 35v capacitors ? I couldn't find the 16v capacitor at my radio shack. Thank you to the author of this document.

John Smith -

I have the blinking green light on a mitsubishi tv WS65711. I have to use a pin to reset wait till the green blinking light goes out then turn tv on. This goes on several times and then it finally stays on instead of it turning itself off. I'm going crazy. Had a Mitsubishi repairman. So far$300 later still no Change. Help. Any ideas what I need to do?

lhelto -

My ws48511 would not turn on and had an issue with the device scrolling multiple times. Per advice on the internet I pulled the front panel off and disconnected one of the wires that feeds the front panel buttons. That worked by disconnecting the front panel. About two years later I had the blinking led issue. I replaced the 7 capacitors on the DM board. An ebay TV repair company sent me 680uf capacitors to replace the 1000uf capacitors. They even sent instructions saying that was the right fix instead of 1000uf. After replacing them, the TV works, it's just that I still get a blinking led if the front panel wire are connected so I'm keeping them disconnected. I'm not sure what's causing the tv not to turn on if the front panel is connected. But if you disconnect the front panel maybe yours will turn on.

Jim -

Thank you SOOO much for posting this repair guide! I am handy by nature, but soldering was completely new to me. Like others, I ordered the parts from Mouser Electronics for about $20, followed the instructions with some guidance from YouTube, and now our old television is breathing new life! A+++

Debbie Thompson -

Thanks a lot oldturkey 03. I really wanted an excuse to buy a new TV, but you ruined that by helping me fix my TV for under a buck. Great instructions and pictures. If you are not in a hurry I got 10 capacitors on eBay for 99 cents. Fix a TV for under a buck - crazy. THANKS!!!

Marty Cinadr -

Thank you!!! This fix worked great. Amazon had 10 capacitors for $7.20 free shipping. Popped them in to replace old ones and like magic the green flashing timer light issue was fixed. Awesome instructions! Thank you

Ray -

This has happened to our Mitzubishi TV at least 4 times when the power went out. The first two times we had it repaired$$. The last two times we waited it out for about a month with the TV plugged in and green light blinking and it went out and the TV worked again!

Jacqueline Cullinane -

I have the blink green light.... I need part number for the capacitors to see if I can order and fix my problem. My TV repair man does not do home service and wants 90.. to pick the tv up and then hope he can get parts. NO So if someone has the parts number please email me jayeec@aol.com

Thank you

Donna

Donna Church-Macheski -

@churchdl "this board has 7 1000uf 16Volt capacitors" the part numbers for those depends on where you are and where you want to purchase them from.

oldturkey03 -

Many thanks to oldturkey03 for these great instructions!! Following a power outage my 65 inch Mitsubishi that worked great for 15 years quick working (green blinking light). I called service outlets and they said parts from Mitsubishi are no longer available for my model and I thought I was going to have to spend thousands of dollars for a new TV. Then I ran across these great instructions and bought $15 worth of parts and followed each step as outlined by oldturkey03 and now it works great! Thanks again oldturkey03 for sharing your wealth of knowledge! It is greatly appreciated!!

Larry D. -

My WS65515 has same issues replaced the bulged capacitors and it worked great for bout hour the back to flashing green light, tried reset,looks like maybe time for new tv but I love my tv I have. Any more ideas

gmc73 truck@aol.com

Earl Mullins -

How do you do about checking if the fuses are functioning without power?

mathia marriro -

Will this work on a 2012 model? Mine started this light blinking green after we had a power surge.

C Elliott -

It might. See if the components are the same. Re,b,er that Mitsubishi took a beating with this model. It had a poor design and failure rate was extremely high. So you may be up for a tough task but it's always good to try since you got not much to lose on this.

oldturkey03 -