Einleitung
Nuraphones have a design flaw that leads to the capacitive sensor wire (that detects the phones on your ears) being broken over time. If you're handy with a quick single wire soldering job, this is a quick way to get back up and running for another life on your wonderful Nuraphones.
It's not actually that hard - just a single wire solder - but that wire is a Litz wire and requires some soldering skill and an appropriate iron to burn off the insulation and get a solid connection.
-
-
For fixing the "deep sleep" issue, feel for the cup that has a flexible ring (capacitive sensor) around the face-side of the cushion. It should be the right cup.
-
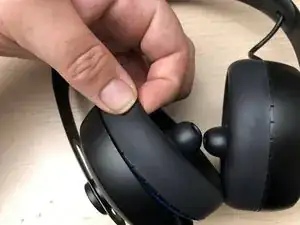
Grip the hard outer shell of the ear cup you want to disassemble.
-
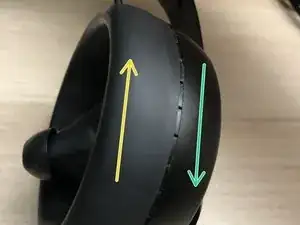
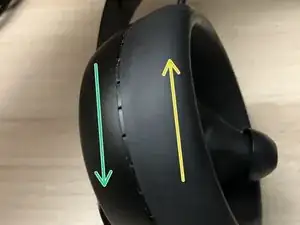
Completely cover the soft padding area with your other hand, squeeze to grip, and twist like opening a jar.
-
Twist the left cup clockwise to open, and turn the right cup anticlockwise to open.
-
-
-
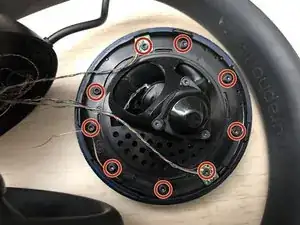
Remove 9 Torx T7 screws from the ring of the cup
-
When reinstalling any plastic screw, insert the screw in the hole and rotate backwards (unscrew direction) with slight downward pressure until you feel a click - that locates the original thread and prevents stripping. Begin screwing it back in where you feel the click.
-
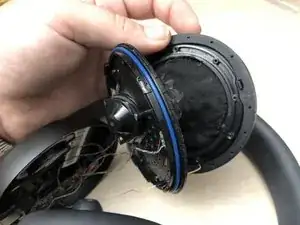
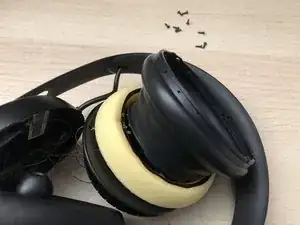
Separate the two halves of the cup, revealing the skin mounting
-
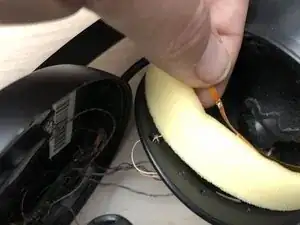
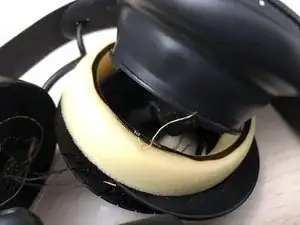
Fold back the skin, revealing the ear cup foam and (if fixing the Deep Sleep issue) the broken wire leading to the capacitive ring
-
-
-
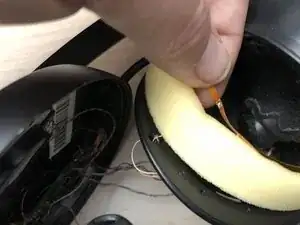
The capacitive sense wire will likely be buried halfway through the foam. Your job is to get it back through.
-
It may help to squish the foam flat and fish the wire through the smaller, squished distance.
-
-
-
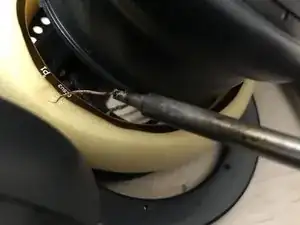
Litz wire has enamel (insulation) wrapping every tiny strand individually. Thus, you need to melt it off the bundle at the tip - it should form a dark brown blob with some smoke, assisted by adding excess fluxed solder (and cleaning your soldering tip while doing so).
-
After you have a tinned segment, you may wish to trim it to a clean, tinned tip (remove fraying at the end), then simply attach it back to the pad on the capacitive ring.
-
You're done! Reverse the disassembly steps to re-assemble.
-
To reassemble your device, follow these instructions in reverse order.
