Einleitung
This guide will take you step-by-step on how to replace your buttons.
-
-
Before disassembling your Atari Lynx, be sure the device is powered off.
-
Remove any game in the console by opening the right latch and sliding the game to the right.
-
-
-
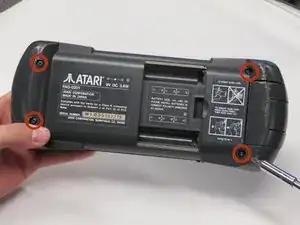
Remove the four 35 mm Phillips #1 screws at each corner of the backside on the Atari Lynx.
-
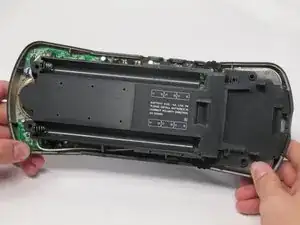
Pinch the rear panel with your fingers and lift away from the Atari.
-
-
-
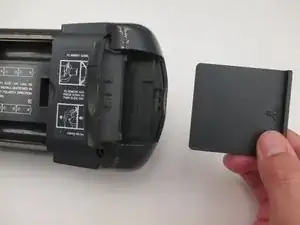
Remove the battery panel by pinching the sides with your fingers and lifting it away from the Atari.
-
-
-
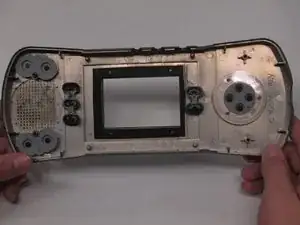
Remove the control panel by pinching the sides with your fingers and lifting it away from the Atari.
-
-
-
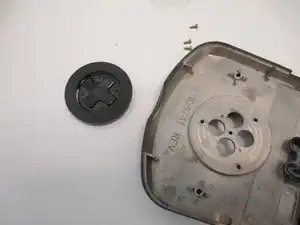
If you want to replace the buttons other than the D-pad, you can pull them up by pinching the sides with your fingers and lifting away from front panel of Atari.
-
-
-
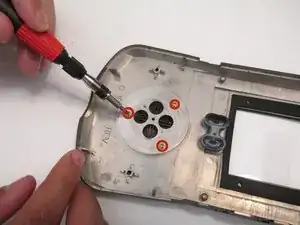
To remove the D-Pad, remove three 10 mm Phillips #0 screws surrounding the D-Pad.
-
The buttons should fall out once the screws have been removed.
-

To reassemble your device, follow these instructions in reverse order.
Ein Kommentar
Thanks for the guide. The title photo shows a Lynx II, however, while all the detailed instructions are for the original Lynx (I) which is built differently.
It would be great to have a Lynx II disassembly and MOSFET Q12 replacement guide.