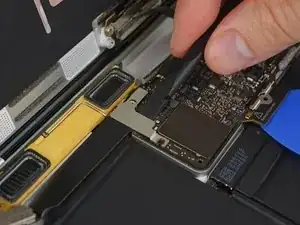
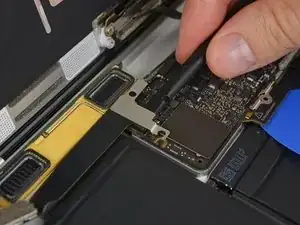
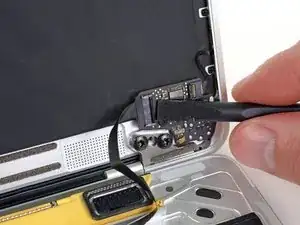
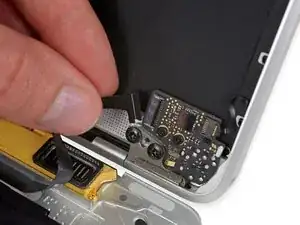
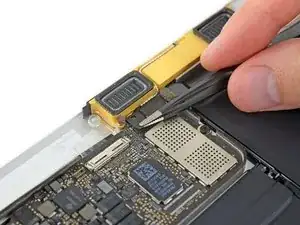
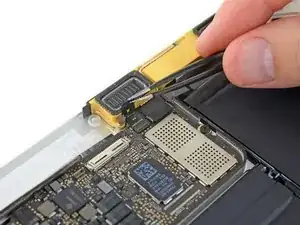
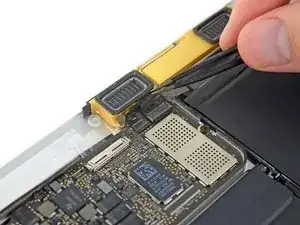
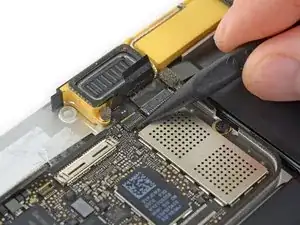
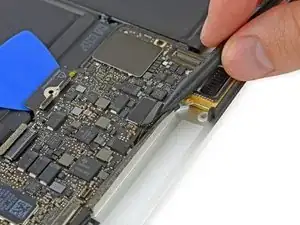
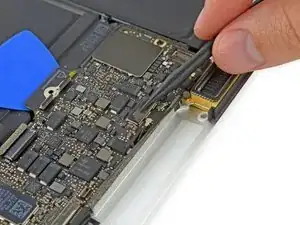
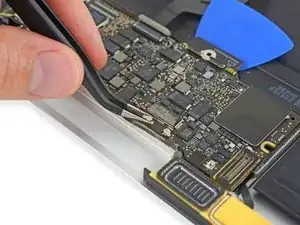
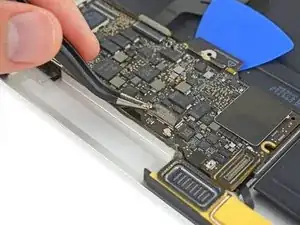
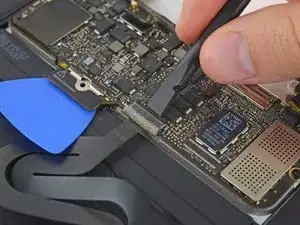
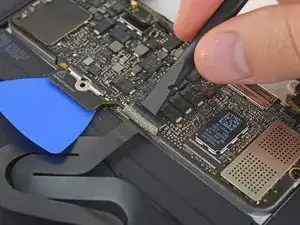
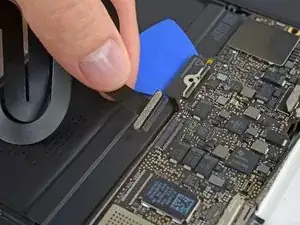
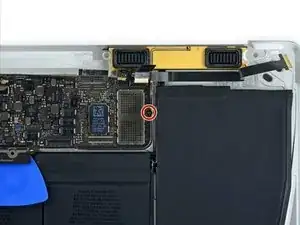
Einleitung

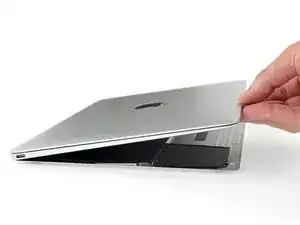
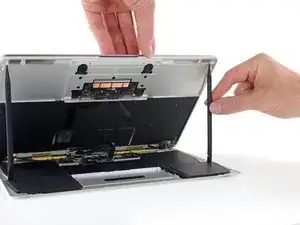
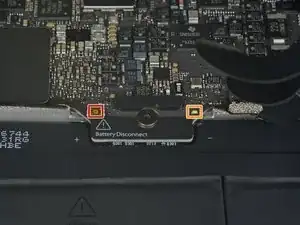
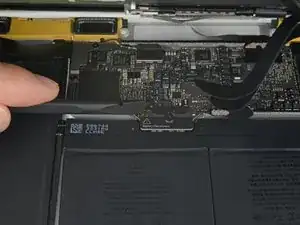
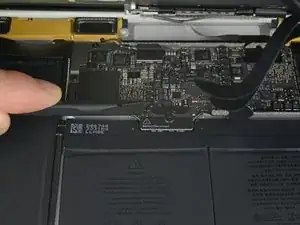
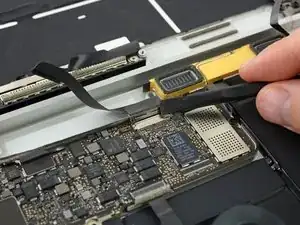
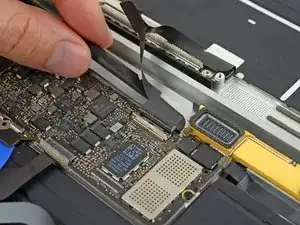
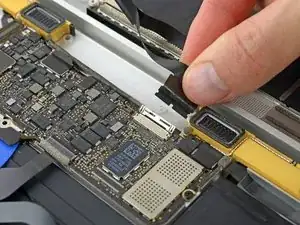
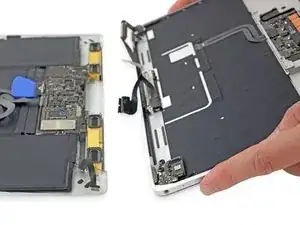
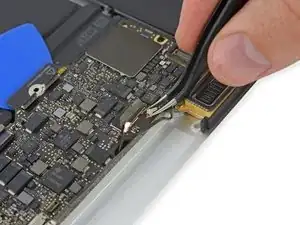
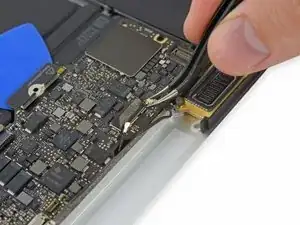
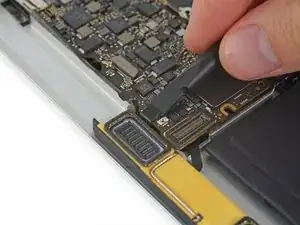
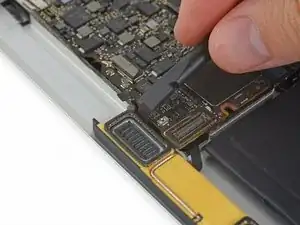
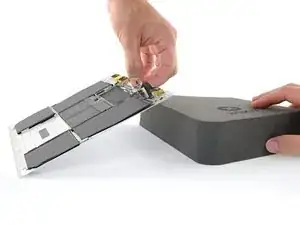
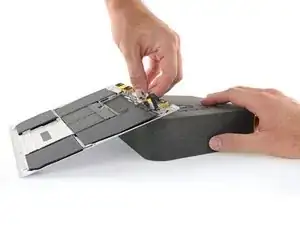
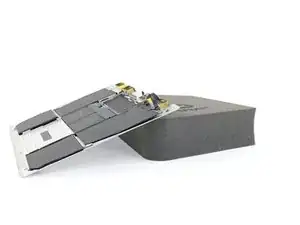
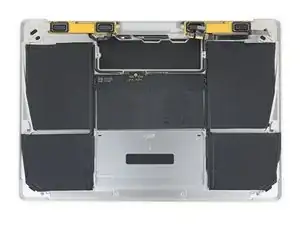
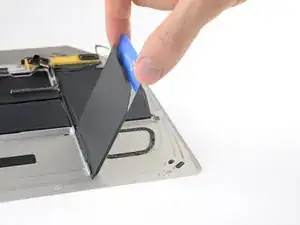
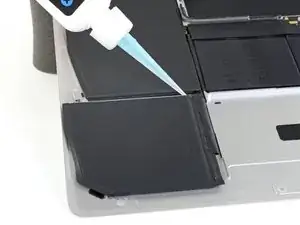
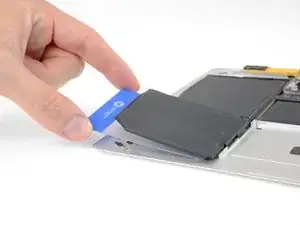
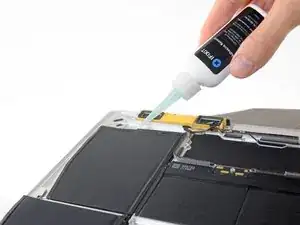
Benutze diese Anleitung, um den eingeklebten Akku deines 12" MacBook mit Retina Display zu entfernen und auszutauschen. Am besten machst du dies mit Hilfe eines iFixit Akku Austausch Kits. Der flüssige Klebstoffentferner aus dem Kit löst den Kleber, mit dem der Akku befestigt ist, und ermöglicht so einen leichten Ausbau des Akkus.

iFixit Klebstoffentferner ist entzündlich. Benutze ihn nur in einem gut belüfteten Bereich. Rauche nicht und halte dich nicht in der Nähe von offenen Flammen auf.

Entlade zu Sicherheit den Akku deines MacBook Pro bevor du mit der Arbeit beginnst. Ein geladener Lithium Ionen Akku kann ein gefährliches und unkontrollierbares Feuer auslösen, falls er versehentlich beschädigt wird.

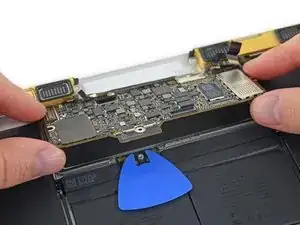
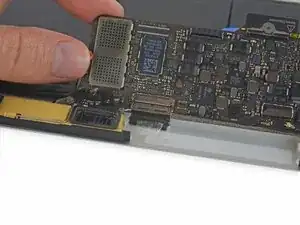
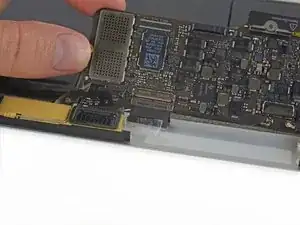
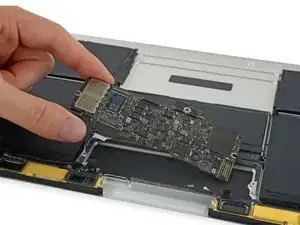
Die Kontakte des MacBook Akkus befinden sich unter der Hauptplatine, daher wird in dieser Anleitung der komplette Ausbau der Hauptplatine empfohlen, um den Akku auszutauschen. Es wäre auch möglich, nur die Schrauben an der Hauptplatine zu lösen und die Platine leicht anzuheben, um den Akku zu entfernen, aber der Einbau eines neuen Akkus ist sehr schwierig, wenn die Hauptplatine nicht entfernt wird.

Achtung: Das Lösungsmittel zum Lösen des Akkuklebers kann Beschädigungen und/ oder Verfärbungen an bestimmten Plastikteilen hervorrufen. Achte darauf, wo du das Lösungsmittel aufträgst.

Um Beschädigungen an der Hauptplatine zu vermeiden, solltest du, wenn du die Reparatur abgeschlossen hast, aber bevor du es einschaltest, es mit Niederspannung verbinden, indem du einen 5-Watt iPhone Ladestecker und ein USB-S zu USB-A Kabel benutzt. Diese Zusatzteile sind nicht im Lieferumfang deines MacBooks enthalten, vergewissere dich daher vor der Reparatur, dass du diese Teile zur Hand hast.

  1. WTpjAPhBML2eX4Z1
    • Bevor du weiterarbeitest, ziehe das Netzkabel und schalte das MacBook aus. Klappe das Display zu und lege den Laptop mit der Unterseite nach oben.

    • Nur für 2015er Modelle: vermeide Schäden am Logic Board und schließe es nach erfolgreicher Reparatur , aber bevor du es einschaltest an eine Niederspannungsquelle an. Benutze dazu ein 5 Watt iPhone Ladegerät und ein USB-C zu USB-A Kabel.

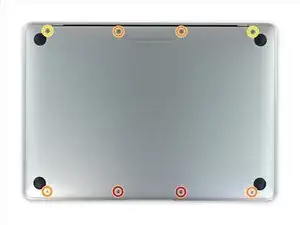
    • Entferne folgende acht Schrauben, mit denen das untere Gehäuse befestigt ist:

    • Zwei 1,8 mm P5 Pentalobe Schrauben

    • Vier 2,9 mm P5 Pentalobe Schrauben

    • Zwei 6,1 mm P5 Pentalobe Schrauben

    • Schaue dir beim Ausbau die Lage der Schrauben genau an - sie müssen beim Eindrehen leicht schräg stehen.

    • Achte darauf, dass bei der ganzen Reparatur die Schrauben gut geordnet bleiben und passe auf, dass jede Schraube genau auf ihren alten Platz zurück kommt, damit keine Schäden am Gerät entstehen.

    If, like me, you didn’t have a P5 Pentalope screwdriver but did have one that fits an iPhone.

    You can sand down the tip until it’s the right size.

    Stuart -

    Thank you Stuart! I would never have thought of this and it worked perfectly.

    R McP -

    Hello,

    where do I plug the USB-C to USB-A cable on MacBook MacBook Pro (Retina, 15-inch, Mid 2015)

    I can’t any port suitable for USB-c !??

    sissi -

    My MacBook had P4 pentalobe screws, notP5

    Greg Lavardera -

    Big thanks to Jeff for such thorough and detailed instructions. This is definitely a more advanced repair so if you're not comfortable with making such repairs, like having experience working on iPhones, computers, etc., you might think twice before attempting. It's very helpful to read all the instructions thoroughly before starting. Plan on 3 to 4 hours—the battery removal along with its adhesive is a real $@$*-show, but totally doable if you followed Jeff's recommendations.

    I'll post a few tips in the comments on each step that I think is worth noting but I will mention here one of the trickier steps. ZIF connectors on the flat cables can be a little tricky, especially if you have never done these. Before attempting to do the first one (step 8) review the others in steps 16, 20, and 25. You'll get a better sense of how these little retaining flaps flip up and what they actually look like when you study each photo in each step—they are very tiny and fragile.

    Steven Gibson -

    Just finished replacing the battery. I followed the directions that came with the battery instead of this guide. In short, Steps 15 to 35 are not necessary. You don't have to completely disassemble the laptop to replace the battery.

    Andrew Mohan -

  2. oFRbloAsCqR4kMZO
    oFRbloAsCqR4kMZO
    o5lecdLOaMSsveUP
    ElEXJd66E6riIMYk
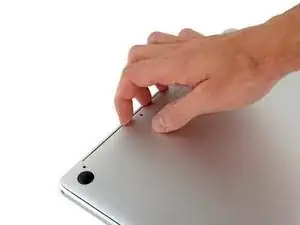
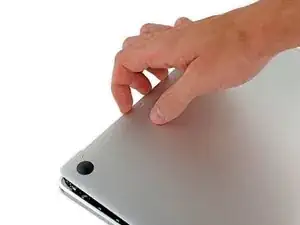
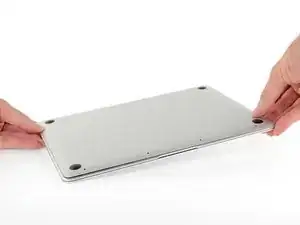
    • Zwänge deine Finger in den Spalt zwischen dem oberen und dem unteren Gehäuse. Beginne an der Rückseite des MacBooks zwischen den Scharnieren.

    • Hebe das untere Gehäuse nur ein wenig an, damit Schäden an den Kabeln, die das obere und untere Gehäuse verbinden, vermieden werden.

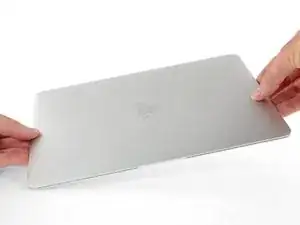
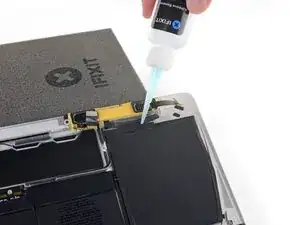
    • Fasse das untere Gehäuse fest an und hebe es gleichmäßig hoch, bis es sich vom oberen Gehäuse löst.

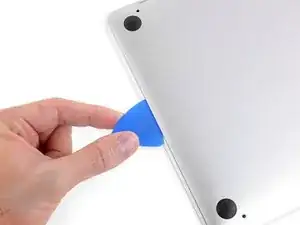
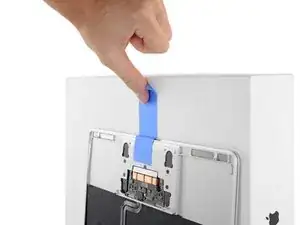
    • Möglicherweise geht das Hochheben des unteren Gehäuses schwer. Schiebe, falls nötig, ein Plektrum oder ein anderes ESD sicheres Werkzeug an den Seitenkanten des unteren Gehäuses entlang , um die beiden versteckten Rasten zu öffnen.

    • Um beim Zusammenbau diese Klammern wieder einzurasten, musst du fest auf die beiden Seitenkanten des unteren Gehäuses drücken (in der Nähe des Plektrums im dritten Bild), bis du es einrasten hörst.

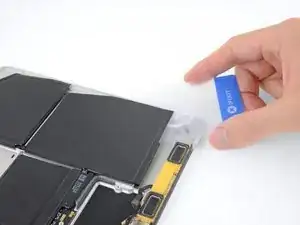
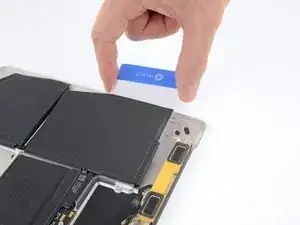
  3. WhfqVDXiYnDGnLgT
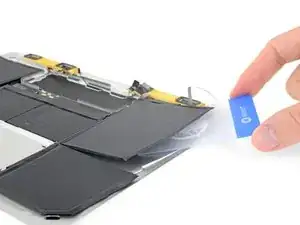
    • Halte das untere Gehäuse gut fest und drehe das Gerät mit dem Apple Logo nach oben um.

  4. MKqpe3xqSy2LdV36
    MKqpe3xqSy2LdV36
    QxVYS4ypIEZYXcCG
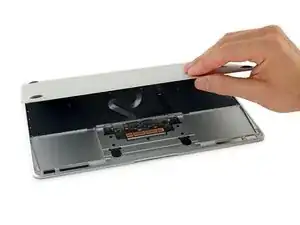
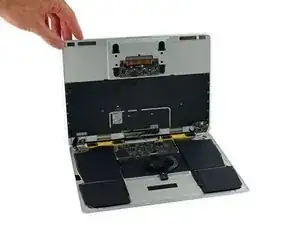
    • Hebe das obere Gehäuse und das Display zusammen von der Vorderkante her nach oben bis zu einem Winkel von etwa 45° an.

    • Es ist hilfreich, wenn du das MacBook in dieser Stellung für den nächsten Schritt abstützst.

    This step at the suggested height tears the ribbon cable. do step 7 first. carefully

    Kiernan -

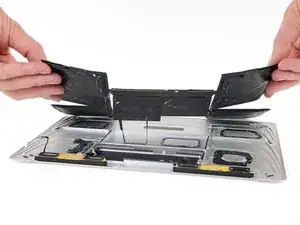
    If you carefully open the display all the way and then lift the upper case, you can let the display rest on your flat working surface. The upper case will be held in place at an appropriate angle by the display hinge.

    Mike C -

  5. EhZji2KUBnRgJuel
    EhZji2KUBnRgJuel
    qP6MReradWrsRpvL
    rII2VNtEKhVYWyhW
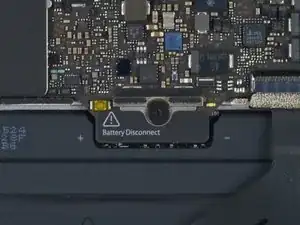
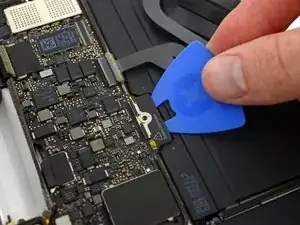
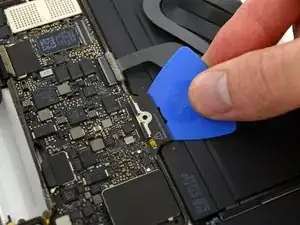
    • Drücke mit dem flachen Ende des Spudgers die kleine goldfarbene "battery disconnect" Taste und halte sie fest.

    • Wenn die Einschalt-LED aufleuchtet, dann halte die Taste weiterhin gedrückt, bis die LED erlöscht und lasse sie dann los. Das kann bis zu 10 Sekunden lang dauern.

    • Wenn die LED nicht aufleuchtet, dann lasse die Taste nach 5-10 Sekunden los. Drücke und halte sie für weitere 5-10 Sekunden und lasse los. Drücke und halte sie zum Abschluss erneut für 5-10 Sekunden und lasse los.

    • Durch dieses Verfahren wird sichergestellt, dass das MacBook ganz heruntergefahren ist und risikofrei daran gearbeitet werden kann.

    Wow okay could someone explain why this is necessary? What happens if you skip this step and simply undo the screw to disconnect the power?

    EB Computers -

    Removing the screw does not disconnect the power—power comes from the battery terminals contacting the underside of the logic board, and they’re tricky to separate reliably at this stage of disassembly. This step is the safest and easiest way to kill power; don’t skip it.

    Jeff Suovanen -

    What if I can’t get my LED to power on when reassembling the machine?

    greg2b -

    Update: Realized my USB-C connector (Step 14) wasn’t properly seated.

    greg2b -

    Hi what will happen if i skip this step, coz i did tried to power down the battery by pressing small gold button, but no avail. the LED light still there even after more than 5 times press (5-10secs or more) each press.

    Dimitri Zaborski -

    Did you learn the answer to your question? I'm having the same issue -- I keep pressing the gold button but the battery light stays on.

    R McP -

    Mi laptop doesn’t turn it on doing that ):

    alexisaguinagam26 -

  6. MmsEtQjDTJFLgQTA
    • Schließe das MacBook und lege es mit der Unterseite nach oben hin.

  7. 2GYsPBbAwkEqs2xq
    • Hebe die Vorderkante hoch, bis das untere Gehäuse mit einem Winkel von etwa 45° geöffnet ist.

    • Achte darauf, dass die Flachbandkabel, mit denen das untere Gehäuse immer noch am MacBook angeschlossen ist, nicht beschädigt werden.

    Before the IPD flex cable can be removed the battery disconnect button has be held down for up to 10 seconds. If the LED near the battery connector is switched on it shows that there is power going through the logic board from the battery, once the button is pressed and this light goes off the machine is safe to be worked on.

    Aaron Dalziel -

  8. lGBQcICtFaslxUHu
    lGBQcICtFaslxUHu
    uhunJJRpxlkLAvhl
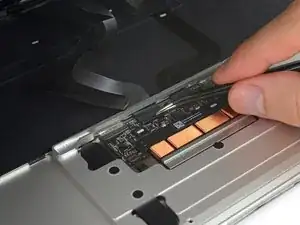
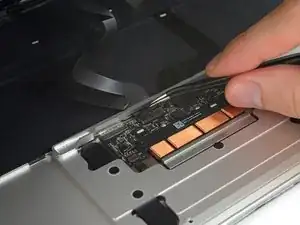
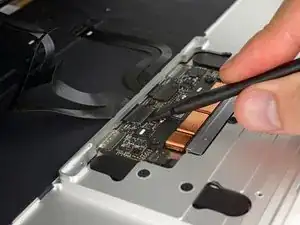
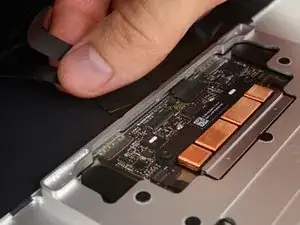
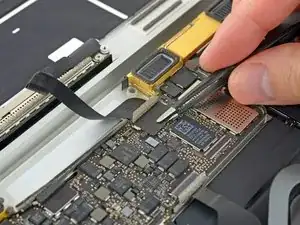
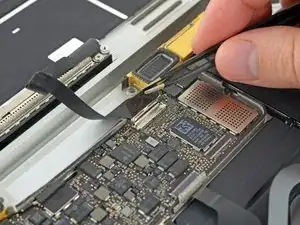
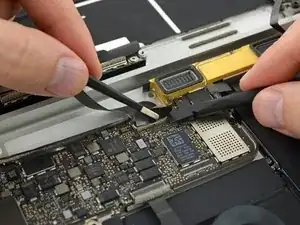
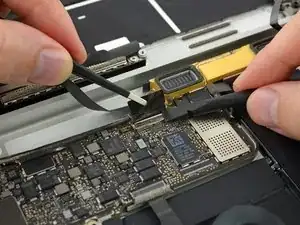
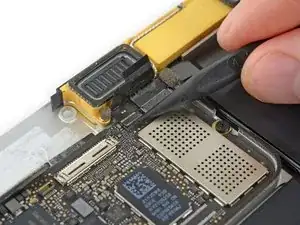
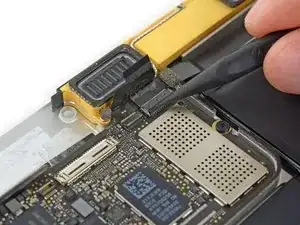
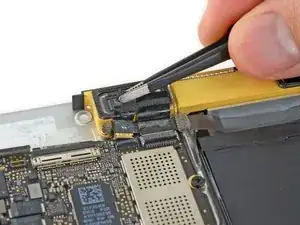
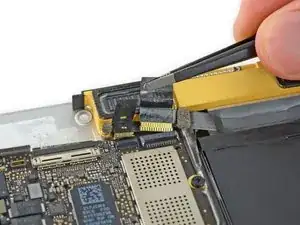
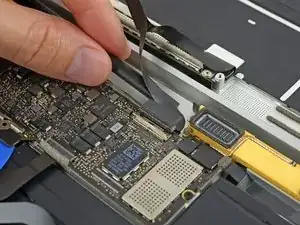
    • Löse mit einer Pinzette das schwarze Klebeband ab, mit dem der ZIF Verbinder des Trackpadkabels bedeckt ist.

    Only peel back the first half of the tape covering the trackpad cable ZIF connector—do not completely remove.

    Steven Gibson -

  9. iImRKXAcEWwgyePw
    iImRKXAcEWwgyePw
    KcGgisHdZUr5nacW
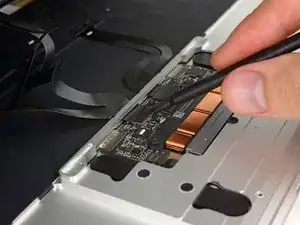
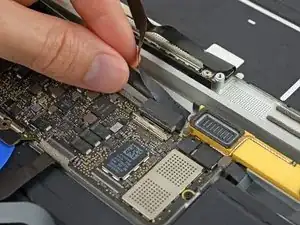
    • Klappe vorsichtig den Sicherungsbügel am ZIF Verbinder des Trackpadkabels mit einem Spudger hoch.

    This is very tricky indeed - at least on my computer. I failed at this point - having skipped to it as sugested above so as not to stress the ribbons on the other side. The ZIF was not as I expected. They had opened when I pulled up the stick cover and I found I was working on the socket itself. The top edge came adrift after almost no pressure being put on it. The ribon did not come free with gentle pulling though. At that point I put the back on again… waited until the battery recharged a bit and found I had not nroken it after all. I doubt I shall try again. It is much harder to replace than the 15 inch - much…

    Simon Anthony -

    I’ve just found that I have broken it after all. No keyboard. Bluetooth still works so I can use the machine.

    All in all, an expensive mistake. BTW - I did NOT get the kit from IFIXIT - not sold here.

    Simon Anthony -

    I found “Recognizing & Disconnecting Cable Connectors”

    Erkennen und Trennen von Kabelverbindern

    useful, esp. for someone who has not used ZIF connectors and retaining flaps before. There are several retaining flaps that need to be opened. The first time is tricky as you need a sense of how much force to apply. I used the flat end of the provided spudger. Apply progressively firmer upward pressure until the retaining flap pops open. The first time is tricky, but straightforward thereafter.

    Ki Park -

    Mouse back and forth between the two right-side thumbnail photos and you will get a little animation feel showing how these ZIF connectors operate—it's very helpful. Apply light but consistent pressure to pop them up. Helps to go side to side if they're a little stubborn.

    Steven Gibson -

  10. WeOX4JZDcQrqklNd
    WeOX4JZDcQrqklNd
    qtXyAcpgiAVCBmVC
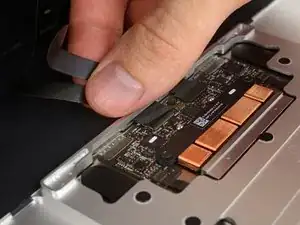
    • Löse das Flachbandkabel des Trackpads vom Trackpad ab, indem du es vorsichtig durch den Schlitz im Rahmen ziehst.

  11. iLYAVQ2N3yLQFkvC
    iLYAVQ2N3yLQFkvC
    6yeyROLAT4q2ViBD
    • Drehe das MacBook vorsichtig herum, so dass das untere Gehäuse flach aufliegt.

    • Klappe das obere Gehäuse/Displayeinheit etwa rechtwinklig auf und stütze es gegen einen stabilen Gegenstand, so dass du es nicht mehr festhalten musst.

    • Klebe das obere Gehäuse mit einem Klebeband in der Nähe des Trackpads fest, so dass es sich nicht versehentlich bewegen kann.

    • Man könnte zwar das MacBook ganz flach aufklappen, dies ist aber nicht zu empfehlen, da die Flachbandkabel beschädigt werden können.

    You can open the laptop screen all the way open with it flat in the table (screen facing up) and the keyboard should stay up.

    xavierviveros -

  12. AMWf6WIendtSbCD4
    AMWf6WIendtSbCD4
    MwEpxQ3QrEtAHRBE
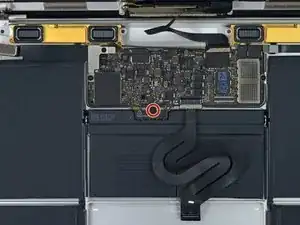
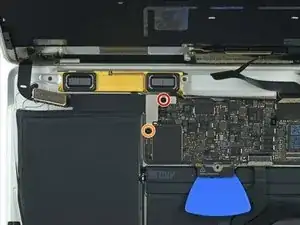
    • Entferne die einzelne 2,9 mm Torx T5 Schraube, mit der der Akkuanschluss am Logic Board befestigt ist.

    • Bei 2015er Modellen kann sich eine silberfarbene Erdungsklammer mit zwei Schaumstoffstückchen direkt unter dieser Schraube befinden. Diese könnte sich lösen. Achte darauf, dass du sie beim Zusammenbau wieder einbaust.

    the moment you opening macbook case and before any tinkering with connections, you MUST press little yellow button on logicboard, located on the right from battery connector - this will disable all power to the board. You can check by looking at the small led on left side of the battery connector - if there is very faint light, it means that power is still there. After pressing button light should go off. Removing screw is not necessary at all, and like I said - you MUST disable power before any touching to connections etc.

    DigiHead -

    Where it says

    “2015 models have a silver grounding clip with two foam pads directly under this screw“

    I have a 2015 MacBook & the grounding clip is not there!

    I’m using this guide to investigate why there are lines on screen or darker screen at certain angles of opening it. Also a background ghosting effect on screen too.

    No obvious damage or loose connectors so wondered if the lack of grounding clip can cause these symptoms?

    Anybody out there know?

    nijafe -

    Either buy the clip and check, or replace the screen (or LB), but the macbook would more likely not start if there is a missing grounded connection, depending on what is being grounded.

    Sean -

  13. pTJmavEfBv2DXgVU
    pTJmavEfBv2DXgVU
    VUebfHZqvKTpapBB
    • Als zusätzliche Sicherheitsmaßnahme kannst du den Akku physisch trennen, indem du ein Akkuisolierstück zwischen Logic Board und Akkuanschluss einsetzt.

    I HAD TO DO THIS TWICE. After replacing the battery while following this guide to a 'T', the battery was not being recognized by the logic board. Strangely, with the power unplugged it would still light up the screen and tell me the battery was at a critical level, but it would not boot. Resetting the SMC had no effect. I thought I killed my computer or got a bad battery, so as a last ditch effort I re-opened the case, pressed the battery disconnect button, removed the screw and inserted the battery separation tool again to Physically Disconnect the battery from the mainboard. After about 5 minutes I then removed the tool and reassembled everything, plugged in via 5v iphone charger and USBA-C cable again and LO, the battery is now reporting correctly, charging correctly and allowing me to boot on its power .

    Neil Schultz -

  14. NxUtySGy3uWmfBTN
    • Entferne die beiden Schrauben, mit denen die Halterung des USB-C Anschlusskabels befestigt ist:

    • 1,1 mm Tri-Point Y00 Schraube

    • Bei manchen Modellen kann es auch eine Kreuzschlitzschraube sein.

    • 3,5 mm Torx T5 Schraube

    This was oddly the hardest part. That Tri-Point screw just wouldn’t budge! I had to sand the end of the only Tri-point screwdriver I had in the end to get it to fit.

    Stuart -

    Be sure to get the metal plate under the chip near where the PT5 screw is before tightening

    abscate -

    I should have read the comments before using the provided 1.1 mm Tri-point Y00 bit. I almost stripped the screw but was able to use a small flat head bit to open the screw.

    Ifixit: you may want to update this part in the instructions. Not everyone reads the comment section, esp. when it comes to specification of bits which is basic and must be accurate. This is one of the more critical ones in the procedure that can easily go south. The rest of the instructions are excellent.

    Ki Park -

    early 2015 model here. I’ve used a Y1.5 with cautiously applied down force.

    beaudry.ian -

    My 2015 had a 2.5mm Y screw not a Y000.

    Michael Bonney -

    Adding to the helpful comments above, on replacing the 1.1mm tripoint screw, I found the the magnetism of the nearby speaker coil overcame that of the driver and would draw the screw away or the combo of forces would fling it out of the work area! After fiddling with it for too long, I used some of the battery adhesive removed earlier to attached the screw to the driver. Wax would probably work better if I’d had some.

    jefflyons -

    I used the PH00 head to unscrew what they call the “1.1 mm Tri-point Y00 screw”, NOT the Y00 head, and it unscrewed perfectly fine.

    Grace Escamilla -

    Agreed, my screw was a PH00.

    stephen delaney -

  15. aPJDUSEVa24G5wDu
    aPJDUSEVa24G5wDu
    fQXrJmJDGER4qs1d
    • Heble die Halterung des USB-C Anschlusskabels vom Logic Board hoch und löse sie ab.

    • Um dieses Kabel wieder anzuschließen, musst du erst die Metallhalterung passend über die Schraubenlöcher legen und dann in der Mitte herunterdrücken. Achte darauf, dass sie korrekt sitzt, sonst kann der Stecker beschädigt werden.

    Emphasis on aligning the bracket correctly. What the pictures do not show is that underneath the flat part of the metal bracket (the area between the two screw holes) is a connector that needs to be accurately aligned. Aligning the two screw holes does not imply that the connector is seated correctly.

    After I re-assembled my 2015 MacBook power would not come on. I thought I had damaged the logic board despite being careful and following instructions. Diagnosing the problem took a while. Retracing the steps and focusing on power supply I was able to determine that the metal flap which hides the connector underneath had not made proper contact.

    What I did was to use a finger to get a tactile feel for the connector underneath the metal bracket aligning properly and then press down vertically when it seemed to be aligned. It’s a subtle tactile feel. After re-doing this step, I got power back. Be careful not to damage the connector as noted in the instructions.

    Ki Park -

    Good tip. It’s so easy to damage these fragile connectors by forcing the plug in and reattaching the mounting plate screws

    Peter Newman -

  16. cnkkpqnImOJBKvGP
    cnkkpqnImOJBKvGP
    XcXlAMnXJVFGLOZA
    • Klappe den Sicherungsbügel am ZIF Verbinder des Flachbandkabels zur Platine der Kopfhörerbuchse mit dem Spudger auf.

  17. gWObarmSQqX4gWjO
    • Löse das Flachbandkabel zur Platine der Kopfhörerbuchse, indem du es gerade aus dem ZIF Verbinder nach hinten ziehst.

    • Richte das Flachbandkabel beim Zusammenbau so wie gezeigt aus, sodass die Seite mit den weißen Streifen zu dir zeigt.

    hey my macbook do not have sound after replacing the topcase, i did connect everything like here you did, also I did the reset of PR and NVRAM. What Can I check more? simply when I open the OS, there is no audio device at all

    dkflu -

    The audio jack cable is a bit of a pain to reinsert. I found if I turned the screen and the bottom on its side, like an open book, I had much better orientation and it was much easier to insert.

    Steven Gibson -

  18. RbKCVCN1PQTMnJRL
    RbKCVCN1PQTMnJRL
    AHlBf6RVtdtJZvGU
    • Ziehe das Klebeband vom Displaykabelstecker mit einer Pinzette zurück.

  19. FsBPT1dfUmOMtEDR
    FsBPT1dfUmOMtEDR
    lwMU4ANHYAICsoVC
    • Es kann sein, dass der metallene Sicherungsbügel am Displaykabelstecker aufklappt, und am Klebeband festhängen bleibt.

    • Wenn das so ist, dann musst du den Sicherungsbügel mit dem flachen Ende des Spudgers nach unten halten, während du mit der Pinzette das Klebeband ablöst.

  20. eHZNWLWbMZxYTtTJ
    • Klappe den Sicherungsbügel auf dem Displaykabelstecker mit dem flachen Ende des Spudgers hoch.

    • Halte ihn möglichst vom Klebeband fern, sonst er kann daran festkleben. Dann wird das Ablösen des Kabels schwieriger.

  21. ZRLuwdSOgysqUIZa
    ZRLuwdSOgysqUIZa
    3qiSmhTTSe5QCCIA
    3fEQPqmPnv2aVyMv
    • Schiebe vorsichtig das flache Ende des Spudgers unter das Displaykabel, um es von der Klebeverbindung zum unteren Gehäuse zu trennen.

    • Achte darauf, dass das Kabel nicht beschädigt wird. Wenn es sich nicht leicht ablösen lässt, dann erwärme das Kabel und/oder das Gehäuse direkt darunter mit einem Haartrockner oder einen iOpener. Der Kleber wird dadurch aufgeweicht und du kannst es noch einmal probieren.

  22. aPihB1CyJim4IF4c
    • Ziehe das Displaykabel vorsichtig gerade aus seinem Anschluss heraus und löse es ab.

    • Schließe gleich danach den Sicherungsbügel.

    • Beim Zusammenbau muss der Sicherungsbügel zugeklappt sein. Setze das Kabel mit den Goldkontakten nach unten korrekt auf und schiebe es vorsichtig in den Anschluss hinein. Achte darauf, dass das Kabel nicht geknickt oder sonstwie beschädigt wird. Wenn es richtig sitzt, sollten die Vertiefungen an den Seiten nicht mehr sichtbar sein.

    A step was skipped. You have to flip up the metal locking tab on the socket before the cable can be removed. See the photo.

    Vin Coniglione -

    And be careful when re-inserting the connector. One end of the two indentations got a little bent (I did not notice) which resulted in a black screen when powering up. I used a heat gun (low setting) to separate the cable from the labtop housing. When re-assembling, first insert the connector (after closing the metal flap as instructed), verify that it’s properly seated, then re-attach the rest of the cable to the laptop housing. In the first try, I first re-attached the cable to the housing, then tried to insert the cable connected into the metal socket. Because of a lack of slack, the cable connector at one end got bent slightly. After identifying the problem, I had to straighten it/unbend out using my fingers. Hence it is easier to insert the connector first, then attach the rest of the cable to the laptop housing.

    Ki Park -

    Black screen upon reboot:

    Inserting the display ribbon cable into it’s contact without closing the metal flap before reassembly will result in a black screen.

    Charlene Lizut -

  23. IIqsgKYEokgwdVfo
    • Trenne die untere von der oberen Gehäuseeinheit.

  24. saJcCgJxCZNvngDF
    saJcCgJxCZNvngDF
    3TMnOECSiciIi2Ow
    5QjrHIMJntJSR55r
    • Die ZIF Verbinder des rechten Lautsprecherkabels und des Kabels zur Platine der Kopfhörerbuchse sind mit Klebeband bedeckt. Ziehe es mit einer Pinzette ab.

    Removing the logicboard must be safer way, but battery replacement can be accomplished if you skip here to step 32, and omit 36.

    Aki Mochi -

    I'm not sure removing the logic board is safer, you have many more opportunities to break something. I left it connected but removed the screws so I could maneuver the battery underneath. Faster and safer imo.

    maccentric -

  25. wwLZpTnHIeHC6CZK
    wwLZpTnHIeHC6CZK
    cHaXZJlfsl1PYcd1
    3BINxS4dFq6OVBDU
    • Klappe mit der Spudgerspitze die beiden Sicherungsbügel an den ZIF Verbindern hoch.

  26. AMmUIQZ6qgitxvcu
    AMmUIQZ6qgitxvcu
    6NHRNWUyyLYhCGuZ
    • Ziehe vorsichtig die beiden Stückchen Klebeband zurück, die du eben grade gelöst hast. Dadurch lösen sich die beiden Flachbandkabel.

  27. TV3ZJwYpJujcVUe1
    TV3ZJwYpJujcVUe1
    TbvsX13hJUcEA6Xh
    • Löse das Stück Schaumstoff auf den beiden Antennensteckern mit der Spudgerspitze ab.

  28. FSpWsmDOZUHOxkoB
    FSpWsmDOZUHOxkoB
    Fd5ZPEjRRd2xcdLB
    • Hebe den ersten Antennenstecker mit einer Pinzette gerade nach oben und löse ihn aus seinem Anschluss heraus.

    • Die Antennenstecker und -anschlüsse sind sehr empfindlich. Achte darauf, dass du nur den Stecker hochhebst und nicht den Anschluss. Heble nicht unter dem Kabel und belaste es nicht unnötig.

    The supplied tweezer is no good. You need one with grooves as shown in the picture. When re-inserting the antenna connectors, make sure that they are seated properly before pushing down. If you have magnifying equipment, use that to get visual confirmation. I used tactile feedback from my fingers to discern proper alignment. Try not to force it.

    Ki Park -

    I used the tweezers provided by iFixit. I struggled with both connectors and finally managed to disconnect both, but when I came back to reconnect them, I realized that both connectors on the logic board were loose. Long story short, it turns out that my little exciting adventure changing the battery cost me $530 to send it for repair at Apple Care. I am quite good at troubleshooting Mac and used to work for Apple for many years. This one step is more dangerous than it seems, because you can end up like me, without wifi on your mac. Honestly, for those who think they can do it, think twice. You can thank me later…

    Arthur Liegeois -

    For me this step was the only point where I had a bit of trouble. The supplied tweezers were not the best for disconnecting the antenna connectors as Ki Park points out already. In my case the outer ring of one of the connectors on the logic board bended slightly. It bended back in place during assembly and the wifi works as normal again after the repair. It is very tricky though, really be careful in this step and use other tools as necessary.

    Arie Machgeels van Ziel -

    BY FAR THE MOST DANGEROUS PART OF THE JOB!. I broked one connector and spent an hour with high powered magnifiers to try a repair. Wasted an hour on this. Id suggest leaving the logic board in place if possible

    Crisis Guy -

    I had no problem with this. The key is to come toward the connectors from the opposite direction from that shown in the photo. Easier to grip the connector.

    david -

    I broke one. Looking back, it may have been safer to detach the motherboard from the case before disconnecting the antenna, as it allows more angles to access them. 😢

    bredelet -

    F. I broke one

    Ried Cartwright -

    I actually put one of the tweezer tines under the connector and used it as a lever gently to pop the antenna connector off the housing. Worked well, but I had to be super careful not to break anything.

    Woodward Price -

    These connectors are incredibly finicky to reinstall. Precise alignment is critical. You can sort of get a sense of when the connectors are properly aligned by trying to slide them side to side with your finger, but mostly it's a case of trial and error. Don't apply excessive force because you risk damaging the edges of the connectors. When properly aligned they don't exactly click, but you do feel them go in.

    nigel -

    DO NOT REMOVE THESE. As others have stated these are fragile and finicky to remove and reinstall. Instead, leave them intact and lift up the logic board at a 70 to 80% angle. Use a piece of tape secured to the bottom edge of the computer and the top edge of the logic board to hold it up and out of the way. If you are diligent, you can remove the batteries without touching or messing with the logic board. Use caution, don't get too overzealous, take your time.

    Steven Gibson -

  29. SEWAp5uMIZkqMfYQ
    SEWAp5uMIZkqMfYQ
    DDyaE6lj4VPJ6q1B
    • Hebe den zweiten Antennenstecker mit einer Pinzette gerade nach oben und löse ihn aus seinem Anschluss heraus.

    • Die Antennenstecker und -anschlüsse sind sehr empfindlich. Achte darauf, dass du nur den Stecker hochhebst und nicht den Anschluss. Heble nicht unter dem Kabel und belaste es nicht unnötig.

    Broke a connector. Now what?

    chrisadams -

    BEWARE - there are no instructions on how to reassemble this. It goes to step 52 - battery installed and that is it. Easy to pull out, almost impossible to put back in afterwards. So STUDY this to get an idea of how to reattach.

    Kyle Swafford -

  30. DhL2mKE4SoSyGZXY
    DhL2mKE4SoSyGZXY
    FLoIUrfatB5MlOwH
    • Hebe den Stecker am linken Lautsprecherkabel gerade nach oben und löse ihn vom Logic Board ab.

    Reassembling NOTE. The left speaker cable needs to be below the logic board when screwing in the right screw. Otherwise you will have to backtrack.

    Kyle Swafford -

  31. vyvOJAWZSjJSCaTn
    vyvOJAWZSjJSCaTn
    nJMdoff3lODZUVoM
    • Klappe den Sicherungsbügel am ZIF Verbinder des Trackpadkabels mit einem Spudger hoch.

  32. cUM4HY2FvvbV4Qj3
    • Ziehe das Trackpadkabel vorsichtig aus seinem Anschluss heraus und löse es vom Logic Board ab.

    Once the logic board has been replaced, when following these instructions in the reverse order it should be pointed out that the all the flaps are flipped down. A distracted person might try to force in the flat connector before realising that he has to flip up the flap of the new logic board.

    Davide Dante -

  33. vAODDnG2DP6wOHKS
    • Entferne die einzelne 3,5 mm Torx T5 Schraube, mit der das Logic Board am unteren Gehäuse befestigt ist.

  34. TbSEH4Y4MdsGYTOW
    TbSEH4Y4MdsGYTOW
    OcBAUBIO31NTbDdH
    CAvrQ6tjS2oNwqWG
    • Klappe die Vorderkante des Logic Boards hoch.

    • Fasse das Logic Board nur an den Kanten an.

    • Hebe das EMI Band hoch, mit dem das Logic Board am unteren Gehäuse befestigt ist, und löse es ab.

    • Das Band lässt sich leichter ablösen, wenn du es mit einem Haartrockner oder einem iOpener erwärmst.

    • Bringe das Band beim Zusammenbau wieder sicher an.

    “Reattach the tape securely during reassembly.”

    In my case the tape did not stick properly to the lower case anymore and also came a bit loose from the logic board. Nonetheless my macbook works fine after the repair, so I'm not sure how important the EMI tape is. If I experience problems in the future I might open the macbook up again and check the tape and perhaps reattach it better with some new glue. There is probably special glue needed, so I'll look into that when it becomes an issue.

    Arie Machgeels van Ziel -

  35. EZaMXdaUkJJfbRBI
    • Entferne das Logic Board.

    If you are replacing the logic board once the machine has been rebuild the 2015 model has to have a 5W power adapter plugged into the machine first before the full 29W power supply otherwise there is a risk of damaging the logic board. Once the power is supplied the battery disconnect LED will switch on and once this has occurred you can remove the 5W and supply the machine with the full 29W power adapter.

    Aaron Dalziel -

    While it’s true that the internal documentation specifies this for a 2015, after frying 2 motherboards with a normal charger, I spoke with the engineers and they told me that this also applies to 2016 and 2017 macbook main logic boards. I say- It can’t hurt to try to wake them up with a 5 watt charger first! Please take 5 minutes to save your motherboard.

    Noah -

  36. EYprELeV5dqgSFws
    EYprELeV5dqgSFws
    t2hVWLEJJNejvPAo
    tKiDjkwqvR2iOtc5
    • Hebe die hintere Kante der unteren Gehäuseeinheit hoch und stelle sie schräg gegen ein Buch oder einen Schaumstoffblock.

    • In den folgenden Schritten wirst du flüssigen Klebstoffentferner an den Kanten der Akkuzellen anbringen. Wenn du einen Teil des MacBooks erhöht aufstellst, dann kann der Klebstoffentferner besser unter den Akku laufen.

    • Du kannst das MacBook während der Reparatur auch wieder anders orientieren, vermeide aber, dass der Klebstoffentferner an andere Bauteile als den Akku und den Metallrahmen gelangt.

    • Lege wenn nötig ein Stück Aluminiumfolie unter das MacBook, um deine Arbeitsfläche vor herauslaufenden Tropfen des Klebstoffentferners zu schützen.

  37. x1J1CFUDXYuSE4Js
    x1J1CFUDXYuSE4Js
    UeLAcvnPDmFRpAqI
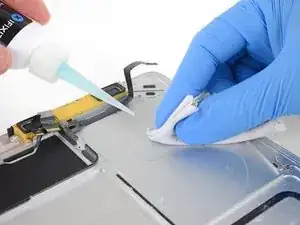
    • Der Klebstoffentferner von iFixit enthält Azeton, dieses kann die Haut und die Augen leicht reizen.

    • Trage bei der Arbeit mit dem Klebstoffentferner eine Schutzbrille. (Sie ist im Kit enthalten)

    • Trage Kontaktlinsen keinesfalls ohne Schutzbrille.

    • Dem Kit liegen auch Schutzhandschuhe bei. Trage sie, wenn du empfindliche Haut hast.

  38. pGaw3EKFFEGwJBBI
    pGaw3EKFFEGwJBBI
    2pjSUFqwYcTBIINR
    IXUCSXNDFVvZeR6V
    • Ziehe den schwarzen Gummistopfen von dem Fläschchen mit Klebstoffentferner ab.

    • Drehe die Kappe der Flasche, um sie lösen oder zu entfernen, bevor du die Spitze des Applikators abschneidest.

    • Die Versiegelung der Flasche wird dadurch geöffnet und der Druck kann sich ausgleichen, bevor du die Applikatiorspitze abschneidest. Wenn du diesen Schritt übergehst, dann kann die Flüssigkeit beim Abschneiden der Spitze unkontrolliert herausspritzen.

    • Schneide die verschlossene Applikatorspitze mit einer Schere ab.

    • Schneide die Spitze an der engen Stelle ab. Dadurch kannst du die Menge an Klebstoffentferner beim bei der Anwendung besser kontrollieren.

    • Drehe die Abdeckkappe wieder auf und verschließe sie gut, bevor du fortfährst.

    My kit has black cap with added curved clear piece attachment

    Kyle Swafford -

  39. 26TSYExVivRRX2t6
    26TSYExVivRRX2t6
    SyNtamIJGrxuU1oI
    Y1LfgfdCBAHhaUgf
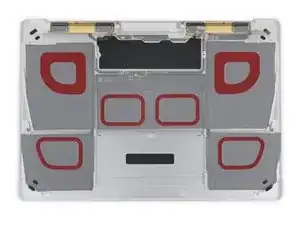
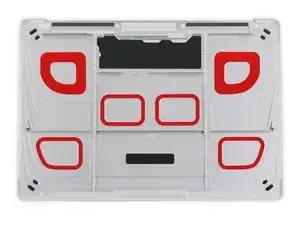
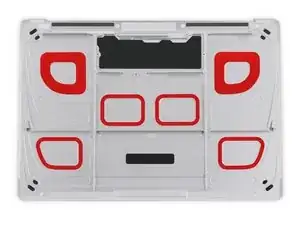
    • Der Klebstoff, mit dem die Akkuzellen am unteren Gehäuse befestigt sind, befindet sich an den rot markierten Stellen.

    • Du kannst diesen Schritt als Referenz für die Anwendung des Klebstoffentferners in den folgenden Schritten benutzen.

  40. hTh1Ia1XAULTmhRP
    hTh1Ia1XAULTmhRP
    4RwXPQWpUSXHvhkE
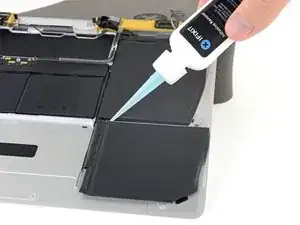
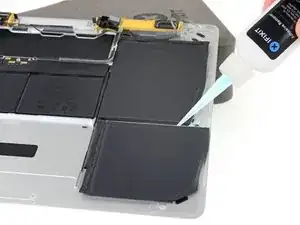
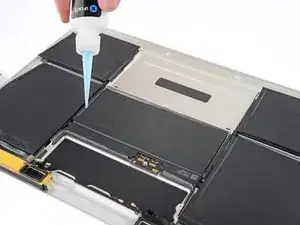
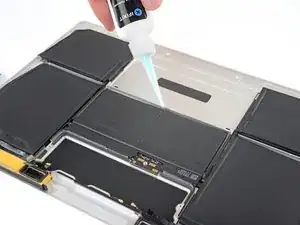
    • Gib einige Tropfen Klebstoffentferner gleichmäßig unter die Oberkante der vorderen rechten Akkuzelle.

    • Du musst nicht sehr viel Klebstoffentferner verwenden. Das Fläschchen enthält mindestens die doppelte Menge, die du brauchst, um alle Akkuzellen zu entfernen.

    • Warte 2-3 Minuten, bis der flüssige Klebstoffentferner unter die Akkuzelle eingedrungen ist, bevor du mit dem nächsten Schritt fortfährst.

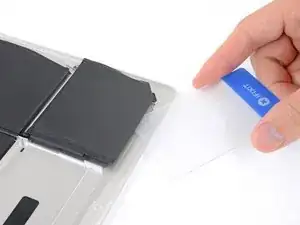
    Das ist nicht nötig. Ich habe mit einer schmalen Spachtel die Akkus sehr gut und vorsichtig vom Klebstoff getrennt.

    Hat wunderbar geklappt.

    Gruß aus München, Tom

    Thomas Schroeder -

  41. 24DTVFWAGcK4vTJO
    24DTVFWAGcK4vTJO
    a2lAcmQmof25MLLD
    QQyG4mcHBdOsxeML
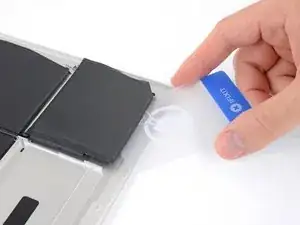
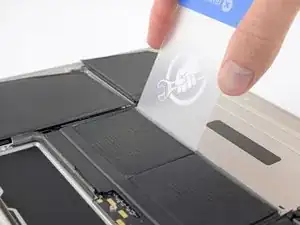
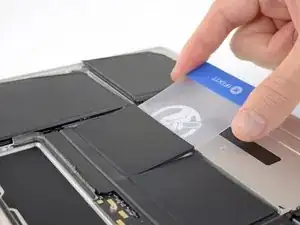
    • Schiebe nach 2- 3 Minuten die Ecke einer Plastikkarte unter die Akkuzelle.

    • Du solltest dazu nur sehr wenig Kraft benötigen. Wenn das schwergängig ist, dann gib noch etwas mehr Klebstoffentferner unter die anderen Kanten der Akkuzelle und warte 2 - 3 Minuten, bis du wieder versuchst, die Karte einzuschieben.

    • Vermeide es, den Akku zu verformen. Aus einem beschädigter Akku können gefährliche Chemikalien austreten und/oder er kann Feuer fangen.

    • Es hilft vielleicht, wenn du die Karte ein wenig verdrehst, um damit einen kleinen Spalt zwischen der Akkuzelle und dem Gehäuse des MacBooks zu schaffen.

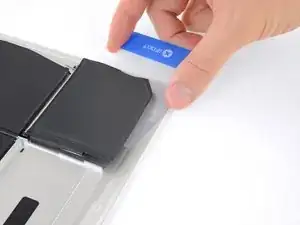
    • Schiebe die Karte weiter unter der Akkuzelle, um sie von der Klebeverbindung zum Gehäuse abzulösen.

  42. lvjKOwGRCNSBOmDY
    lvjKOwGRCNSBOmDY
    6d3qGtTslLCsZWG3
    • Hebe die Akkuzelle am rechten Rand hoch, um sie komplett vom Kleber abzulösen, versuche aber noch nicht, sie ganz zu entfernen.

    • Lasse die Plastikkarte unter der Akkuzelle stecken, damit sie nicht wieder festkleben kann, wenn du zum nächsten Schritt übergehst.

  43. OaCbKjlh2ys1QdfZ
    OaCbKjlh2ys1QdfZ
    OHIIIGt1cnA2OxFI
    • Wiederhole die vorherigen drei Schritte, um die vordere linke Akkuzelle abzulösen.

    • Belasse vor dem nächsten Schritt die Plastikkarte unter der Akkuzelle, damit sie nicht wieder festkleben kann.

  44. VlW5BkGeSUDmJ1TW
    VlW5BkGeSUDmJ1TW
    ZgDcRDRkkLZmBx3G
    fQsGMriSBYOgGIEh
    • Wiederhole die vorherigen Schritte, um die große Akkuzelle an der linken Seite des MacBooks abzulösen.

  45. BNF6v6QPBiUgmyQb
    BNF6v6QPBiUgmyQb
    YgSRVIMmgsTbxuRn
    • Wiederhole die vorherigen Schritte, um die große Akkuzelle an der rechten Seite des MacBooks abzulösen.

    • In der Nähe der Hinterkante der Akkuzelle befindet sich das Flachbandkabel der Kopfhörerbuchse. Achte darauf, es nicht zu beschädigen.

  46. tu643KGJhitEYN3R
    tu643KGJhitEYN3R
    ElKAWhpLhTaVisLv
    Bwx1RpDiugbjvC1A
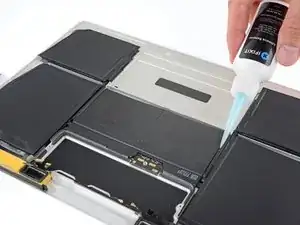
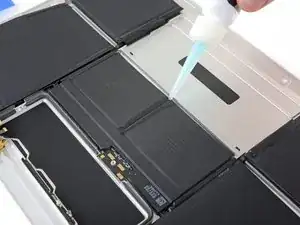
    • Lege die untere Gehäuseeinheit flach vor dich hin und wende den Klebstoffentferner an den mittleren beiden Zellen an, an jeder Seite und an der Vorderkante. (gegenüber der Stelle, wo das Logic Board ist)

  47. H2ReIRri4UCBdpLO
    • Gib ein wenig zusätzlichen Klebstoffentferner in die Mitte zwischen die beiden Akkuzellen.

    • Lasse den Klebstoffentferner 2 -3 Minuten einwirken, bevor du weitermachst.

  48. cGYoZUAvWGHHNFkW
    cGYoZUAvWGHHNFkW
    RhCMlolFwhVVm3Lg
    ZDeGFBRYx3ElWy1d
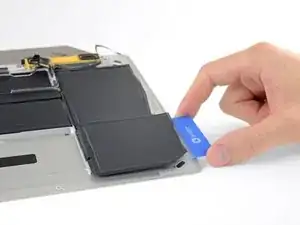
    • Setze die Plastikkarte unter die Vorderkante einer der Akkuzellen ein und löse sie vorsichtig ab.

    • Versuche dabei, die Zelle nicht zu verformen. Aus einem beschädigten Akku können gefährliche Chemikalien austreten, und/oder er kann Feuer fangen.

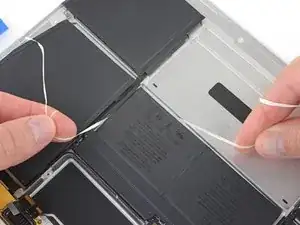
    • Wenn du Schwierigkeiten hast, die Karte unter die Akkuzelle zu schieben, dann versuche, ein Stückchen Zahnseide oder einen dünnen Draht unter die Akkuzelle zu bekommen und mit einer sägenden Bewegung zur Seite zu ziehen, um so den Kleber aufzutrennen.

  49. dAoOQ5vcpgkWvIJf
    • Wiederhole den vorigen Schritt, um so die letzte Akkuzelle abzulösen.

  50. gOI1uxwhopTgcWGq
    gOI1uxwhopTgcWGq
    jGp2pZUpixIjoxHx
    BCxpHvqPaZ4YVNQv
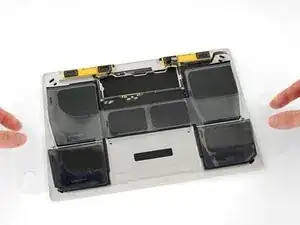
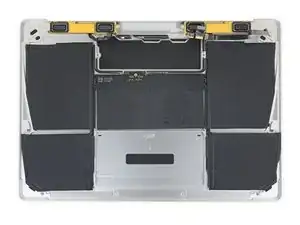
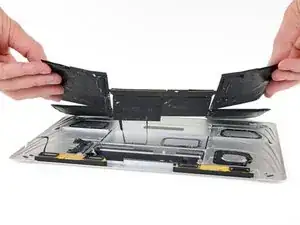
    • Entferne den Akku, indem du ihn von dem Bereich der Lautsprecher und des Logig Boards weghebst.

    • Achte darauf, dass du den Akku nicht über die untere Gehäuseeinheit ziehst, du könntest die Lautsprecher oder die Flachbandkabel beschädigen.

    • Bevor du einen neuen Akku einbauen kannst, musst du erst alle Klebstoffreste vom Gehäuse des Macbooks beseitigen.

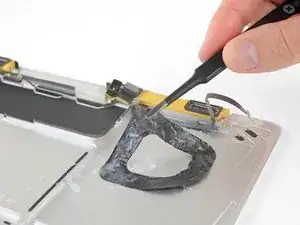
    • Ziehe größere Stücke des Klebers mit einer Pinzette oder der behandschuhten Hand ab.

    • Schabe alle Klebstoffreste mit einem Plastiköffnungswerkzeug ab und reinige tieferliegende Bereiche mit Klebstoffentferner oder Isopropylalkohol. Wische nur in eine Richtung, nicht vor und zurück, bis alle Klebstoffreste verschwunden sind.

    • Das ist eine mühselige Arbeit, die etwas dauern kann. Sei geduldig.

    Change the battery: 25 minutes

    Remove the adhesive: 2:35 hours

    Andrea Moretti -

    Frankly, this is the hardest and time consuming step throughout replacement task. I strongly recommend to utilize chemical tools to get rid of residue of adhesive tape. I used unused credit card to scrape it away. Be patient.

    Aki Mochi -

    I used citrus oil. It’s vegan. Mr Jobs would approve ;) Made it very easy - less than an hour. After removing battery with the method shown in this iFixit, apply oil to remaining adhesive (black stuff included). Wait five minutes. Scrape black stuff away with plastic card etc. Wipe glue residue from edges towards middle (of each cell) with cloth. I used an old face washer. The nap picks up the clumps of dissolved glue residue nicely. Finish with clean cloth and alcohol. Looks like new!

    Pete Smith -

    I applied some isopropyl alcohol to the adhesives then broke up one corner and lifted it up, then slowly pull it the same method to remove an iPhone’s battery’s adhesive. The old adhesives came off with ease and cleanly — less mess to wipe off afterwards.

    Trung Dang -

    I’ve removed pieces of glue very very easy, with ceramic hob scraper.

    Everything was as new in 5 minutes.

    davor -

    Once the big, black adhesive strips are removed, cleaning up the remaining detritus can be time consuming. I found the best way to proceed was to continuously apply small quantities of the adhesive remover while wiping away the detritus immediately.

    Woodward Price -

    Didn't see these comments b4 removing the adhesive so spent 2 hours scraping it off. Next time I might use some Goo Gone or alcohol.

    Andrew Mohan -

  51. axvdCwwQjpjWyE4w
    axvdCwwQjpjWyE4w
    KnGZxuHLm4IJuVee
    4psnHwhpLKW3dRPh
    • Prüfe sorgfältig, ob dein neuer Akku gut passt und richtig ausgerichtet ist, bevor du ihn einbaust.

    • Im Gegensatz zu den meisten anderen Laptops, sind die Akkus des MacBook genau geformt, so dass sie in das "terassenartige" untere Gehäuse passen. Jede einzelne Zelle muss genau eingepasst werden, sonst schließt das MacBook nicht richtig und kann beschädigt werden.

    • Es kann sein, dass die einzelnen Zellen deines Ersatzakkus mit einer dicken Plastikfolie zusammengehalten werden, damit sie bei der Montage in der richtigen Position bleiben. Entferne diese Schutzfolie erst, wenn der Akku komplett eingebaut ist.

    • Wenn dein Akku auf der Bodenseite schon mit Klebestreifen versehen ist, dann kannst du jetzt die Schutzfolien abziehen, um die Klebeflächen freizulegen. Wenn keine Klebestreifen angebracht sind, dann befestige dünnes doppelseitiges Klebeband z.B. Tesa 61395 auf dem unteren Gehäuse in den rot markierten Bereichen.

    • Setze den Akku vorsichtig an den richtigen Stellen ein. Drücke jede einzelne Zelle gegen das untere Gehäuse und halte sie 5-10 Sekunden lang fest. Danach kannst du die obere Schutzfolie und etwas Schaumstoff ablösen.

    • Nur bei 2015er Modellen: Nach dem Zusammenbau musst du das MacBook mit einer Niederspannungsquelle verbinden, bevor du es anschalten darfst. Wenn du das nicht tust, kann dein Logic Board beschädigt werden.

    • Kalibriere deinen neu eingebauten Akku: Lade ihn auf 100% und lasse ihn mindestens zwei weitere Stunden am Ladegerät. Ziehe den Stecker und benutze dein MacBook normal, um den Akku zu entladen. Wenn die Ladeanzeige am Minimum ist, dann speichere ab und lasse den Laptop an, bis er von selbst ausgeht. Warte wenigstens 5 Stunden und lade dann auf 100% auf.

    • Wenn dir nach der Installation deines neuen Akkus etwas Ungewöhnliches auffällt oder Probleme auftreten, kann es sein, dass du den SMC deines MacBooks zurücksetzen musst.

    hola a todos, yo le he cambiado la batería a todos mis Macbook pero el cambio de esta batería fue verdaderamente aterrador, les recomiendo que si está en su posibilidad económica pagar a un agente autorizado o una macstore hagalo, el cambio de mi batería lo realice yo y fue satisfactorio, pero me faltaron muchas herramientas. el Macbook no encendido a la primera destapar revisar volver a cerrar. la batería tiene una pega extremadamente dura y me costo mucho sacarla Suerte

    jesset81 -

    hello to all, I have changed the battery to all my Macbook but the change of this battery was truly terrifying, I recommend that if it is in your financial possibility to pay an authorized agent or a macstore do it, the change of my battery makes it  me and it was satisfactory, but I lacked many tools.  the Macbook not turned on the first uncover review close again.  the battery has an extremely hard tack and it cost me a lot to take it out, luck

    jesset81 -

    To remove the battery, I applied acetone on the edges of the battery. Kept it tilted fir a few minutes and started prying with a credit card. Reapply acetone to the edge of the card, pry again, wait a few minutes and pry again. I thought it would be harder than it was. Removing the battery and all adhesive probably cost 30 minutes work.

    vanblerk123 -

    I found after reassembly I had no response from the display, although I could hear the boot up sequence and USB-C cable insertion audio. After reset of the SMC I at least began seeing the backlight on boot. Subsequently forcing entry to diagnostics mode caused the display itself (i.e. graphics) to also come to life. The diagnostics found no issues but did seem to trigger the display to start working... hopefully helpful to someone.

    Paul Richards -

    I managed to fit the battery with the help of this guide, but I have turned it on, and it does not recognise the pad or the keypad and yet it recognises the keypad button to turn it on and off.

    The start screen shows, but I cannot put my password in because the keyboard doesn't work and yet it went into a mode telling me to use a Bluetooth mouse which I did that connected and the mouse cursor works but then tells me to attach a Bluetooth keyboard. So the keyboard and the mouse pad on my retina does not function. Has anybody got any suggestions? Are there any of the connectors inside that I took off that out the obvious ones to check the connection?

    david p white -

Abschluss

Um das Gerät wieder zusammenzubauen, folge der Anleitung in umgekehrter Reihenfolge. Um Schäden an der Hauptplatine zu vermeiden, solltest du, wenn du die Reparatur abgeschlossen hast aber bevor du es einschaltest, es mit Schwachstrom verbinden, indem du einen 5-Watt iPhone Ladestecker und ein USB-S zu USB-A Kabel benutzt.

Bitte entsorge deinen Elektroschrott fachgerecht.

Hat die Reparatur nicht den gewünschten Erfolg gebracht? Gehe zu unserer Community, da kann dir geholfen werden.

Jeff Suovanen

Mitglied seit: 06/08/13

407162 Reputation

71 Kommentare

Beautiful. ‘Followed the instructions to a T. No issues at all. Thanks!

Peter Rasmussen -

Everything worked, except the keyboard. No backlight, no power. Using remote keyboard for now. Any ideas? Trackpad works fine.

Neal Abrams -

@nabrams1 Check both cables that connect to the trackpad—make sure all four connectors are clean and fully seated, and that the cables aren’t damaged in any way. The first cable connects the keyboard to the trackpad, and should not have been disconnected, but check it anyway. The second cable connects both keyboard + trackpad to the logic board. Good luck!

Jeff Suovanen -

I did try all of those and checked the cables and ZIF connectors under a microscope. I am thinking a bad trackpad now since it works fine, but the keyboard does not respond. The only way I have figured out o use the machine is to disconnect and reconnect the battery, which is not easy. Otherwise, I cannot power it on myself since the power button is part of the keyboard. Apple won’t touch this now since I replaced the battery myself, so it is kind of a brick. I can’t run AHT since the keyboard doesn’t respond (command-D). Any ideas?

Neal Abrams -

Bad trackpad seems possible. If the keyboard was working before the repair, there may be damage to the trackpad or the logic board itself. It’s hard to say without swapping out parts to test, unless you have a microscope + multimeter + board schematic, and we’re rapidly getting out of DIY territory there. I’d probably take another look at the cables and sockets just to make extra sure it’s not something simple. Hope this helps!
Jeff Suovanen -

@nabrams1 Anecdotal, but: someone on our 2016 MacBook teardown commented that their keyboard also stopped working (amongst other things) and that replacing the trackpad did indeed sort things out. So, probably worth a try. ;)

Jeff Suovanen -

Huzzah! I ordered a tracked replacement else suffer bricking my MacBook. All is better and I am typing from the machine right now! I will add a comment to the trackpad replacement, but my machine had T4, not T3 screws. I stripped a couple on the removal. In the end, this was more expensive than Apple replacing the battery, but there is a sense of triumph! I was also bitter since Apple had already replaced the keyboard and screen due to recalls. I wanted to DIY this one. Thank you Jeff!

Neal Abrams -

Awesome!! Thanks for the update :D

Jeff Suovanen -

All in all a pretty easy replacement… if it weren’t for the arduous removal of the adhesive!

My device doesn’t have a tri-point screw as mentioned in Step 14, but aside from that, nice writeup!

iamdravenman -

Same here, follow instructions, READ throughly and you’ll be fine. Watch for those little connectors, WiFi especially (fragile !). No tri-point screw in 14 either, just a phillips type. As for the adhesive removal I used 70% tech alcohol + 30% acetone mixed together + little spatula that came with battery (bought at Aliexpress). After assembly I connected phone 5V charger as suggested. All worked out fine. Just time consuming :)

Hubert H. -

My 2015 macbook does have the tri-point screw Y00 and i only had the crew driver Y0 and Y1 which are to big :-) so made the quick route.

Step 14 T5 only and then steps 31 and 34 so I could tilt the pcb enough to remove and install the new battery.

I used the usb C to usb A cable with a iPhone charger after connecting the computer starte up, and everything is fine now 4592mAh and cycle 1 :-)

Hope that this battery last longer than the 272 cycles of the original battery. Thanks for the detailed description what makes at easier for me to judge if I will manage.

Gert Jan

Gert Jan Bollen -

I used the guide and it worked very well. I did not have the adhesive remover and simply used heat and a scraper to manually remove the batterie. I was very careful during that manual removal it worked very well. Because of that, I skipped steps 14-33 and I think I was better off. I simply lifted the logic board up and remove the battery while all the cables were in place. I feel this was better because there was less risk of breaking a connector or cable. I cut a lot of work out of the project and it went very well. I had it completed in about 45 minutes.

dhilbish -

Great guide - thanks a lot! Like another user I skipped steps 14 to 33. It was no problem to remove the battery without removing the logic board and all the other stuff. You only have to be careful to hold the body of the Macbook tight so that it does not move when you work on the battery.

Heating the glue was not sufficient, I had to go and buy the detergent.

Christian Schmidt -

After performing the steps, and the low power startup procedure, on initial startup I had chime, the battery charging image (48%) and then the screen went gray - and the mouse pointer was on the screen and it would respond to the trackpad. Then the screen went squirelly (kinda like it lost sync). I restarted the laptop and then the screen went blank. I’ve gone back in a couple of times to reseat the display cable, to no avail. And I’ve lost the keyboard lights. So I’m going to take a breather and try to perform steps 1 to 22 over again. Any advice?

bryanlethcoe -

I went back in and reseated the trackpad ribbon cable and reclosed the ZIF connector, which restored the keyboard. I used an external monitor to confirm that the laptop is booting up. I also reseated the display cable, but that did not work. I have a new cable coming in a few days, and I’ll replace the current cable, hopefully to fix the issue…

bryanlethcoe -

Hi, I did everything as said on the guide, but my computer is totally dead. Nothing happens when I charge it, and I can’t turn it on. I thought there was a problem with the battery I bought, but now I got a new one, and it still can’t turn on. I have checked every connection 4 times, so is there anyone who has an idea to what I can do? I don’t have a usb-c to usb-a cable so I just used the normal charger. Could that be it? Thanks in advance!

Viktor Sorensen -

And the small led light on the logic board is lit.

Viktor Sorensen -

Hi,

A short way is also possible, take about 15-20min to change the battery for me.

DON’T do steps 8-9-10, disconnect the ZIF connector on the motherboard side only.

SKIP steps 15>>30, only lift the motherboard by placing a pencil eraser under it, and finally SKIP step 35.

For detaching the battery, a credit card also work, no need detergent

Work great for me.

munnin -

I used your approach after I opened the computer and quickly realized that I didn’t want to disassemble so many components. I also read some comments from people who made mistakes during putting everything together again.

The hardest part was removing the battery while the computer was opened with a 45-60 degree angle while making sure the the ‘prop-up stick’ didn’t fall out resulting in the top half of the computer falling down. Man, that battery is glued in there so well, was hard to remove it. (even using everything that came in the ifixit repair kit.

I was so happy when after plugging in the computer and pressing the button I heard the startup sound.

Job done!

Corjan -

Excellent instructions. My first time opening a macbook. I did see the route to the short way some mentioned as I was going through the steps, but it would not have worked for my repair. I had to get in there, battle the adhesive (still using remover), and pick the bits off which would have been near impossible if it wasn’t fully opened without risking those connectors. Last battery lasted 970 cycles comfortably; I don’t know if heavy use, travel, dirt, heat, etc. really cemented my battery adhesive. Having it fully apart allowed me to be meticulous about getting it clean and perfectly seated as well. If you do purchase the kit and have the 2015 macbook be prepared to have a PH00 on hand if the Y00 screwdriver tip doesn’t fit (step 14) or the ability to run to the store real quick. Thumbs up to the writer of the guide! Thanks! Saved me a good amount of money with excellent DIY instructions.
Brian Betka -

Thank you very much, excellent instructions. My issue is that, after completion, the Macbook (early 2015) neither starts / wakes up automatically from the lid opening action, nor does the keyboard or trackpad cause any input whatsoever. I have double-checked all 4 connections of the ZIF connectors/cables as mentioned by you in the earlier answer to a comment. Could there be another bigger issue? The display displays everything correctly as it was before the battery replacement…

Andreas Stargard -

Hello! The new battery didnt charge, the battery status is still Replace now like on the old battery! Any help please
Vladimir -

Thanks for this, I will start replacing the battery but not sure the issue come from it. I managed 2 days ago booting the laptop up but now when it is boot up only the track pad respons ( i can fell the haptic return ) . Any Ideas?

Gigi -

Excellent instructions on the battery replacement for a battery that had failed and reporting service battery after 530 cycles, a big thanks to the author. After completing them the MACBOOK worked OK and then I started to get intermittent problems with the power button and the system bringing the shutdown dialogue without pressing the power button. On closer examination and second removal of the trackpad IPD flex ribbon cable (which also routes keyboard signals to the logic board) the cable came apart at the fold half way along the cable. This cable is very fragile and as mentioned in step 7 you need to be very careful on handling them. In my case I think the cable was fatigued or mechanically damaged where the fold was during manufacture . A replacement cable has been installed and the laptop now works ok.

I have also posted this comment on the trackpad repair fixit.

Mark Timms -

I was able to replace my battery with the help of this website and my computer is working like a champ! Thank you so much!

tifinnie05 -

Even though I had the screwdrivers necessary for this project, I purchased the entire battery replacement kit which made everything a breeze. Make sure to also have a box of ziplock bags and a sharpie so that you can keep all of the screws organized. And some painters tape to keep the opened laptop held in-place to a 90-degree surface while you’re working on the ribbon removal. For the 90-degree surface, I used another opened MacBook… but a wall would work also. It definitely helped to read the comments, particularly when it came to the “tri-point screw” removal. For me it was simply a Phillips screw. The one frustrating part of this process was removing the Phillips screw that held the USB C connector in place. It was necessary to take a piece of high-grit sandpaper to the screw that was provided in the kit, because the tip was far too pointy for the small screw. After that, everything went smoothly.

darren floyd -

Hardest point for me was not having the exact tri-point screwdriver

(it’s one thing I fault Apple on, as it was unnecessary to have two types of screw on one cable).

I used standard Lighter Fluid (easily available in the UK) to remove the batteries, which was far less trouble than I thought it would be. ( I’ve used it before to remove sticky label residue, so, figured it would work).

Really useful guide, thanks for the tip on the 5w (5V - 1A) iPhone charger. Everything appears to be working!

Stuart -

Great instructions, I had two issues step 14 which was the removal of the 3.5 mm screw but eventually managed to remove it. Second, (user error) the Zif connector must have had some dirt or something because once everything was re-assembled the keyboard and trackpad did not work. I cleaned the connector, double-checked all the other cables and the issue was resolved. Other than these two items, make sure to follow step by step.

Giuseppe Greco -

Connected to 5w charger and I don’t get the chime and the battery icon how long do I need to leave it .cheers

Ian Bentley -

All Sorted lose connection

Ian Bentley -

Excellent instructions, and easy to follow with great pictures that make everything crystal clear. I purchased the replacement kit and had absolutely everything I needed to complete the repair in less than 2 hours. Works as advertised. I had to reset PRAM to get the battery to start charging.

Jack McHenry -

Hello

I have changed my battery with success but I can’t have my camera any more.

Any idea.

CharlyC -

Work like a charm after the battery is replaced. The removal of the adhesive takes hours but Isopropyl alcohol comes to the rescue :-)

chiew lee -

Would it be easier to just get a new bottom case w/ battery pre-installed?

Bryan Terry -

I tried all the steps and replaced the battery. However, I used the computer charger to plug in the computer. The computer gave the chime sound but nothing came on. No apple logo. I can hear the wire connection but when I press the power button nothing happens.

Emmanuel Bhatti -

Do you know why my new battery is not charging and how to fix it?

I have installed a new battery, then first connected with a 5 watt iPhone charger. Subsequently, charged it with my MacBook charger to 100%. The charger was working normally. For calibration I drained the battery by normal usage until the Mac fell asleep. Five hours later I connected the charger, nothing happens. When I push the power button, the low battery symbol is shown with the symbol I should charge.

Frankmac -

My second new battery is having exact the same problem. After battery drainage, when the 5 watt iPhone charger is connected, the battery led on the motherboard is on. As soon as I remove the 5 watt iPhone charger, the led turns off. When I connect my regular MacBook charger, the led does not turn on.

Frankmac -

It’s normal for the machine not to boot up right away after a deep drain on the battery. Plug the charger in and leave it for 30-60 minutes, then try turning it on again. The battery charge symbol on the screen is not normally an indication that anything is wrong with the battery; it just means there isn’t enough charge in reserve for the system to safely boot up quite yet. Just give it a little time.

Jeff Suovanen -

Thank you for your reply Jeff. The 5 W iPhone charger and regular MacBook charger have been plugged in for several hours. When I try to boot it afterwards, nothing happens. In the beginning the battery charge symbol was there, later it was not (probably because the battery was fully drained). Is there another explanation why the battery is not charging? I have ordered a second new battery.

Frankmac -

I followed the instructions and everything works but the audio. I’m pretty excited that it’s working and I’ll go back in and tighten some things later this week. The headphone jack didn’t work either.

Robin Gunn -

Hallo, wie beschrieben ist der Akku eingebaut, wird erkannt, aber leider wird der Mac nicht Strom versorgt. Der Mac schaltet sich ohne externe Stromversorgung ab. Was habe ich falsch gemacht?

Marcus Stiller -

Versuchen Sie, die SMC zurückzusetzen

Daniel Philips -

I did every step and I replaced the battery but now my MacBook doesn’t start, she only chimes, the chime cuts when almost finishing and then nothing, I don’t get a charging screen. The led inside tells me there’s power but I don’t know what to do now.

MRZO Gaming -

I disconnected the battery two times and nothing changes!

MRZO Gaming -

If you are technically oriented, this is a good guide to replace a 2015 MacBook battery. I did this work myself after reading the how-to. Delegating to an Apple repair person seemed fraught with too many places to mess up. Apple doesn’t have a good track record of owning up to mistakes.

Make sure to read the comments. There are a couple of issues in the how-to description that can lead to a bad outcome. Overall, it’s a good how-to guide.

For me, steps 15 and 22 were critical. Read the comments. If after replacement power doesn’t come on, it could be step 15 during re-assembly. Not easy to diagnose because damaging the logic board (despite following instructions and precautions) is always a possibility. If power comes on but the screen remains black, check step 22.

Most of the steps involve seating connectors into sockets for which there is no simple correctness check. Following the instructions carefully will help prevent damaging the laptop. And you can retrace the steps to debug problems.

Ki Park -

Great instructions and photos. I would emphasize the delicate ribbon cables don’t like to be twisted. I was almost completely finished reassembling, when I over twisted the trackpad ribbon cable and it broke into three pieces. A quick order and I had the replacement in a couple days. The final battery replacement worked perfectly. Thanks for the great guides!
Chris -

Make sure you get a PH000 screwdriver and you dont need any extra tape, comes pre applied!

Lane Hayes -

Followed guide step by step and it worked perfectly. For those with the 2015 model and the 5v charger don’t panic if you don’t get a tone or battery icon after fifteen minutes. Mine took nearly 45 to boot up. Be patient before you think of tearing it apart and having another go. Great guide!

kevin mauthe -

Changing my Macbook battery by myself was probably the one of most stressful things I’ve ever attempted, but the instructions were very clear, and the part kit was great. One problem on step 14 (It’s not a tri point but a philips head), however I thankfully had one small enough in my garage. Also struggled a little with the adhesive on the cable in step 21. I think the idea is to separate the cable from the adhesive, or separate the cable and adhesive tape from the case? Also, when calibrating the battery, it’s turn on with the low voltage, then switch to the normal voltage to charge. I was worried it wasn’t charging, then realized I needed to change the voltage back to normal, after powering it on.

Thank you for this great resource and service. Hopefully many more people will be inspired to repair their devices, and not continue to trash the planet.

Paul Campbell -

anyone else having an issue where they need to keep opening the laptop and resetting the battery? i only just installed it the other day it was working fine for a couple days and then it’s started playing up. after reboots it won’t start up properly either i have to give it it’s time (a good hour or two) and then it might decide to switch ON or the best way it so open it up press the little button to “turn off the battery” and then just put it back together and powers up straight away. super strange

Albert -

es necesario cargarlo con que tipo de cargador de iPhone , podría mandar una foto porque el cuadrado es usb a lightining , otras marcas tienen cable de usb a entrada usb C .

Jiri Ramos -

Chime, chime, chime and nothing else… no low battery light nothing and it’s about a half chime. I have tried a few time in the last few days unplugging and plugging it back in. The chime stops after a while then starts up again. I painstakingly followed the removal and replacement directions and now the computer will not fire up with the iPhone charger as directed. With my old, completely dead battery it would at least start up before if I kept the computer plugged in. It is a 2015 model.

Has anyone received any answers beside there may have been a problem with the install? “If the MacBook fails to power on after 15 minutes, there may be an issue with your repair.”

Is there another procedure to follow?

Help me please… thanks

Mike A -

I followed this guide and it worked perfectly, except for one thing - I had no audio. I took the whole thing back apart, checked all the connections, put it back together…still no luck.

I reset the PRAM and the SMC, with still no luck. I figured I must have damaged one of the cables, so I ordered replacement parts, and prepared to return it to the client. But before I did that, I wanted to make sure I exercised the battery, as the card that I received with the battery from iFixit advised. So I charged it to 100%, turned off all the battery management and played YouTube videos all night to run it all the way down.

The next morning, it was dead as a doorknob. So I charged it for about 5 minutes, pressed the power button and all the sudden it was working!

Wyandotte Duplexes -

How long should the iPhone charger be hooked up before switching to the MacBook charger?

Thomas Schultz -

This step might be what you’re looking for!

Carsten Frauenheim -

Ottima guida, dettaglio e qualità delle immagini perfetto. Grazie

Paolo Tardocchi -

I just successfully completed this battery replacement on a 2015 MacBook that I picked up on eBay for a song (the original battery had 1,068 charge cycles on it and it wouldn’t hold a charge anymore). The instructions are easy to follow, and the hardest part for me was getting the new battery aligned just right to fit the terraced parts of the case before the adhesive made it impossible to shift. To anyone else who attempts this repair, don’t overlook the instruction to plug in the MacBook to a 5-watt charger before powering up the first time. I was thankful to be told of this quirk in these machines. Many thanks to the author for this writeup!

John Jarvis -

I did this repair with the ifixit kit and it went almost perfectly. The macbook is as new again with a 5369 mAh battery.

10 min. Preparation and setting up my workplace. This was well worth the time and it helped a lot during the rest of the work to have everything close at hand.

15 min. Taking apart the macbook, then a little break. All the right bits were included. Only the tweezer was not very useful since it is a bit slippery.

30 min. Removing the old battery, with plenty of time for each part of the battery to soak in the solvent. Removal was pretty easy with the provided cards and did not need much force. I stuck some plastic packaging underneath each loose battery to prevent it from re-adhering since the kit only had two plastic cards included.

20 min. Cleaning the lower case of all the old sticky stuff. This was a lot more work then I expected, but worked out fine. The provided solvent and cleaning cloth was very helpful. I cut the cleaning cloth in three pieces beforehand to have a clean piece as spare.

Arie Machgeels van Ziel -

[continuation of previous post]

5 min. Putting in the new battery. Very easy to do with the pre-attached tape and transparent plastic cover sheet.

15 min. Re-assembling the macbook. Some of the tape at connectors would not re-attach, but this did not cause any problems so far.

5 min. Safe-charging with the 5W iPhone charger. I almost directly got the familiar chime sound and the macbook started without any problems.

After charging the battery fully with the normal Macbook charger I'm now using it again to type this review. Now just calibrating the new battery by using the Macbook and then it can hopefully be used for many years to come.

Total repair time (excluding breaks): 100 minutes.

Thank you iFixit for providing this guide and the very useful and complete repairkit!

Arie Machgeels van Ziel -

Just a heads up, after almost 2 months suddenly the battery is not found anymore by the system. See Why does my MacBook 12" A1534 say: Battery not installed? for details on my progress getting it to work again.

Arie Machgeels van Ziel -

I followed each step exactly - no broken clips or cables. Went directly to a 5W iPhone charger, but the laptop is dead - no life or charge at all. I cannot put the old battery back in since the new one is glued in place. Not sure what went wrong or what to try next

CJB -

To follow up, i plugged the laptop into it’s regular charger. It booted right up and everything is functional. However the battery indicator shows an ‘x’ through it. Battery status shows 1% charge and ‘Needs Service’. I can use the laptop but only with the power cord. Could the new battery be faulty? is there something I can check?

CJB -

The battery was bad and iFixit sent me a replacement. This time everything worked as expected and my MacBook is as good as new! Great customer service.

CJB -

Completed the repair. Everything worked nicely! Great guide with all the necessary detail!

Jochen Hager -

Followed the instructions and my MacBook 12” 2015 works again. I’m very happy with the battery kit and the instructions. Thanks a lot

paulholst -

Superb - thanks for the large amount of adhesive remover - needed it :-). All worked well - skipped 14-33 just proped up the MB

Adam Macgill -

Amazing guide - worked PERFECTLY, but boy did it require exquisite care and patience. I think this probably took me 6 hours, but I went about it very slowly.

Woodward Price -

Great guide. Followed it carefully and everything worked well.

Eyal Goldman -

Thanks for a great guide! A better close-up of the touchpad ZIF connector in its inserted state, tape pulled back as far as it goes for a clear view, would have been helpful. I wasn't sure if I had it fully inserted - the contacts stuck out a little bit, and I was applying more pressure than maybe I should have before realizing this is the correct insertion depth.
Realizing I needed to follow it backwards for reassembly was a little frustrating. I get that everything we need is already in there, but would have preferred straight-forward reassembly instructions to save time and be more confident that I'm putting everything together correctly, since there's a lot that can go wrong.
As for my repair, it went well! There was no sound at first. Not sure why- I opened it back up, and the audio ribbons all seemed properly connected. Disconnecting/reconnecting did the trick.
Breathing new life into the Macbook with a fresh battery & upgrade to Ventura using OCLP, it feels new again after 8 years!

Wolf Ruhmann -

I completed this guide without incident, but plugging in to the 5V/1A charger didn't give me a chime. (I left it plugged in to that overnight just in case.) When I reassembled, screwing in the screw in step 12 turned on the faint white LED, which I understood to mean that the new battery was making good contact. The ribbon cable from the USB-C port also seemed to click back in place with no issues. I plan to disassemble and check both of these again (along with the grounding clip), does anyone else have any more suggestions for things to check when I open it back up? I'm handy with a multimeter if that helps.

R McP -