Einleitung

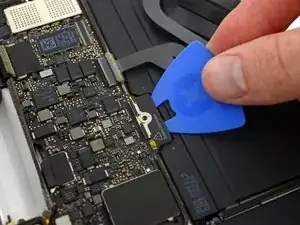
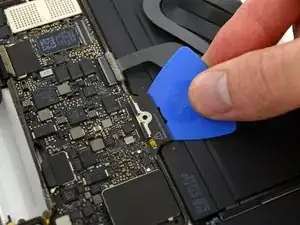
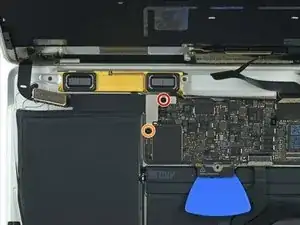
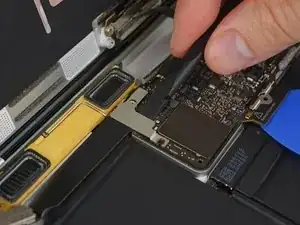
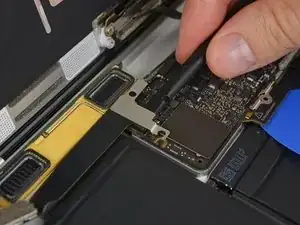
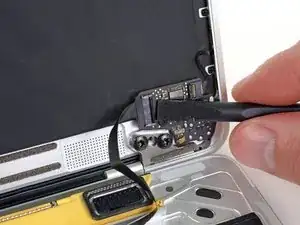
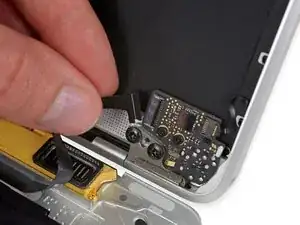
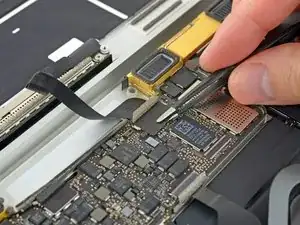
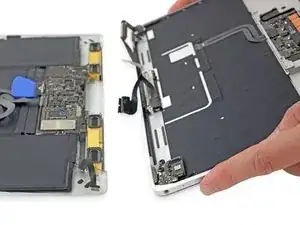
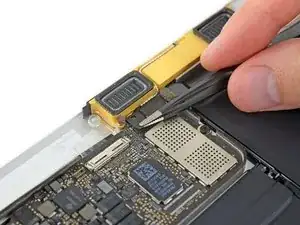
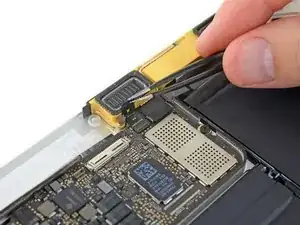
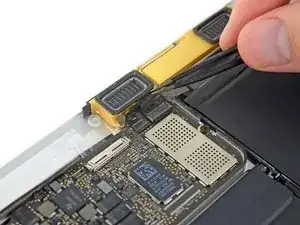
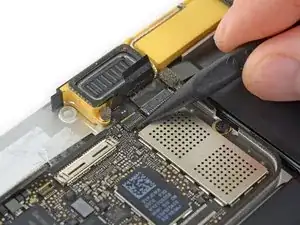
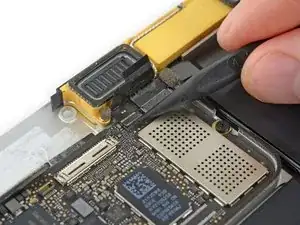
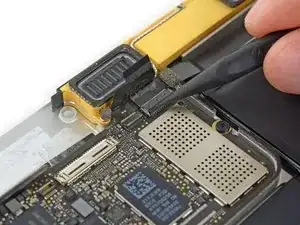
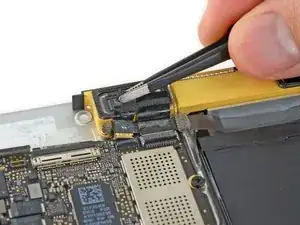
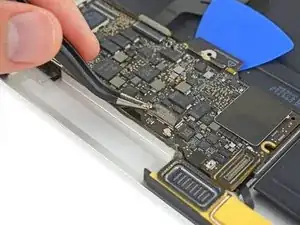
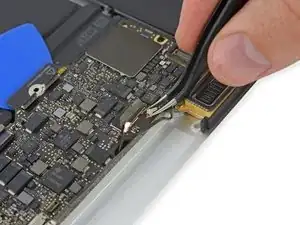
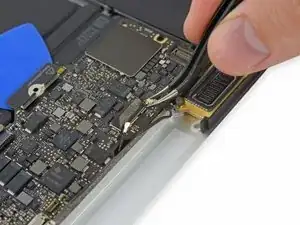
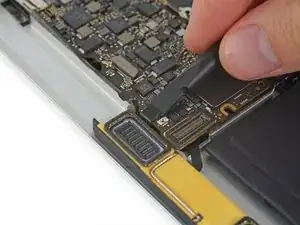
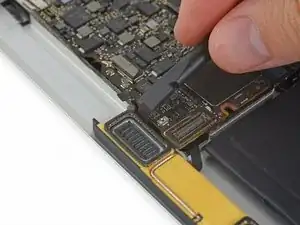
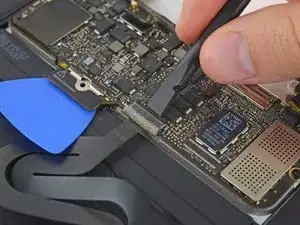
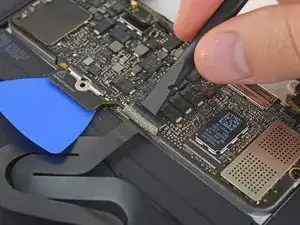
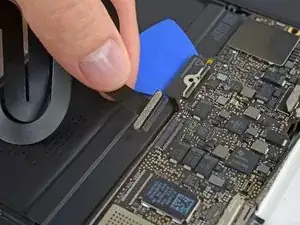
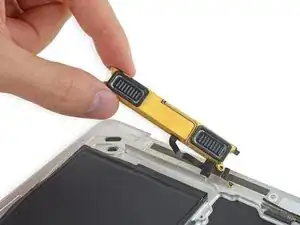
Ersetze den linken Lautsprecher in deinem Retina MacBook 2017. Ein Teil der kabellosen Antenne ist ebenfalls im linken Lautsprecher enthalten. Benutze diese Anleitung, um den Lautsprecher sowie die Antenne als eine Baugruppe auszutauschen.

  1. dLTjRC36EADiCFBK
    dLTjRC36EADiCFBK
    FZYKkYtpGq1QwBO2
    YAOsWGKtCtOGVFRy
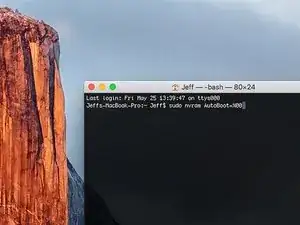
    • Zuallererst musst du die automatische Startfunktion (Auto Boot) deines Macs deaktivieren. Auto Boot schaltet deinen Mac ein, wenn du ihn aufklappst, was versehentlich beim Auseinanderbau passieren kann. Benutze diese Anleitung oder befolge die anschließende Kurzversion zum Deaktivieren von Auto Boot. Dieser Befehl funktioniert eventuell nicht auf allen Macs.

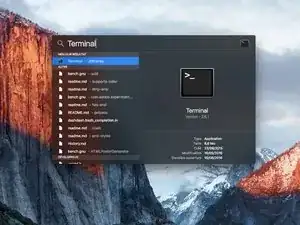
    • Schalte deinen Mac ein und starte Terminal.

    • Kopiere den folgenden Befehl und füge ihn im Terminal ein (oder tippe ihn exakt so ein):

    • sudo nvram AutoBoot=%00

    • Drücke die Eingabetaste [return]. Wenn du dazu aufgefordert wirst, gib dein Administratorpasswort ein und drücke erneut [return]. Hinweis: die Return-Taste kann auch mit ⏎ oder "enter" gekennzeichnet sein.

    • Nun kannst du deinen Mac sicher herunterfahren und das untere Gehäuse öffnen, ohne dass er sich versehentlich einschaltet.

    • Nachdem deine Reparatur zu Ende ist und dein Gerät wieder erfolgreich zusammengebaut ist, musst du Auto Boot mit folgendem Befehl wieder aktivieren:

    • sudo nvram AutoBoot=%03

    Is this step necessary? I can’t perform this step as I am attempting to repair water damage and need to remove logic board & most likely replace the battery.

    Macrepair SF -

    @mac_medic You definitely don’t want the power coming on while the board is wet. In your case, I think powering on the machine to disable Auto Boot would do more damage than it prevents. I agree, skip this step and be prepared to disconnect the battery quickly if the laptop automatically powers on. Good luck!

    Jeff Suovanen -

    Thats right! You don't want power running while working on your logic board.

    Dan -

    This did not work when running High Sierra.

    Kyle B -

    Tried this on a 2018 MBP 13” Touchbar (there’s no iFixit guide for this model yet). Need to replace a broken screen.

    Luckily I managed to connect to an external screen (Cmd-Down Brightness to switch displays) and enter above command. Seems to work, but there’s another problem with this model - it powers up as soon as any key is pressed……. ffs <gnashes teeth>

    Cool_Breeze -

    I unscrew the battery first and wrap electrical tape over the logic board battery connector before attempting any repairs to the board. Haven’t had any problems yet and I’ve worked on about 10 of these models already. Also when you open the bottom case use a suction cup at the bottom and pull up then run a plastic spudger along the edges to disconnect the clips. Also only use a plastic spudger on the board. Saw a youtube video from a repair shop and he did not disconnect the power and used all metal tools during the entire process of removing the board. His last step was to disconnect the battery terminal.

    Brian -

    Is this step necessary if my mac can turn on? Battery fully dead(

    Nursat b -

    BEFORE YOU START: The included torx head stripped off before I was done (and you might need an additional T4) so stop now and go buy a good one. Also they fail to warn you above to get some blue threadlocker ahead of time.

    Jason Sherron -

    This command did not work for me and I read that sometime in later 2020 Apple stopped this command from working…any ideas on a work around?

    Patrick Machacek -

    Not able to do that with damaged screen

    richardjgreen -

    If you have a damaged screen you can still use a converter from thunderbolt (USB 3) to HDMI and plug your Macbook Pro to your TV as monitor display. Just make sure to chose the right Source (HDMI IN) in your TV. I did it and to make it work I unplug and plug again in my Macbook and so I could disable the Auto boot

    Roberto Sanchez Bustos -

    Hi. This does not work on 2018 13” MacBook Pro with Touch Bar. I did exactly this to disable auto boot. But when I check by using nvram -p it says: auto-boot true. Am I doing something incorrectly? I did everything step by step. Copied and pasted the sudo command, pressed enter and then entered my password. I have Big Sur 11.1 installed. Is there any other way since I need to replace the screen. Thank you. Adrian

    Adrian Vizik -

    Hi everyone. This is also a little pointless if you can’t see anything on the screen, and you don’t have a display adapter to USB C to display it. I agree with Brian about removing the back and disconnecting the battery cable before you even think about opening the lid of the MacBook. Applying the insulation tape is also a handy little tip that just makes sure there is no way to discharge from either the board or battery.

    Roberto Enrieu -

    running `nvram -p | grep 'AutoBoot'` in terminal verifies that it was accepted

    result: `AutoBoot %00`

    Marek Polák -

    Running Big Sur 11.6.7 on a 2019 16" MBP, it's "auto-boot". So it's: nvram -p | grep 'auto-boot' to display the current state, the default is true - and then to change it, sudo nvram auto-boot=false which turns it off.

    Ed Mechem -

    This step is completely unnecessary if you follow the guide to disconnect the battery properly. Just put some tape between the battery and logic board connection to prevent it from accidentally touching and therefore powering on the laptop.

    Grant Ormsby -

    It took me a few tries to make this command work, as I was able to copy and paste the command into Terminal, but could not type in my laptop’s password. I finally typed my password into a text document, copied it (command C), and then pasted it into Terminal and it worked.

    tommy404 -

    I didn’t do this. Mine never auto-booted before I replaced the battery. Now it does.

    hatuxka -

    BEFORE YOU DO ANYTHING - CHECK THE BATTERY!

    I-fixit sent me a bad battery, which I didn’t realize until it was already install. They sent me a new one, but I wasted hours uninstalling and reinstalled.

    Get a volt meter and measure the voltage on the output of the battery pack. If it reads 0 V, SEND IT BACK. It should read over 2 V.

    bcardanha -

    When I did this from Terminal.app within Recovery Mode, the “sudo” was not recognized but I could invoke it without the sudo part. It seems to have been accepted when looking at “nvram -p”

    johann beda -

    When in Recovery Mode, you already have superuser powers. So you don't need to prefix commands with the sudo command to invoke them with root privileges; you already have them. Do a pwd (print working directory) after opening Terminal in Recovery Mode, and you'll see that you're in the root user's directory.

    Ed Mechem -

    I received the battery kit for my 2018 MacBook Pro and as per the above comment from bcardanha - Oct 12, 2021, I checked the voltage on the pads marked + and - . It was zero volts so I panicked a bit.

    I sent a message on the iFixiT Facebook page and I got no reply. I finally found the customer service email for Ifixit Europe and sent them an email voicing my concern as I was not keen to work for couple of hours just to discover that the battery is faulty. I had an almost instant reply on the email (kudos to them) and they adviced me to go ahead and install the new battery as the voltage measured when battery is not connected is not relevant.

    I took a leap of faith and after two hours… the new battery showed 50% charge and everything seems to be working just fine. I am happy it worked.

    Mircea Comanici -

    After removing the old battery and installing the new battery I powered up the MBP before screwing the bottom on. I discovered the my keyboard would not function. It took a few hours of investigation and frustration that I discovered the track pad power ribbon had become partially dislodged from the trackpad. I was able to see that this through the little machined slot where the battery sat. I had to remove the trackpad to reinsert the power ribbon back into the connector in the trackpad. after reassembling and reinstalling the battery etc the keyboard worked. Just food for thought if your run into the keyboard issue.

    Ed Mease -

    This should be the default. IMO I tell you to power on - not the lid.

    G Sena -

    Est ce que cela fonctionne sur un macbook pro 2017 sans touchbar ?

    maël muzelet -

    Bonjour Maël, oui, ce tutoriel concerne "les MacBook Pro 2016 (et plus récents) et les MacBook Retina 12" 2017 (et plus récents)"

    Claire Miesch -

    Excellent instructions. I was able to follow and install the new screen. I recommend that you get a good set of tools before you begin. I started with an inexpensive repair kit bought online. The Penta and torx bits failed. I bought an IFIXIT kit with quality bits and I was able to do everything I needed.

    Tom Markham -

    If you're not running an admin account the sudo command won't work (which honestly, you should not be running admin). Rather than logging in to your admin amount via the OS, in the terminal type "login [admin username]," then the password and you'll be able to do the sudo command as described above. Once you're complete, type "logout [admin username]" and you'll be good to go. Obviously replace [admin username] with whatever the account name for your admin user is.

    arichard2401 -

  2. WTpjAPhBML2eX4Z1
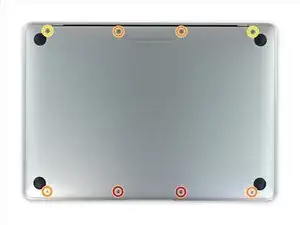
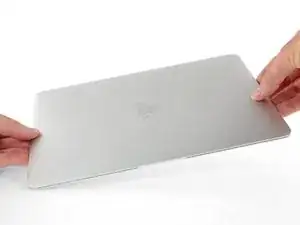
    • Bevor du weiterarbeitest, ziehe das Netzkabel und schalte das MacBook aus. Klappe das Display zu und lege den Laptop mit der Unterseite nach oben auf eine saubere weiche Arbeitsfläche.

    • Entferne folgende acht Schrauben, mit denen das untere Gehäuse befestigt ist:

    • Zwei 1,8 mm Pentalobe P5 Schrauben

    • Vier 2,9 mm Pentalobe P5 Schrauben

    • Zwei 6,1 mm Pentalobe P5 Schrauben

    • Schaue dir beim Ausbau die Lage der Schrauben genau an - sie müssen beim Eindrehen leicht schräg stehen.

    • Halte bei der ganzen Reparatur die Schrauben gut geordnet und passe auf, dass jede Schraube genau auf ihren alten Platz zurück kommt, damit keine Schäden am Gerät entstehen.

    IMPORTANT. You’re not removing the bottom, yet. This step is solely to separate the panel from its clips, permitting inside access.

    Chris Leeds -

    The screws go in tangent to the curve of the case. If you aren’t used to handling small hardware try turning the screw counterclockwise while you feel for the hole until you feel it drop, that means the threads have aligned. It takes only light finger torque when they are threaded correctly

    abscate -

  3. oFRbloAsCqR4kMZO
    oFRbloAsCqR4kMZO
    o5lecdLOaMSsveUP
    OjOkolyUJbLFruoW
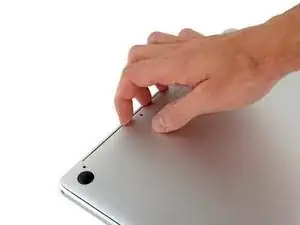
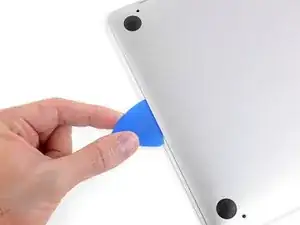
    • Zwänge deine Finger in den Spalt zwischen dem oberen und dem unteren Gehäuse. Beginne an der Rückseite des MacBooks zwischen den Scharnieren.

    • Hebe das untere Gehäuse nur ein wenig an, damit Schäden an den Kabeln, die das obere und untere Gehäuse verbinden, vermieden werden.

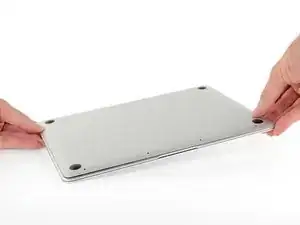
    • Fasse das untere Gehäuse fest an und hebe es gleichmäßig hoch, bis es sich vom oberen Gehäuse löst.

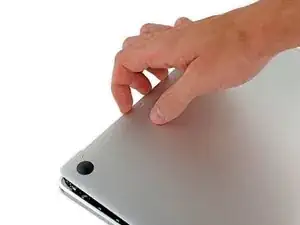
    • Möglicherweise geht das Hochheben des unteren Gehäuses schwer. Schiebe ein Plektrum oder ein anderes ESD sicheres Werkzeug an den Seitenkanten des unteren Gehäuses entlang , um die beiden versteckten Klammern zu öffnen.

    • Damit diese Klammern beim Zusammenbau wieder einrasten, musst du fest auf die beiden Seitenkanten des unteren Gehäuses drücken (in der Nähe des Plektrums im dritten Bild), bis du es einrasten hörst.

  4. v2ajYWLVaPyfdKBp
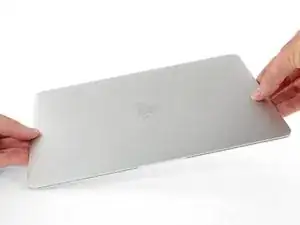
    • Halte das untere Gehäuse gut fest und drehe das MacBook vorsichtig um, sodass das Apple Logo nach oben zeigt.

  5. pYEJCQSeMGAEyFJM
    pYEJCQSeMGAEyFJM
    VjPKdFrhi2OEvgks
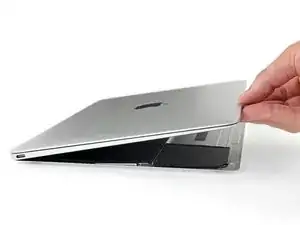
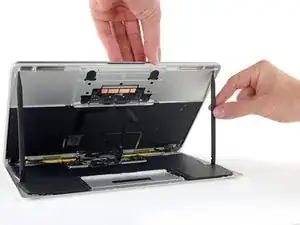
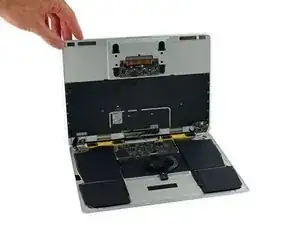
    • Hebe das obere Gehäuse und das Display zusammen von der Vorderkante her nach oben an, bis es mit einem Winkel von etwa 45° steht.

    • Es ist hilfreich, wenn du es in dieser Stellung für den nächsten Schritt abstützt.

    This displays two black pics to prop up the MacBook, but the kit only includes one black pic.

    Kyle Swafford -

  6. EXWTgtXS2vPBhGKP
    EXWTgtXS2vPBhGKP
    1JKIDRDVVFDBjMCr
    rUDUCKRgWBKStQAM
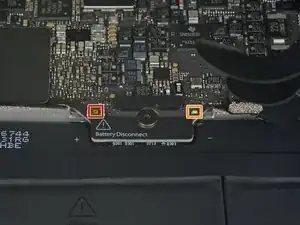
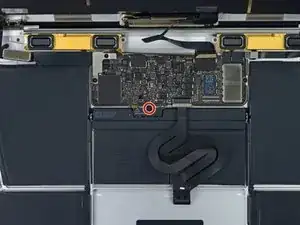
    • Drücke mit dem flachen Ende des Spudgers die goldfarbene "battery disconnect" Taste und halte sie fest.

    • Wenn die Einschalt-LED aufleuchtet, dann halte die Taste weiterhin gedrückt, bis die LED erlöscht. Das kann bis zu 10 Sekunden lang dauern.

    • Wenn die LED nicht aufleuchtet, dann lasse die Taste nach 5-10 Sekunden los. Drücke und halte sie für weitere 5-10 Sekunden und lasse los. Drücke und halte sie zum Abschluss erneut für 5-10 Sekunden und lasse los.

    • Durch dieses Verfahren wird sichergestellt, dass das MacBook ganz heruntergefahren ist und sicher daran gearbeitet werden kann.

    cannot turn on the led after replacing the new screen, even after following the turn on instructions upper…

    Laurent Pierre -

    on reassembly, I had to plug my laptop in to reactivate the LED light

    aaron_vandyke2003 -

    Does anyone know how to turn it back on..? I plugged the laptop in and saw the LED Light, but it won’t turn on

    mmcsorley -

    After reassembly I could not restart my MacBook using the power button or after SMC reset (shift-ctrl-option-pwr). I had to connect my MacBook to its charging cable to get the battery LED to re-illuminate. After that it was all normal.

    Richard Lovatt -

    It took a few minutes on the power adapter for my computer to turn on after it was reassembled.

    Luk Chl -

    mine doesnt turn on w anything, i forgot to click the buton to disconnect :_/

    cristian.campuzano -

    Same issue as above peeps. Followed ifixit directions verbatim and wasn't getting anything after screwing everything back in. Plugged in original 45W power block and waited, after few minutes battery LED came on and a min. or two after that, was able to get screen to turn on. Hope this helps somebody else.

    Brandon Elliott -

    May I ask how to get screen to turn on. I cannot get it work..

    Xiubo Zhang -

    For those whose Mac won't turn on.

    See step 16

    To reconnect this cable, first line up the metal bracket over the screw holes, then "PRESS DOWN" on the middle of the bracket.

    There is a connector under the bracket, which you can't see if you don't see under.

    Not having it in mind, you will not PRESS DOWN the middle of the bracket and there is no connect.

    hls2005 -

    There needs to be mention of procedure for getting the repaired MacBook to power up again after the repair is completed.

    I also am running into the issue described by others. MB will not come on again, even after being plugged into power and performing an SMC reset.

    Kinda stuck….

    Carlos Perez -

    Hi, I tried everything and my MacBook will not start up after replacing the bottom case with a battery installed. I decided to put back on the old case with the battery that needs servicing and it still will not power on. I am fairly experienced taking apart laptops I was an Apple service tech for 15 years. this has me baffalled. Any hints BTY the logic board does not show any power coming from the AC charger the power LED is not lit up

    eestern -

    I had trouble with this as well. What worked for me is to plug in power using the stock 29W USB C power brick that originally came with this Macbook. Trying other, lower powered, power adapters did not work. Use this advice with caution as there are multiple (i.e substantiated) comments that indicate that first power up should only be with a 5W adapter! So perhaps try this strict sequence: try with a 5W adapter, then and only then try with the 29W adapter. Or even slightly better, if everything else has completely failed, only then try full power 29W adapter.

    LexxOne -

    How long did you wait to get it power back on? I replaced my logic board and tried to connect the power charger but it doesnt still turn on.

    Herb -

    The easiest error to make when working on this motherboard if applying full voltage after re-assembly. According to the big A, the motherboard on these Macbooks need to be “woken up” with a 5 watt (phone size) charger. Applying the normal 29 watts may render your system unusable.

    Noah - Feb 18, 2021

    Hello Noah,

    It seems your remark is only valid for the 2015 and not the 2016 edition.

    David - Mar 3, 2021

    While it’s true that the internal documentation specifies this for a 2015, after frying 2 motherboards with a normal charger, I spoke with the engineers and they told me that this also applies to 2016 and 2017 macbook main logic boards. I say- It can’t hurt to try to wake them up with a 5 watt charger first! Please take 5 minutes to save your motherboard.

    Noah - Mar 4, 2021

    Noah -

    I plugged in my charger and the LED came on. The computer gets warm but the screen is not turning on. The keyboards doesn’t seem to respond to recovery options. Any suggestions?

    J'Trel Sapp -

    Hello in muy case the power LED does not go dark (off) . Holding more than 10 sec and nothing. Somebody?

    Flavio -

    The led light doesn’t turn off on mine either. Held for 10 sec 3 times and still on. How do I turn it off now? And will it damage the computer if I work on it with the light on?

    sfalba -

    Also, which way should the track pad flex cable face when reinstalling it?

    sfalba -

  7. 1xlLw6pjiuElshkZ
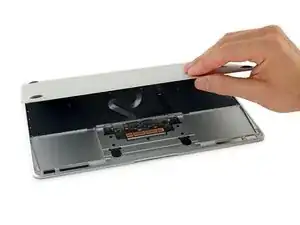
    • Schließe das MacBook und lege es mit der Unterseite nach oben hin.

  8. 2GYsPBbAwkEqs2xq
    • Hebe die Vorderkante hoch, bis das untere Gehäuse mit einem Winkel von etwa 45° geöffnet ist.

    • Achte darauf, dass die Flachbandkabel, mit denen das untere Gehäuse immer noch am MacBook angeschlossen ist, nicht beschädigt werden.

  9. lGBQcICtFaslxUHu
    lGBQcICtFaslxUHu
    uhunJJRpxlkLAvhl
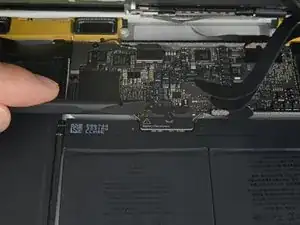
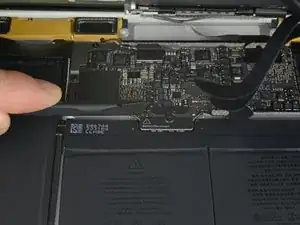
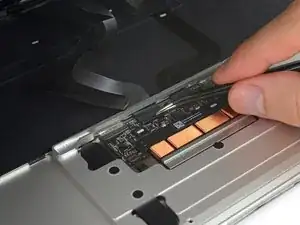
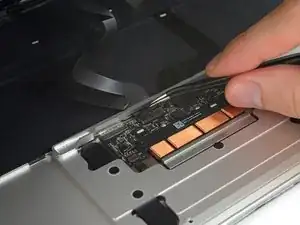
    • Löse mit einer Pinzette das Klebeband ab, mit dem der ZIF Verbinder des Trackpadkabels bedeckt ist.

    Where can I find a replacement cable?

    John Comix -

    Just worked on one that was missing the tape from the factory, so yours may not have it either.

    maccentric -

    that cable got damaged, and now my macbook won't turn on anymore. Does this cable prevent the macbook from working?

    ITZ CRONOMO -

  10. iImRKXAcEWwgyePw
    iImRKXAcEWwgyePw
    b3YwfdgUUlOCsXSy
    LMjS3bqlbWDB4ieE
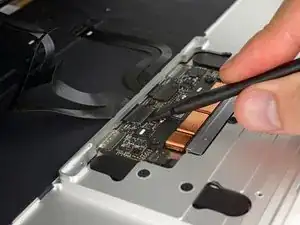
    • Klappe vorsichtig den Sicherungsbügel am ZIF Verbinder des Trackpadkabels mit einem Spudger hoch.

    The small retainer flips up about 90 degrees from locked position

    abscate -

    The keyboard and trackpad don't work after the repair, what can I do? They don't even show up in System Report.

    bredelet -

    I found that the connector was not pushed enough in. Works now.

    bredelet -

  11. WeOX4JZDcQrqklNd
    WeOX4JZDcQrqklNd
    qtXyAcpgiAVCBmVC
    • Ziehe das Flachbandkabel des Trackpads vorsichtig durch den Schlitz im Rahmen vom Trackpad ab.

  12. CDaHMX5h1aFsjtL2
    CDaHMX5h1aFsjtL2
    iLYAVQ2N3yLQFkvC
    XbPR6F5Pfwam2NkO
    • Schließe das MacBook sorgfältig und drehe es wieder um, so dass das Apple Logo nach oben zeigt.

    • Klappe das obere Gehäuse/Display Einheit etwa rechtwinklig auf und stütze es an einem stabilen Gegenstand, so dass du es nicht festhalten brauchst.

    • Klebe das obere Gehäuse mit einem Klebeband in der Nähe des Trackpads fest, so dass es sich nicht versehentlich bewegen kann.

    • Man könnte zwar das MacBook die ganze Zeit flach aufgeklappt lassen, dies ist aber nicht zu empfehlen, da die Flachbandkabel beschädigt werden können.

  13. KhNCZTtfaGxFvwMu
    • Entferne die einzelne 2,9 mm Torx T5 Schraube, mit der der Akkuanschluss am Logic Board befestigt ist.

    From my experience it’s important to carefully press and hold the small button above left of the Battery Discharge label. Use a plastic spudger or finger tip. The illuminated yellow LED to the right will go off. I believe this discharges remaining electricity from logic board protecting it during repair.

    * I cannot find any documentation to support this, but I have damaged boards by not including this step.

    Chris Leeds -

    I don't know what guide your on, but step 6 of the guide to replacing the USB-C cable has you press this button (3 times even).

    maccentric -

    What is with the all plastic end of this cable that appears to just be glued right on top of its connector?

    Does the new one just stick back right on top?

    (In this photo it is the bottom side of the cable below the white water indicator sticker)

    Elizabeth Erkelens -

  14. pTJmavEfBv2DXgVU
    pTJmavEfBv2DXgVU
    VUebfHZqvKTpapBB
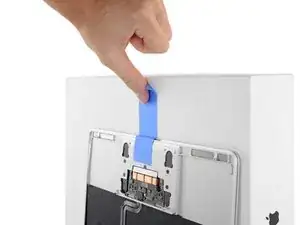
    • Als zusätzliche Sicherheitsmaßnahme kannst du den Akku physisch trennen, indem du ein Akkuisolierstück zwischen Logic Board und Akkuanschluss einsetzt.

    What happen if you don’t disconnect the battery? I didn’t and I saw smoke coming out when I connected the pad flex cable and the computer still started up

    DSANTIAGOSOY -

    If you don’t disconnect the battery you might accidentally short something on the logic board since power is still running through everything while you’re working on it. You can complete the repair without disconnecting the battery, but you risk accidentally breaking your logic board. It’s much safer to keep the battery disconnected while you’re working.

    Adam O'Camb -

  15. NxUtySGy3uWmfBTN
    • Entferne die beiden Schrauben, mit denen die Halterung des USB-C Anschlusses befestigt ist:

    • Eine 1,1 mm Kreuzschlitzschraube #00

    • Eine 3,5 mm Torx T5 Schraube

    I’m at this point and the 1.1 mm Phillips #00 screw won’t budge and now I fear it could be stripped? Now what???

    Y'vonne Feeney -

    You could try to cover the tip of your screwdriver with a thin rubber glove to improve the grip on the screw while applying a little more downward force for the initial jolt. That might loosen the screw.

    Tobias Isakeit -

    The USB-C ribbon cable breaks very easily when being attached. Any particular tricks for ensuring that it won’t snap somewhere while being installed?

    bfg737 -

    With my iFixit screwdriver kit, these were Philips #000, not #00.

    Paul Nishikawa -

    This was #000 for me as well

    Adam Hupp -

    I was at the 1.1 mm and couldn't get it open with the 00. I ordered the 000 but it still won't budge. I tried the glove idea and as much pressure as I'm comfortable giving. I'm pretty sure the screw is stripped. Any ideas or advice or am I in trouble?

    johnny gutierrez -

  16. aPJDUSEVa24G5wDu
    aPJDUSEVa24G5wDu
    fQXrJmJDGER4qs1d
    • Heble die Halterung des USB-C Anschlusses mit dem flachen Ende des Spudgers gerade hoch und löse sie vom Logic Board ab.

    • Um dieses Kabel wieder anzuschließen, musst du erst die Metallhalterung passend über die Schraubenlöcher legen und dann in der Mitte der Halterung nach unten drücken. Achte darauf, dass sie korrekt sitzt, sonst könnte der Stecker beschädigt werden.

    At re-assembling, when you reconnect this cable, pressing centre of metal plat is extremely important. You should feel tiny click when it connected properly. I encountered unrecognised external HDD and external monitor through USB-C even though charging in/out was OK, i.e failure of data transmission. I needed to re-open the back cover and pressed the metal plate again, then USB-C connection worked properly.

    Aki Mochi -

    After this step, I flipped the Macbook over once more and opened it up 90 degrees, supported on the back. Proceeded directly to step 25. Seems safer, those fragile connectors and flimsy cables give me heebie jeebies.

    maccentric -

  17. cnkkpqnImOJBKvGP
    cnkkpqnImOJBKvGP
    XcXlAMnXJVFGLOZA
    • Klappe den Sicherungsbügel am ZIF Verbinder des Kabels zur Audioplatine mit dem Spudger hoch.

  18. gWObarmSQqX4gWjO
    • Ziehe das Flachbandkabel zur Audioplatine gerade aus seinem ZIF Anschluss heraus und löse es ab.

    • Achte beim Zusammenbau darauf, dass das Flachbandkabel so liegt, dass die Seite mit dem weißen Streifen, wie zu sehen, zu dir zeigt.

    • An dieser Stelle ist es möglich, das MacBook ganz zu öffnen und flach auf den Tisch zu legen, ohne dass die Flachbandkabel beschädigt werden.

    Make sure at reassembly that you insert the ribbon cable in to the jack board fully. It seems to take an extra push. The white line should disappear when it is seated properly. I didn’t get it in all the way by a fraction of a mm and had no sound (internal speakers weren’t even recognized). Went back and seated the cable fully and sound was back.

    Timothy Dinkelman -

    I had that same problem, too.

    lyonmissions -

    Had the same problem, (no audio after reassembly) it did have the startup chime though.
    after re-seating the ribbon cable, it worked for a few days, but then nothing after waking up.
    not even the startup chime.
    Any body got pointers on how to check if i broke the cable or the board? (looks fine...)

    Christian Stanner -

  19. CTPUBYsAgXtXxHEF
    CTPUBYsAgXtXxHEF
    hEKnBCb2bAATpq1P
    • Ziehe das Klebeband vom Displaykabelstecker mit einer Pinzette zurück.

    I won’t have my daughter’s MacBook with its banana encrusted USB-C port until she returns home during spring break — just doing some homework before then. But if the case can lie flat after the audio board ZIF cable is detached, why do you need to detach the display cable connector (Steps 19-24)? It seems that you could jump straight to Step 25 to replace the USB-C port and avoid those steps.

    John Conklin -

    Hi John, disconnecting the display cable is not necessary, but is recommended to avoid accidental damage to the cable during the rest of the procedure. If you feel confident in the safety of the cable then you can skip ahead. Good luck with the repair!

    Adam O'Camb -

    I skipped ahead to step 25 successfully by making a secure stand for the display and being careful to not strain cables. If you are decently motor skilled this saves you 15 minutes or so. Not recommended if you live with cats who love little screws to chase

    abscate -

  20. rbj3KLTQamuZVO4N
    rbj3KLTQamuZVO4N
    w4bF2ScjrdZVOhXx
    • Es kann sein, dass der metallene Sicherungsbügel am Displaykabelstecker aufklappt und am Klebeband festhängen bleibt.

    • Wenn das so ist, dann musst du den Sicherungsbügel mit dem flachen Ende des Spudgers nach unten halten, während du mit der Pinzette das Klebeband ablöst.

  21. eHZNWLWbMZxYTtTJ
    • Klappe den Sicherungsbügel auf dem Displaykabelstecker mit dem flachen Ende des Spudgers hoch.

    • Versuche ihn vom Klebeband fern zu halten, sonst kann er daran festkleben. Dann wird das Ablösen des Kabels schwieriger.

    I found it helpful to stick one of the triangular picks in between the table and the retaining flap to keep them separated.

    Kofi Kantanka -

  22. ZRLuwdSOgysqUIZa
    ZRLuwdSOgysqUIZa
    3qiSmhTTSe5QCCIA
    3fEQPqmPnv2aVyMv
    • Schiebe vorsichtig das flache Ende des Spudgers unter das Displaykabel, um es von der Klebeverbindung zum unteren Gehäuse zu trennen.

    • Achte darauf, dass das Kabel nicht beschädigt wird. Wenn es sich nicht leicht ablösen lässt, dann erwärme das Kabel/Gehäuse direkt darunter mit einem Haartrockner oder einen iOpener. Der Kleber wird dadurch aufgeweicht und du kannst es noch einmal probieren.

    Great, another new fragile display cable to deal with. Thanks Apple.

    maccentric -

  23. aPihB1CyJim4IF4c
    • Ziehe das Displaykabel vorsichtig gerade aus seinem Anschluss heraus und löse es ab.

    • Schließe gleich danach den Sicherungsbügel.

    • Beim Zusammenbau muss der Sicherungsbügel zugeklappt sein. Setze das Kabel mit den Goldkontakten nach unten korrekt auf und schiebe es vorsichtig in den geschlossenen Anschluss hinein. Achte darauf, dass das Kabel nicht geknickt oder beschädigt wird. Wenn es richtig sitzt, dann sind die Vertiefungen an den Seiten nicht mehr sichtbar.

    I’m pretty sure I understand the instructions here, but I had to think about it a little longer because “… must remain closed when the cable is reinserted during reassembly …” was not clear to me right away. The retaining flap I discovered, is super delicate, and hence my paranoia, so I wanted to point this out in case anyone else felt like me: ''''Is it correct to assume that your instructions could be interpreted as:

    “After disconnecting the cable, close the retaining flap for now to avoid damaging it. When reinstalling the cable, flip up the retaining flap once again, realign and slide the cable with gold contacts facing down.”

    I bent the USB-C corner of the lower case from a short drop onto laminate flooring, so in I went to shape it so the edge wouldn’t snag or scratch things. I am typing on my MacBook that received the body work.

    Thank you for your guidance!

    John Torquido -

    For @seriouslyjohn and anyone else who might be wondering: “the flap must remain closed when the cable is reinserted” means keep it closed. Do not reopen the flap to insert the cable; just insert it carefully while leaving the flap closed. I know it probably runs counter to the procedure you’re used to, but Apple’s documentation is very clear on this, and I have to think it’s for a reason. My advice is to follow the instructions as written and don’t try to reinterpret them ;) Congrats on a successful repair!

    Jeff Suovanen -

    Oops! I most definitely did NOT reinsert the cable into a closed connector. We can only wonder why Apple instructed this step to be counter-intuitive. I’ll pay closer attention to any weirdness that may arise, but the MacBook has been traveling and performing as it should; I’m going to avoid reopening the case, as easy as it is, until I have a good reason to do so. Thank you for replying and updating the guide!

    John Torquido -

    I would argue that you should NOT close the retaining flap. I followed the directions to the letter, and when I started up the MacBook, the display did not register since the I wasn’t able to reseed the cable fully without worrying about tearing the cable. I did hear the computer charging and saw that the keyboard lit up, so I knew the MacBook was working besides the display. I looked up another video on Youtube that left the retaining flap open when reinstalling, so I took apart the Macbook again and tried it that way, and IT WORKED! The cable wasn’t fully reseated with the retainer open and I’m not sure if that was my fault or not, but with the retainer flap open, it was easier to see that. My 2 cents. Good luck everyone!

    Sulmo Kim -

    I initially tried inserting the cable with the retaining flap closed (as described), however after completing reassembly the MacBook could be heard to start but without any display action (no backlight, no graphics - also tried resetting the SMC). Being suspicious of this step based on the comments above, I tried re-inserting the cable with the retaining flap open before subsequently closing the flap. It may have just been my perception but insertion with the retaining flap open certainly appeared to result in a more robust mating of cable and connector. After reassembly and reset of the SMC I at least saw backlight action although no graphics still. A subsequent boot into to diagnostics mode resulted in the graphics coming to life.

    Maybe my re-insertion while the retaining flap was closed was not quite correct (although I was certainly trying to be careful), but my experience was that success was achieved making the cable insertion while the retaining flap was open.

    Paul Richards -

    It is kind of nice that I don't have to worry about that. The screen cable is literally plug & play. Super easy.

    lyonmissions -

  24. IIqsgKYEokgwdVfo
    • Trenne die untere von der oberen Gehäuseeinheit.

  25. saJcCgJxCZNvngDF
    saJcCgJxCZNvngDF
    3TMnOECSiciIi2Ow
    5QjrHIMJntJSR55r
    • Die ZIF Verbinder des rechten Lautsprecherkabels und des Kabels zur Platine der Kopfhörerbuchse sind mit Klebeband bedeckt. Ziehe es mit einer Pinzette ab.

    Removing the logicboard must be safer way, but battery replacement can be accomplished if you skip here to step 32, and omit 36.

    Aki Mochi -

    I'm not sure removing the logic board is safer, you have many more opportunities to break something. I left it connected but removed the screws so I could maneuver the battery underneath. Faster and safer imo.

    maccentric -

  26. wwLZpTnHIeHC6CZK
    wwLZpTnHIeHC6CZK
    cHaXZJlfsl1PYcd1
    3BINxS4dFq6OVBDU
    • Klappe mit der Spudgerspitze die beiden Sicherungsbügel an den ZIF Verbindern hoch.

  27. AMmUIQZ6qgitxvcu
    AMmUIQZ6qgitxvcu
    6NHRNWUyyLYhCGuZ
    • Ziehe vorsichtig die beiden Stückchen Klebeband zurück, die du eben grade gelöst hast. Dadurch lösen sich die beiden Flachbandkabel.

  28. TV3ZJwYpJujcVUe1
    TV3ZJwYpJujcVUe1
    TbvsX13hJUcEA6Xh
    • Löse das Stück Schaumstoff auf den beiden Antennensteckern mit der Spudgerspitze ab.

  29. FSpWsmDOZUHOxkoB
    FSpWsmDOZUHOxkoB
    Fd5ZPEjRRd2xcdLB
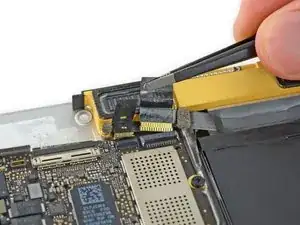
    • Hebe den ersten Antennenstecker mit einer Pinzette gerade nach oben und löse ihn aus seinem Anschluss heraus.

    • Die Antennenstecker und -anschlüsse sind sehr empfindlich. Achte darauf, dass du nur den Stecker hochhebst und nicht den Anschluss. Heble nicht unter dem Kabel und belaste es nicht unnötig.

    The supplied tweezer is no good. You need one with grooves as shown in the picture. When re-inserting the antenna connectors, make sure that they are seated properly before pushing down. If you have magnifying equipment, use that to get visual confirmation. I used tactile feedback from my fingers to discern proper alignment. Try not to force it.

    Ki Park -

    I used the tweezers provided by iFixit. I struggled with both connectors and finally managed to disconnect both, but when I came back to reconnect them, I realized that both connectors on the logic board were loose. Long story short, it turns out that my little exciting adventure changing the battery cost me $530 to send it for repair at Apple Care. I am quite good at troubleshooting Mac and used to work for Apple for many years. This one step is more dangerous than it seems, because you can end up like me, without wifi on your mac. Honestly, for those who think they can do it, think twice. You can thank me later…

    Arthur Liegeois -

    For me this step was the only point where I had a bit of trouble. The supplied tweezers were not the best for disconnecting the antenna connectors as Ki Park points out already. In my case the outer ring of one of the connectors on the logic board bended slightly. It bended back in place during assembly and the wifi works as normal again after the repair. It is very tricky though, really be careful in this step and use other tools as necessary.

    Arie Machgeels van Ziel -

    BY FAR THE MOST DANGEROUS PART OF THE JOB!. I broked one connector and spent an hour with high powered magnifiers to try a repair. Wasted an hour on this. Id suggest leaving the logic board in place if possible

    Crisis Guy -

    I had no problem with this. The key is to come toward the connectors from the opposite direction from that shown in the photo. Easier to grip the connector.

    david -

    I broke one. Looking back, it may have been safer to detach the motherboard from the case before disconnecting the antenna, as it allows more angles to access them. 😢

    bredelet -

    F. I broke one

    Ried Cartwright -

    I actually put one of the tweezer tines under the connector and used it as a lever gently to pop the antenna connector off the housing. Worked well, but I had to be super careful not to break anything.

    Woodward Price -

    These connectors are incredibly finicky to reinstall. Precise alignment is critical. You can sort of get a sense of when the connectors are properly aligned by trying to slide them side to side with your finger, but mostly it's a case of trial and error. Don't apply excessive force because you risk damaging the edges of the connectors. When properly aligned they don't exactly click, but you do feel them go in.

    nigel -

    DO NOT REMOVE THESE. As others have stated these are fragile and finicky to remove and reinstall. Instead, leave them intact and lift up the logic board at a 70 to 80% angle. Use a piece of tape secured to the bottom edge of the computer and the top edge of the logic board to hold it up and out of the way. If you are diligent, you can remove the batteries without touching or messing with the logic board. Use caution, don't get too overzealous, take your time.

    Steven Gibson -

  30. SEWAp5uMIZkqMfYQ
    SEWAp5uMIZkqMfYQ
    DDyaE6lj4VPJ6q1B
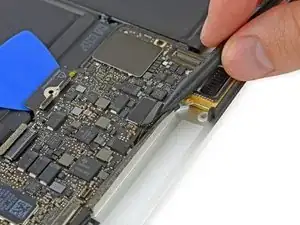
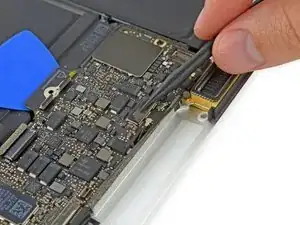
    • Hebe den zweiten Antennenstecker mit einer Pinzette gerade nach oben und löse ihn aus seinem Anschluss heraus.

    • Die Antennenstecker und -anschlüsse sind sehr empfindlich. Achte darauf, dass du nur den Stecker hochhebst und nicht den Anschluss. Heble nicht unter dem Kabel und belaste es nicht unnötig.

    Broke a connector. Now what?

    chrisadams -

    BEWARE - there are no instructions on how to reassemble this. It goes to step 52 - battery installed and that is it. Easy to pull out, almost impossible to put back in afterwards. So STUDY this to get an idea of how to reattach.

    Kyle Swafford -

  31. DhL2mKE4SoSyGZXY
    DhL2mKE4SoSyGZXY
    FLoIUrfatB5MlOwH
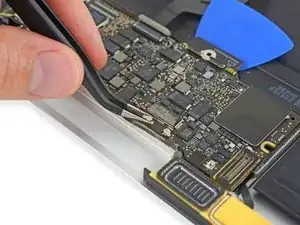
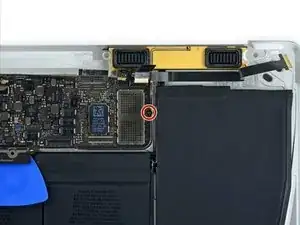
    • Hebe den Stecker am linken Lautsprecherkabel gerade nach oben und löse ihn vom Logic Board ab.

    Reassembling NOTE. The left speaker cable needs to be below the logic board when screwing in the right screw. Otherwise you will have to backtrack.

    Kyle Swafford -

  32. vyvOJAWZSjJSCaTn
    vyvOJAWZSjJSCaTn
    nJMdoff3lODZUVoM
    • Klappe den Sicherungsbügel am ZIF Verbinder des Trackpadkabels mit einem Spudger hoch.

  33. cUM4HY2FvvbV4Qj3
    • Ziehe das Trackpadkabel vorsichtig aus seinem Anschluss heraus und löse es vom Logic Board ab.

    Once the logic board has been replaced, when following these instructions in the reverse order it should be pointed out that the all the flaps are flipped down. A distracted person might try to force in the flat connector before realising that he has to flip up the flap of the new logic board.

    Davide Dante -

  34. vAODDnG2DP6wOHKS
    • Entferne die einzelne 3,5 mm Torx T5 Schraube, mit der das Logic Board am unteren Gehäuse befestigt ist.

  35. TbSEH4Y4MdsGYTOW
    TbSEH4Y4MdsGYTOW
    OcBAUBIO31NTbDdH
    CAvrQ6tjS2oNwqWG
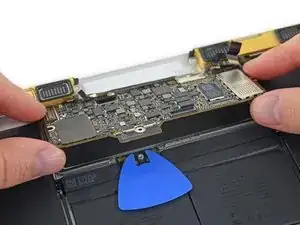
    • Klappe die Vorderkante des Logic Boards hoch.

    • Fasse das Logic Board nur an den Kanten an.

    • Hebe das EMI Band hoch, mit dem das Logic Board am unteren Gehäuse befestigt ist, und löse es ab.

    • Das Band lässt sich leichter ablösen, wenn du es mit einem Haartrockner oder einem iOpener erwärmst.

    • Bringe das Band beim Zusammenbau wieder sicher an.

    “Reattach the tape securely during reassembly.”

    In my case the tape did not stick properly to the lower case anymore and also came a bit loose from the logic board. Nonetheless my macbook works fine after the repair, so I'm not sure how important the EMI tape is. If I experience problems in the future I might open the macbook up again and check the tape and perhaps reattach it better with some new glue. There is probably special glue needed, so I'll look into that when it becomes an issue.

    Arie Machgeels van Ziel -

  36. EZaMXdaUkJJfbRBI
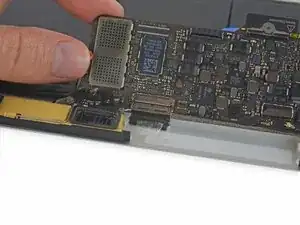
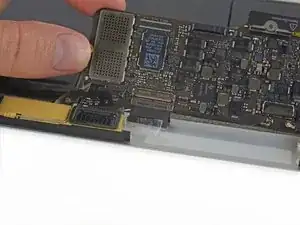
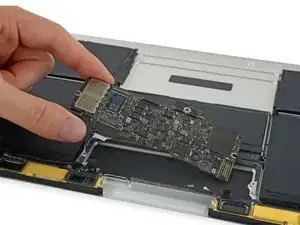
    • Entferne das Logic Board.

    If you are replacing the logic board once the machine has been rebuild the 2015 model has to have a 5W power adapter plugged into the machine first before the full 29W power supply otherwise there is a risk of damaging the logic board. Once the power is supplied the battery disconnect LED will switch on and once this has occurred you can remove the 5W and supply the machine with the full 29W power adapter.

    Aaron Dalziel -

    While it’s true that the internal documentation specifies this for a 2015, after frying 2 motherboards with a normal charger, I spoke with the engineers and they told me that this also applies to 2016 and 2017 macbook main logic boards. I say- It can’t hurt to try to wake them up with a 5 watt charger first! Please take 5 minutes to save your motherboard.

    Noah -

  37. irZSorLqyRTA1mcS
    • Entferne mit einer Pinzette das Formstück aus Schaumstoff, mit der die Schraube auf der rechten Seite des linken Lautsprechers bedeckt ist.

    • Wenn du an dem Formteil ziehst, wird es zerreißen. Versuche deine Pinzette unter das Klebepad zu schieben, mit dem der Schaumstoff auf der Oberseite der Schraube festgeklebt ist.

  38. L5TpIiElCkTindNb
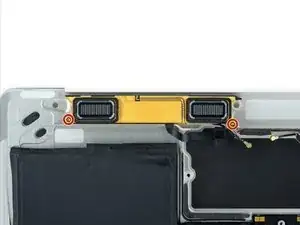
    • Entferne die beiden 4,1 mm Torx T3 Schrauben, mit denen der linke Lautsprecher am unteren Gehäuse befestigt ist.

  39. IeIcjC2TmmqfLQPx
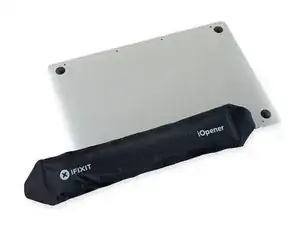
    • Bereite einen iOpener vor und erwärme das untere Gehäuse direkt unter dem linken Lautsprecher, so dass der Kleber am Lautsprecher weich wird.

  40. LR1pKrnslnZVqbGp
    LR1pKrnslnZVqbGp
    WOJujrD6YEHyyFgc
    fekuDnEkZDss5QSV
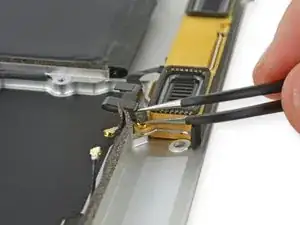
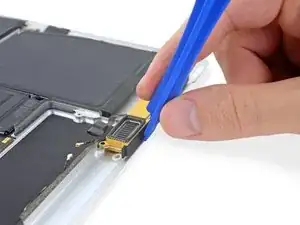
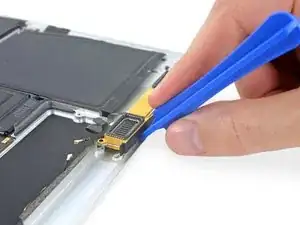
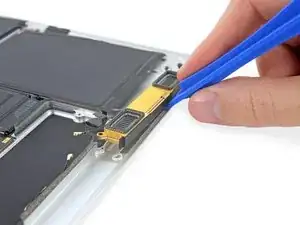
    • Hebele mit einem Plastiköffnungswerkzeug unter der Oberkante des linken Lautsprechers und löse ihn vom unteren Gehäuse ab.

  41. xAJfXEVqEWCRuxwC
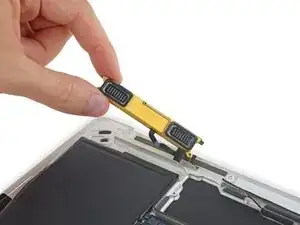
    • Entferne die linke Lautsprechereinheit.

Abschluss

Um dein Gerät wieder zusammenzubauen, folge den Schritten der Anleitung in umgekehrter Reihenfolge.
Tobias Isakeit

Mitglied seit: 31/03/14

108055 Reputation

0 Kommentare