Einleitung
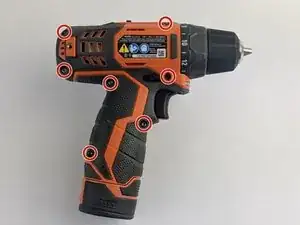
A damaged housing assembly will impede the users ability to properly insert the battery and undermines the drills durability in harsh working environments. Switching out the drill’s housing assembly requires a Hex 2.0 Screwdriver to remove the seven M3 X 14mm screws.
Werkzeuge
Ersatzteile
-
-
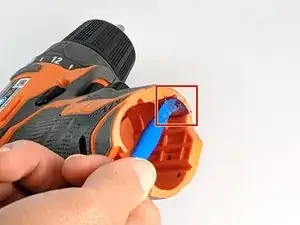
Eject the battery from the drill.
-
Unscrew the seven M3x15.3mm screws, with the 2mm hex screwdriver bit, that secures the Housing Assembly.
-
-
-
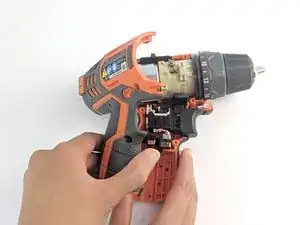
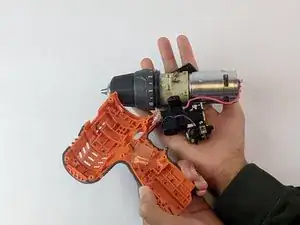
Grasp carefully the top and bottom of drill components.
-
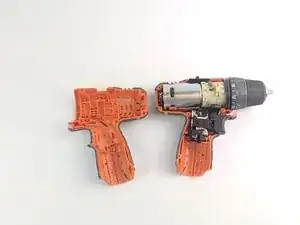
Lift and transfer, as a whole, the drill components from the old housing assembly to the new housing.
-

Abschluss
To reassemble your device, follow these instructions in reverse order. Also reinsert the battery to make sure the drill has power.