Einleitung
This is a great design but with a crucial flaw. If you go to the Rubbermaid website and look at the Reveal's user reviews mostly everyone loves the mop but has the same complaint - the unit stops spraying. It's often blamed on the handle/trigger but it's actually the pump plunger/piston that binds and gets stuck in it's cylinder. You will need to open the pump case and pull the assembly out. Once you get it out you'll see it's actually pretty simple with not many parts to worry about. It is a bit fussy to reassemble but not at all complicated. Update: Many people asked about the O-Ring failing on the fluid bottle. I finally had the same problem and have added Step 7 to fix this.
Werkzeuge
-
-
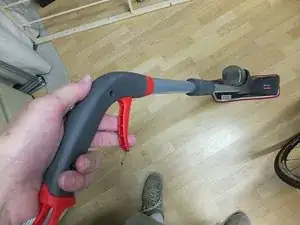
Trigger starts having problems - it sticks, returns slowly or won't return at all. No spray comes out of mop dispensing nozzle at base of pump chamber.
-
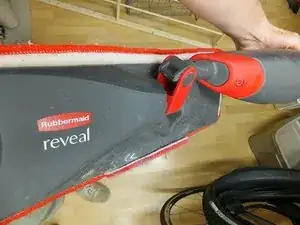
Notice in photo 2 the red pump casing sleeve and the tiny spray nozzle hole.
-
-
-
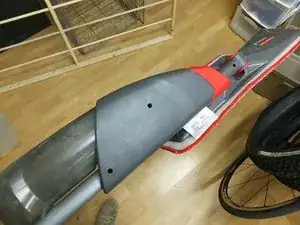
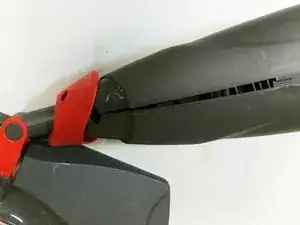
You will need a long, thin, Phillips (star head) screw driver. The Reveal has 3 screws holding the main pump body. You can easily see the 2 on the body and 1 right where the stem meets the mop swivel head.
-
-
-
Once the screws are removed the pump body can be split open. Use a metal spudger or a thin flat head screw driver and do this slowly - do not just bust it open as you may damage parts.
-
NOTE! You do not need to separate the pump case all the way down to the bottom where the stem meets the red swivel for the mop head. The screw here needs to be losened off enough for you to be able to separate the main body above it.
-
-
-
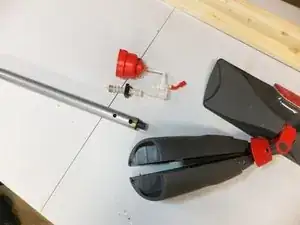
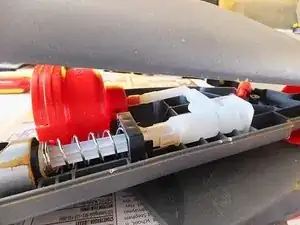
Lay out the parts just as you see here. It is important to understand how these simple parts work together. You don't need to completely take apart every little piece.
-
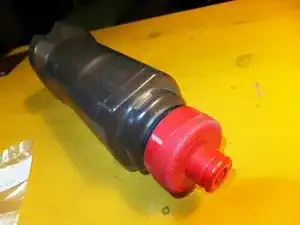
It is helpful to know that the red cone shape attaches to the outside liquid container (where you put in your cleaning solution).
-
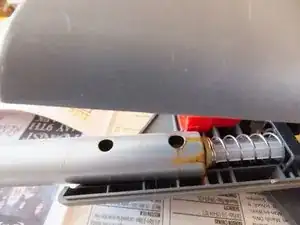
The silver rod with 2 holes is the mop handle. It attaches to the pump plunger/piston. Keep this in mind for later assembly.
-
-
-
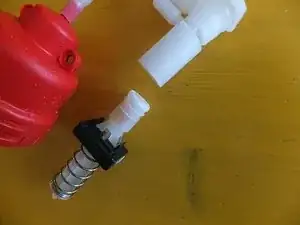
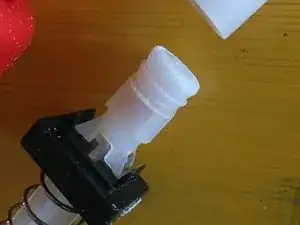
The problem is that the plastic pump plunger/piston sticks in the cylinder. Use 120 grit sandpaper and EVENLY sand the circumference of the plunger head and the 2 ribs below it. Test. Repeat until there is better movement but NO loss of suction.
-
Photo 2 shows the plunger/piston sanded so it works nicely in the cylinder without having taken off too much material - you do not want to take off too much. It doesn't need to be super pretty smooth but sanding too rough and uneven will not keep suction. Sand a little at a time and test it at each and every attempt.
-
When you are satisfied put a small amount of petrolium jelly (Vaseline) around the plunger/pistons head and ribs.
-
-
-
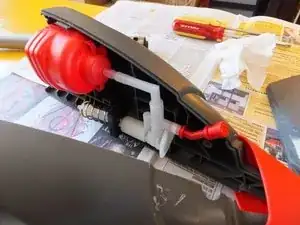
Hold open the pump body casing and align the pump parts into the grooves supplied inside. This isn't hard and makes sense as you move them into place ... take your time.
-
Notice in the 2nd and 3rd photos the mop rod (that connects the handle to the pump body). It has another rod inside that attaches to the plunger/pistion to make it go up/down in the cylinder. This needs to connect properly to the top of the plunger/piston AND be properly seated into the pump casing.
-
Test your assembly by simply placing the 2 pump body casings together - they should fit tightly and the trigger should work the pump smoothly.
-
Once you are satisfied everything inside fits properly put the pump case back together, careful to line it up so it fits perfectly snug with no gaps and the entire pump assembly is seated and secure. Ttighten up the screws.
-
-
-
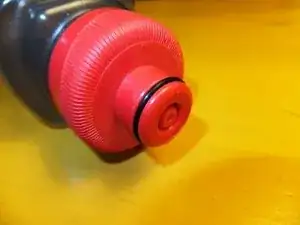
The O-Ring for your specific unit may be different (some comments have questionable discrepancies in unit types). Measure it or have someone who sells the O-Rings measure it.
-
The O-Ring used in this guide is 568-018 / OR-70NBR-3/4x1/16-C/S(50) and works awesome!
-
Your mop has been saved from the garbage. I've tested this for about 6 months and still going strong no problems. Happy mopping!
61 Kommentare
the phillips head does not work, there is some specialty screw head in there. My unit only has one screw, not two. I am stuck and cannot dissassemble this pos.
Fred -
Can I drill the screw hole bigger so that I can use my drill to try different drill bits to get this taken apart? I dan't return it because of the model change. I hate products like this that are a good idea with lousy execution.
Fred -
Hi Fred. Sounds your model, with one screw, is designed different than the one I repaired. At this point, if I were you I'd go for it as it's garbage otherwise. Also, if your model is different than the one I've provided instructions for you may find they don't exactly work once you've cracked it open .... but the idea/design/function might be the similar? And yeah I agree ... good idea lousy execution (that way we'll have to buy more mops?) .... too bad. Good luck Fred.
Leonard -
Thank you for getting back to me - I really appreciate your follow through! Fred
Fred -
