Einleitung
Werkzeuge
-
-
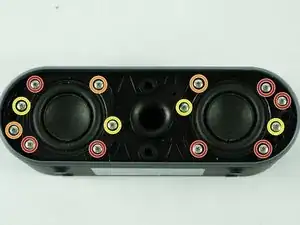
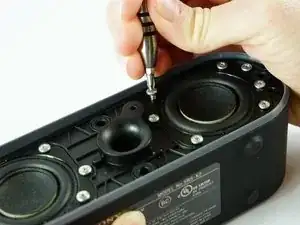
Remove seven, 27 mm long Phillips #1 screws.
-
Remove three, 11mm long Phillips #1 screws.
-
Remove four, 10 mm long Phillips#1 screws.
-
-
-
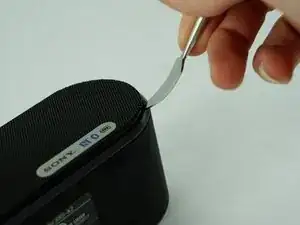
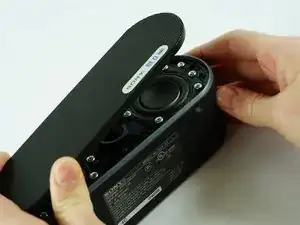
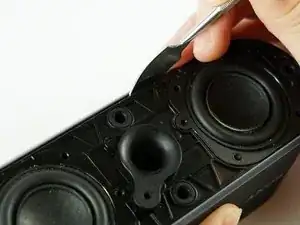
Use the spudger to remove the speaker host plate. Insert the metal tip in the seam between the host plate and the shell.
-
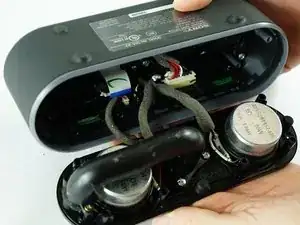
Center the spudger on the top of the device, this is furthest from the wiring, in wiggling the spudger under the plate, the plate should move up and out of the shell, you can finish lifting the plate away with your fingers.
-
-
-
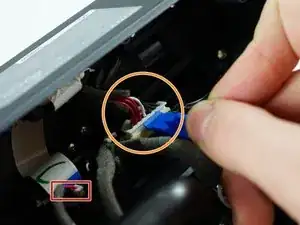
Unplug the power cable connector shown using the plastic opening tool. Wiggle the tool under the lip of the plug, the smaller area and odd angle means lifting up with the plastic tool in the setup shown.
-
Unplug the power connector shown using the plastic opening tool lift from the front of the plug shown and move the opening tool to either side to get it all the way out of the socket.
-
-
-
Use the soldering iron to heat the connection shown. Pull the wire once heated to disconnect safely.
-
-
-
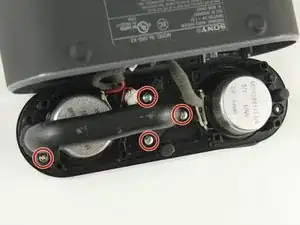
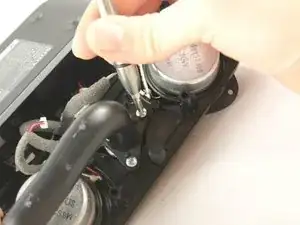
Remove the four, 10 mm Phillips#1 screws from the black pipe. This allows for air to flow through the device to the battery to cool it, but it is in the way of removing the speaker.
-
Once the screws have been taken out just lift the pipe up and away from the device components.
-
-
-
Remove the speakers by lifting up and angling the solder ports away from the edge of the speaker housing.
-
Melt the solder from the connection to the speaker, pull the wire to disconnect.
-
To reassemble your device, follow these instructions in reverse order.
3 Kommentare
Sony SRS-XB20 Bluetooth speaker
The Sound from the left speaker is normal but the other is much less, about 70% lesser than nomal. To confirm this I had to connect it to my PC, then used the sound settings to seperate the sounds of both speakers and actually noticed that both speakers were working but the output from the right speaker was less than normal. On the other hand when a call comes in or I try to make a call the volume from the right speaker becomes normal.
The microphone no longer works, when I receive a call with the speaker and I talk into the microphone, I am not heard at the other end, also when I activate Siri, and give a command from the speaker Siri appears not hear a thing.
Please what can I do to get this issues resolved because my speaker is still quite new.
The portion of the 27mm screws is incorrect on the left hand top left screw by the left speaker is not a 27mm screw, this just caused me to long screw into the battery terminal
I need two speaker Sony SRS_x2

