Einleitung
Die nachfolgend beschriebene Maschine ist 17 Jahre lang fast ohne Wartung gelaufen und produzierte erstaunlicherweise immer noch Kaffee, wenn auch schlechten. Allerdings war sie völlig verschmutzt. Die Heizung wurde erneuert, die Mahlsteine getauscht, die Brühgruppe revidiert, das Getriebe und alle bewegenden Teile nachgefettet, alle wesentlichen Dichtungen getauscht. Danach funktionierte sie wieder ausgezeichnet.
Werkzeuge
-
-
Alle Anbauteile wie Schubladen, Wassertank, Brühgruppe entfernen.
-
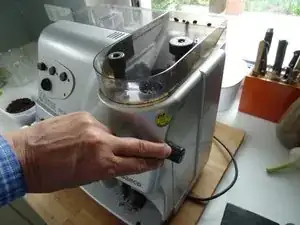
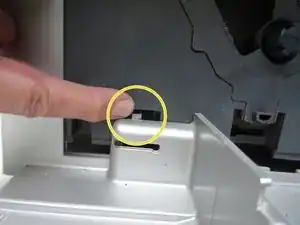
Dampfknopf vorsichtig herausziehen. Falls er zu fest sitzt erst den Deckel lösen (Schritt 2 bis 4), etwas anheben und dann mit einem kleinen Schraubendreher die Rastnase wegdrücken.
-
-
-
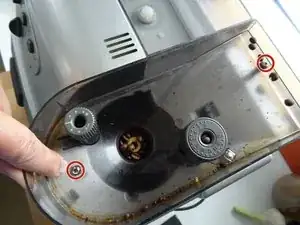
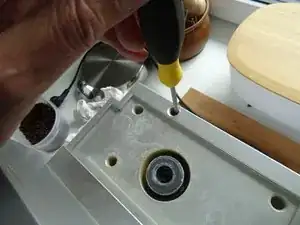
Der Bohnenbehälter ist mit zwei Kreuzschlitzschrauben befestigt. Diese werden gelöst. Die Versteller der Mühle und der Kaffeemenge können bleiben.
-
Hebe den Bohnenbehäter nach oben heraus.
-
-
-
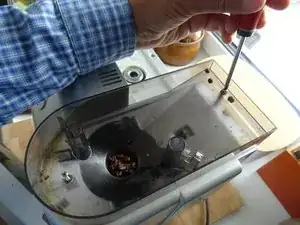
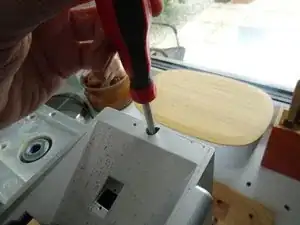
Der Deckel ist mit vier Schrauben befestigt, zwei an der Unterseite vorn, zwei an der Rückseite oben. Eine davon ist eine Torx 10, die anderen Kreuzschlitz.
-
-
-
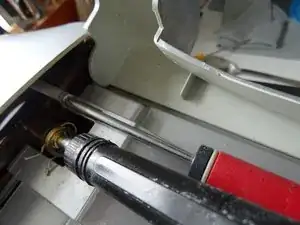
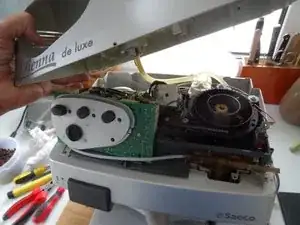
Nun kann der Deckel abgehoben werden. Erst hinten, dann schräg nach vorne ziehen. Den Silikonschlauch vom Wassertank einfach abziehen.
-
-
-
Auf den Arbeitstisch legt man ein Tuch, die Maschine wird dann auf den Rücken gelegt. Eventuell muss der Drehteller am Boden herausgezogen werden.
-
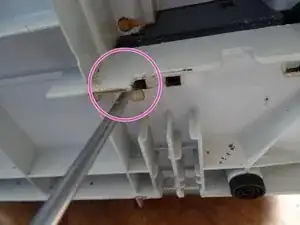
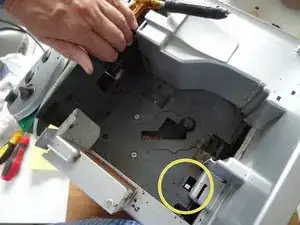
An der rechten Seite des Bodens findet man mehrere rechteckige Öffnungen. Bei der dritten ist eine Raste, mit der die komplette Einheit befestigt ist. Diese wird nach hinten gedrückt, dann kann man die gesamte Einheit nach oben abziehen. Das klemmt manchmal, wenn die Maschine sehr verschmutzt ist.
-
Dabei muss man auf zwei Dinge achten: Das Netzkabel muss frei rutschen können und die Sperrklinke der Bodenschublade darf nicht klemmen.
-
-
-
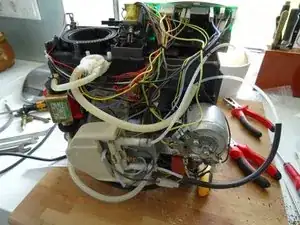
Ein Blick auf die Einheit von hinten. Oben links die Mühle, davor das Flowmeter. Ganz links die Ulka-Pumpe, in der Mitte der Boiler für den Schnelldampf, darunter das Getriebe mit dem Motor. Rechts unten der Erhitzer. Rechts oben die Steuerelektronik.
-
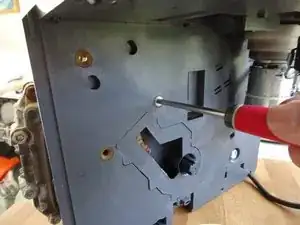
Von vorne erkennt man rechts das Mahlwerk, die Grundplatte mit der Vertiefung für das Supportventil und die Antriebswelle. Ganz links ist der völlig verkalkte Erhitzer zu sehen.
-
Arbeite die Schritte in umgekehrter Reihenfolge ab, um dein Gerät wieder zusammenzubauen.
4 Kommentare
Hi VauWeh
I have a Vienna Plus espresso machine and recently it started stopping right after grinding the coffee beans specifically when is about to start pumping the water. The red light starts blinking.
As a work around I ensure that the door is closed and lightly punch the machine and it starts pumping and espresso comes out.
I keep the machine clean and now even more often on daily basis.. I have lubricated it and descaling it on regular basis .. recently even more often due to this problem to ensure this is not the issue.
have you experienced this problem and how can I fix it?
next I want to follow your instructions in taking apart and check the inside..
if you can help I can send you the video of this behavior and symptom.
this is now occurring on daily basis
Thanks
Tony
Tony -
My guess are issues with some sensors/switches, e.g. the front door or the coffee grounds drawer or the fluidmeter. Hmmm, hard to say without seeing it. Can you upload the video e.g. to YouTube? Unfortunately I gave my good old Vienna to friends and I cannot compare to yours.
VauWeh -
Hi VauWeh
Here is the YouTube link showing the behavior..
thanks again for your support
Tony
Tony -
Hi Tony, really really strange, I never saw such a behaviour before! Does this model have a adjuster for the amount of coffee grounds, (strong vs weak coffee) as seen here in the first picture in step 1? (The front one). Try to turn it. If something changes, I would suppose as culprit a switch in the coffee grounds regulation chamber, or only a dirty chamber. This chamber is easy to find, its just to the left of the grinder. Its the part, which is responsible for the “clack-clack", direct before the red LED occurs. Open your machine and have a look on it while working. You even can reach to the chamber (without opening the machine) by taking out the brewing unit and using your fingers to reach it from below. Below is a flap that is opened by a magnet, perhaps it does not and cleaning is sufficient. Good luck, greetings from germany!
VauWeh -
