Einleitung

  1. ltCf5GdDAJsTFKqq
    ltCf5GdDAJsTFKqq
    V6UmIcMfBxrHTJJi
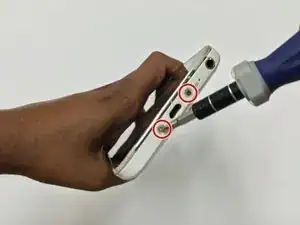
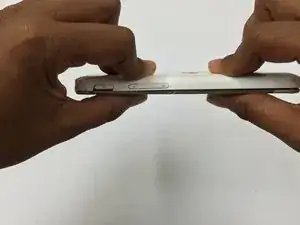
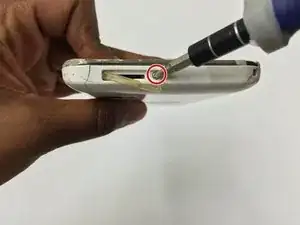
    • Remove SD Memory Card before taking the device apart. Using the screwdriver, remove the 10mm Phillips screw that is near the SD Memory Card port.

  2. RfxiQ3uMJaHBUpfB
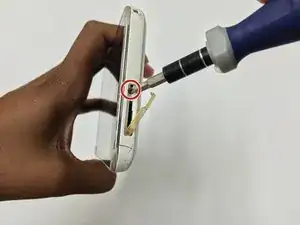
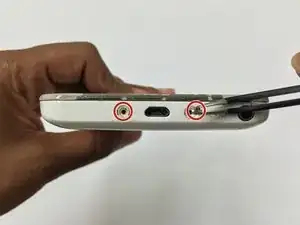
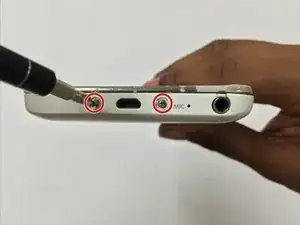
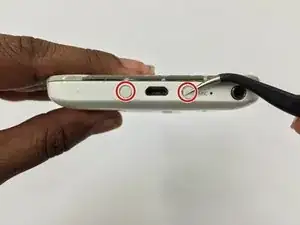
    • Remove the white caps which are covering the screws that are located on either side of the charging port.

    • You may have to use a low heat blow dryer for 5 to 10 seconds, or other equivalent heat source to loosen the adhesive.

  3. U1YrRLaLsSggav4u
    U1YrRLaLsSggav4u
    KYbRXQBUYQvhmi1d
    • Continue to unscrew the two 10mm Phillips Screws from the bottom of the device.

  4. ridYW6mXcPRnKYk1
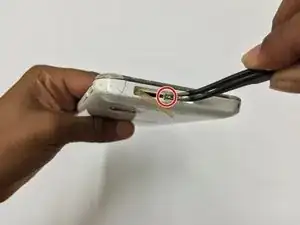
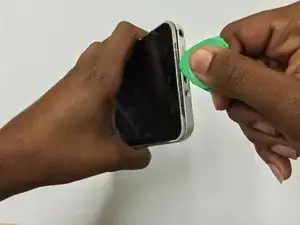
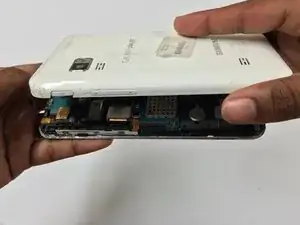
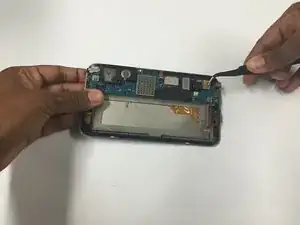
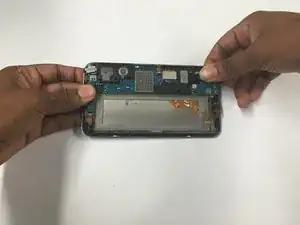
    • Starting from the bottom and working around, use an opening pick to separate the front cover housing from the back cover housing.

    • You will hear a popping sound, indicating the separation.

  5. y1rqlNnmdEuwpQF6
    y1rqlNnmdEuwpQF6
    RvDRRhuDFAxZQ6Oq
    • Take the back housing cover off of the device.

  6. FU5jYidVp2HeOStL
    FU5jYidVp2HeOStL
    jiZbf14nLhsJ2dAW
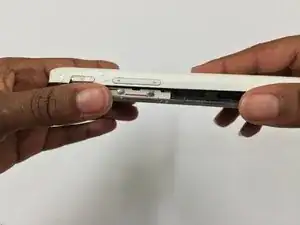
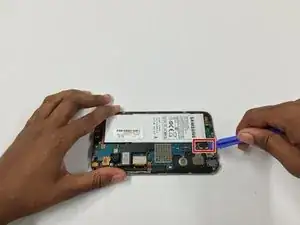
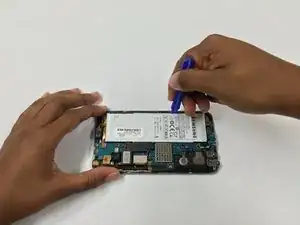
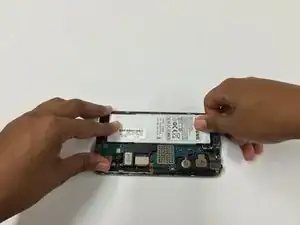
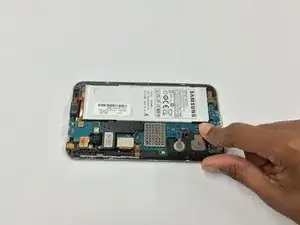
    • Detach the tab the battery is attached to and the battery using the same prying tool in an upward motion.

    • Adhesive is behind the battery, but it is not strong.

  7. e3uahMDHwMDOqaIL
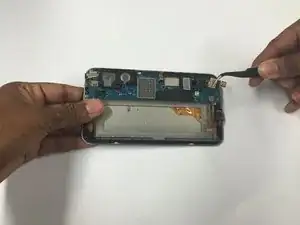
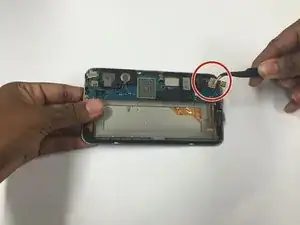
    • Remove the rear and front facing cameras by lifting the tab that they are attached to with the tweezers, they should come up quickly, and together.

    • Both of the Cameras are attached to one flex cable, so when you remove the tab both of them should come out.

  8. XOjM5jFSXsmgNn2N
    XOjM5jFSXsmgNn2N
    RLEJLUuUCHYKdudf
    • Gently put in the new rear facing and front facing camera and snap the tab back onto the motherboard.

  9. XM2YQGHGamqPFYKn
    XM2YQGHGamqPFYKn
    akLVLVyr62wXaQVO
    • Insert the battery into its position, and reconnect its tab onto the motherboard.

  10. paBNWCmgWEvcHULN
    • Now put the rear housing cover on the device, starting from its bottom side, and snap the edges all the way around to close the device.

  11. dCmVS2FtoioGRlqE
    dCmVS2FtoioGRlqE
    TTcIwt6igRgHPPTC
    BVjWCGYUmDACdm3l
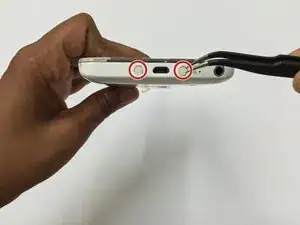
    • Lastly reinsert the screws at the bottom of the device, as well as the screw inside the SD Memory Card port.

Abschluss

To reassemble your device, follow these instructions in reverse order.

China Ayala

Mitglied seit: 05/03/15

584 Reputation

0 Kommentare