Einleitung
This guide will teach you how to replace a nonfunctional battery in your Samsung Galaxy Note 10.1 2014 edition.
Werkzeuge
Ersatzteile
-
-
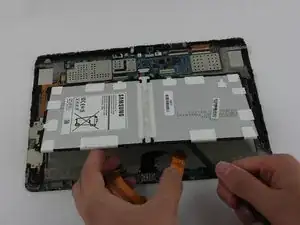
Using the nylon spudger or plastic opening tool along the edges of the screen, separate the back case off of the device.
-
-
-
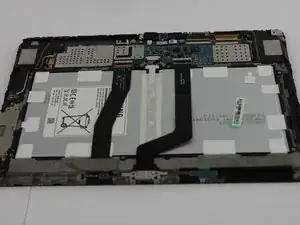
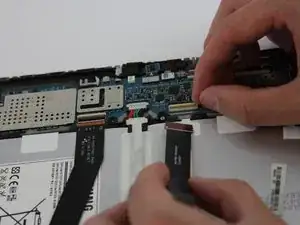
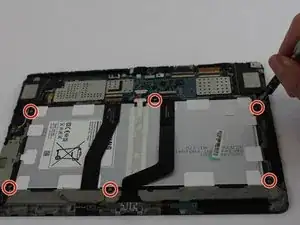
Place your finger on the thin black bar at the end of the ribbon tape and flip each one up.
-
Gently pull the ribbon tape on the battery away from the bar. Repeat this process for the second ribbon tape.
-
-
-
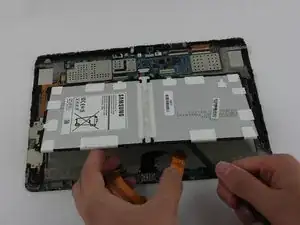
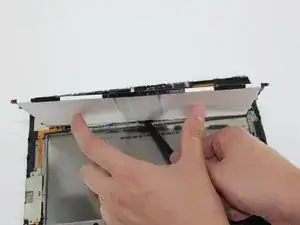
Lift up the battery from the bottom and situate the black nylon spudger underneath the battery.
-
Use the black nylon spudger to disconnect the multi-colored wires from the rest of the device.
-
To reassemble your device, follow these instructions in reverse order.
4 Kommentare
Step 1 you have to show the back cover to remove. Showing the front side is confusing.
After step 4 there should be a step 5 to show how to disconnect the white connector with the colored wires: it took time to discover that you have to lift the 2 side clips, and not to pull…
prisca -
Just followed your instructions. Used a online kit with a guitar pick-like spudger. Had to wrestle with it slightly, but everything worked out perfectly to your instructions.
Matt -
Followed the instructions. Worked nearly perfectly. The last step is a bit tricky. Just look at the new battery to understand the system.
Eramur -
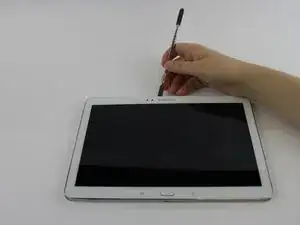
Remove stylus before you remove. There’s a nubbin on the main board that may dislodge it stylus is in place. it is easily reinserted, but easy hassle to avoid.
Matt -
It’s worth mentioning that there is a part of the device casing, accessible from the back, that can be removed but has very fragile retaining clips. Although the picture does show that the prying tool is lifting the screen, it is hard to see. You will not be able to access the charge port by removing a portion of the casing. You must remove the case from the screen side.
Eden Mugg -
Be careful!!!
the first picture of this first step and the instructions are misleading. What you need to remove is the back cover of the tablet. Use the opening tool along the edges of the back cover, NOT on the screen as the picture and the instructions say.
rene carmona -
Its not misleading. You need to remove from the front as removing from the back you will tear the grey clipping from the glued back piece. You will not be able to replace the charge port from removing just the back either as you should be doing both.
Bradley Carr -
I agree this first step should be revised and include a warning.
My battery was swollen and the screen was separating from the case (big gap along edge).
Purchased new battery. Have spudger. Have done phone battery replacements before without issue.
I tried to do the separation but apparently was between the screen assembly and the back electronics rather than separating the entire electronics from the back casing.
The screen glass “exploded”…I’ll be finding glass particles in my office for the next few years I think. In addition, not realizing why things weren’t working I figured I would have to replace the screen anyway and continued on only to discover that a bunch of ribbon cables were destroyed during separation.
Given this process is listed as “EASY” there really should be some clear warnings about making sure the spudger doesn’t end up between the screen assembly and back electonics but rather ends up between the back case. The angle of the spudger in the photo doesn’t make this obvious.
What a waste.
mattp -