Einleitung
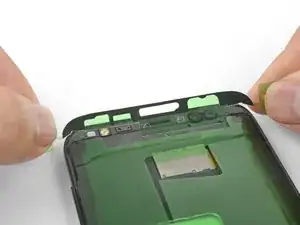
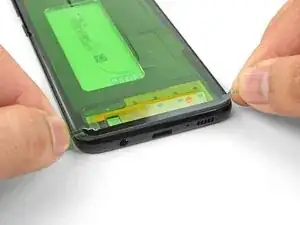
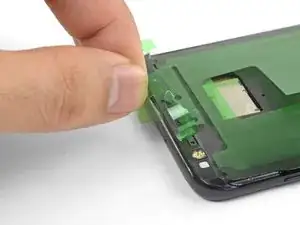
In dieser Anleitung wird gezeigt, wie du die Displayklebestreifen im Samsung Galaxy S8 ersetzen kannst. Du brauchst sie, wenn du Anleitung zum Displaytausch im Galaxy S8 anwendest.
Werkzeuge
Ersatzteile
-
-
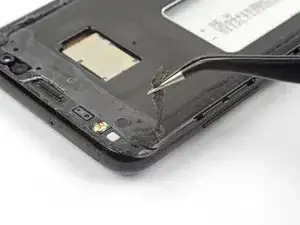
Entferne alle Klebstoffreste und alle Spuren von Schmutz vom Rahmen des Smartphones. Reinige die Klebeflächen mit hochkonzentriertem Isopropylalkohol (mindestens 90%ig) und wische sie mit einem fusselfreien Tuch sauber.
-
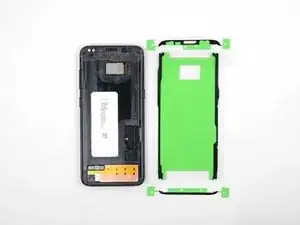
Lege die Klebestreifen probeweise aus, damit du eine Vorstellung davon hast, wo sie hingehören.
-
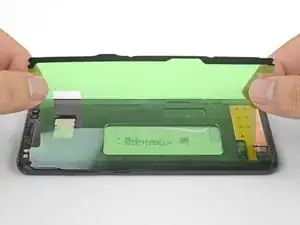
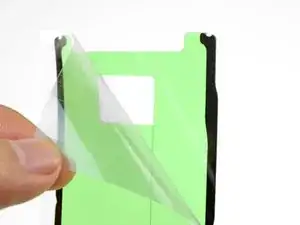
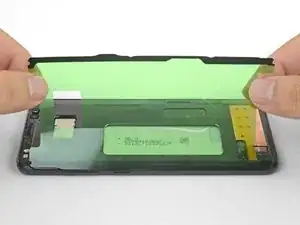
Ziehe die durchsichtige Schutzfolie vom großen vorgeschnittenen Klebestreifen ab, so dass eine der Klebeflächen offen liegt.
-
-
-
Richte sorgfältig eine Kante des Klebestreifens mit der entsprechenden Kante am Rahmen des Smartphones aus.
-
Lege den Klebestreifen leicht auf den Rahmen herunter.
-
Wenn er nicht ganz richtig sitzt, dann ziehe ihn nochmals vorsichtig ab.
-
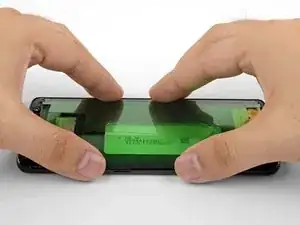
Wenn der Streifen gut passt, dann drücke ihn mit dem Finger am Rahmen fest.
-
-
-
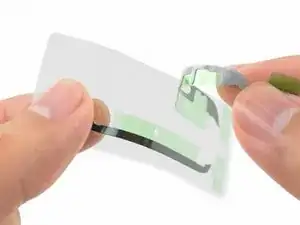
Ziehe einen der Endklebestreifen von der durchsichtige Schutzfolie ab.
-
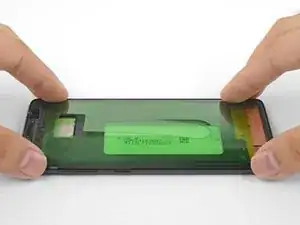
Halte den Streifen an den beiden grünen Endlaschen und richte ihn am Rahmen des Smartphones aus.
-
Lege den Streifen leicht auf das Smartphone ab. Achte darauf, dass alle Ausschnitte genau passen.
-
Wenn der Streifen richtig sitzt, dann drücke ihn mit dem Finger am Rahmen fest.
-
Wiederhole das Ganze für den anderen Endklebestreifen.
-
-
-
Baue das Gerät weiter zusammen, bis du soweit bist, das Display einzubauen.
-
Ziehe alle grüne Schutzfolien ab und entferne sie, so dass die Klebeflächen für das Display freigelegt werden.
-
Richte das Display aus und lege es auf die Klebestreifen ab.
-
Drücke ringsum den Rand des Displays mit den Fingern fest, so dass es gut festklebt.
-
Lege ein paar schwere Bücher eine Stunde lang auf das Display, damit der Kleber gut anhaftet.
-
Hier kommst du wieder zur Anleitung zum Displaytausch im Galaxy S8 zurück.
4 Kommentare
My set of adhesive strips were a mirror image of these pictures, meaning the strips when solely attached to the green plastic liner were arranged to adhere to the back cover, not onto the phone! This is likely a production issue with the green plastic liner and clear plastic backing being swapped. Like in these pictures here, the seal strips stay aggressively with the green plastic liner upon pealing off the clear plastic liner; however, they were then an incorrect mirror image when trying to position then to the phone. This forced me to painstakingly use scotch tape the position and secure edges of the green plastic to the phone first (sticky side of strips facing up), and then lower the back cover down onto the phone, to adhere the strips to the back cover first. Then, lift off the back cover to removed the green liner, exposing adhesive to apply to the phone-side. Trust me, I didn’t install the strips upside down, or mirrored. This is just the way all my strips came, and there was no other workaround.
Hi Kevin,
First, I’m sorry to hear of your troubles! I’m glad you came up with a system to get the adhesive on. Very ingenious!
I looked into this issue and found that the adhesive you got is correct. Unlike the screen adhesive, which should be applied to the frame first, the back cover adhesive should be applied to the back cover first. Unfortunately, we don’t have any explicit guides for the back cover adhesive. However, I will edit the device guides to clarify that point.
Thanks for bringing this observation up!
Thank you for the rapid response, Arthur. You’re very welcome. I presume IFixIt sources these strips from a common supplier, also serving competitors. These multi-piece strips have very fine hole, notch, and angular details demanding a level of placement precision not easily achievable by adhering them on the back cover first — especially if intended to restore a level of water resistance. Ifitit stands out above it’s competitors, as the kit was excellent. It might further differentiate itself by provided a template to nest into the back cover first, creating a guide. Again, thank you for your product and support. Excellent.
I will keep your feedback in mind about the template. As for water resistance, replacing the back cover adhesive will unfortunately still compromise the water resistance, unless you use an adhesive press.
