Einleitung

The steps below will help you open up your device, remove all of the hardware restricting access to the speakers, and then remove the speakers themselves. The process itself is straightforward, but you will need to stay organized because you will be removing almost all the device's hardware before you're finished. Keep track of all 14 screws you will take out of the device, as well as the location and orientation of all hardware you temporarily remove. You'll know your device well after this replacement!

  1. UyfJFalhKEKWSsgd
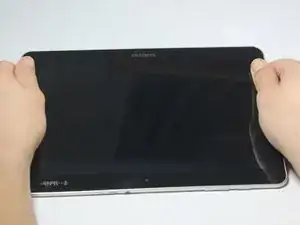
    • Power off your tablet before you begin disassembly.

    • Screen side facing you, rotate device 180 degrees so the "SAMSUNG" logo is upside down.

    Je pense qu'il y a un problème sur ce tuto, quand on démonte la vitre avant, le LCD reste sur la tablette.

    Antonio Jimenez -

    Surtout ne faites pas comme indiqué sur les photos, il faut décoller la plaque grise au niveau de l'appareil photo, déclipser le tour de la face arrière, et dévisser les trois vis du haut côté caméra.

    Antonio Jimenez -

  2. J1fQXAeXIYEPArMC
    J1fQXAeXIYEPArMC
    lZ66UlIEXKWONvwk
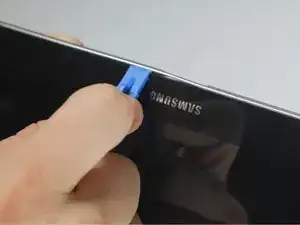
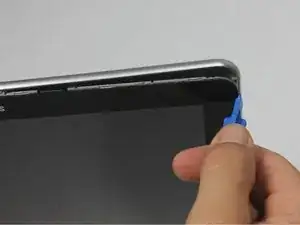
    • Using the plastic opening tool, start in the center near the charge port and wedge the angled tip between the plastic back and the glass screen.

    • Create a wedge and apply pressure. Use the tool to separate the screen from the back until you hear an audible “pop."

    • Continue to wedge the tool about every inch along the current edge.

  3. GAlwSWxIxSL42RKE
    GAlwSWxIxSL42RKE
    AHEklNM4GvIi2lYj
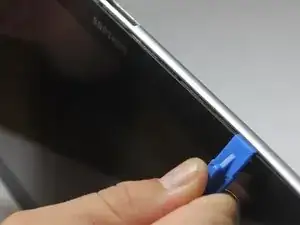
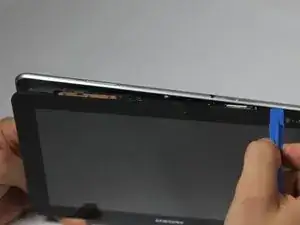
    • Once the bottom edge has been loosened, work towards a bottom corner from the other edge and continue to wedge gently until you can “pop” the corner out.

    • Continue this process on the other bottom corner until it can be popped out as well.

  4. 6cu1lPOhk2Dk14hG
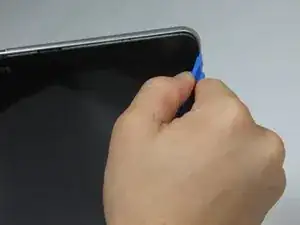
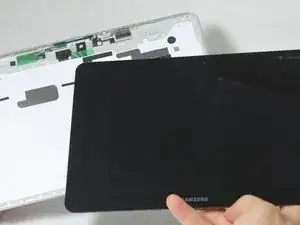
    • Place your hand between the device and the back panel. Then continue the wedging motion along the top edge of the device until the back panel comes loose.

    • Do not wedge the tool directly on top of the power buttons and headphone jack. Wedge nearby so that you don’t damage internal hardware.

    Bonjour, je pense qu'il y a un problème sur ce tuto car quand on enlève la vitre avant, le LCD reste sur la tablette.

    Alors que normalement il faut démonter la plaque arrière, les images sont fausses.

    Antonio Jimenez -

  5. whcQyCHpkFUC4vOL
    • Remove the back from the device.

    • Excessive force shouldn't be necessary here. If the back panel is sticking, find the area of the edge closest to the sticking point and wedge the opening tool there until the back panel pops free.

  6. mHRkhj32sTUp6gRX
    mHRkhj32sTUp6gRX
    uA61bDmBEjlfoqjM
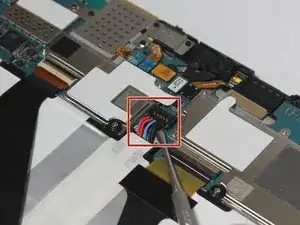
    • When working with electronics, it's important to choose a tool that's ESD-safe to avoid accidental damage to the device. The regular black nylon spudger or a plastic opening tool should be used whenever possible.

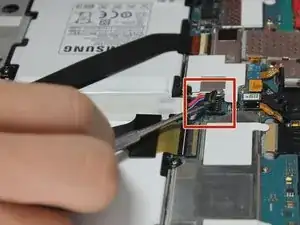
    • The connection between the battery and motherboard is a group of four wires in black housing that can be found near the top middle of the device. Using a plastic spudger or a flat, slim tool, lift the black connector housing upwards to disconnect it.

  7. dmhbZIY6PPOpQ6kR
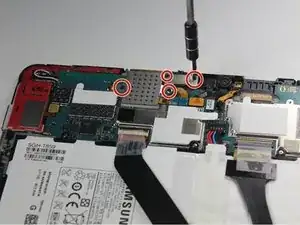
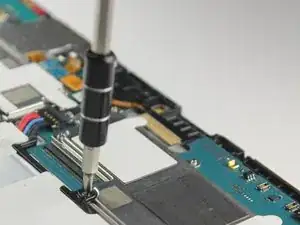
    • Use a Phillips #00 screwdriver to remove all 4 black 2.5mm screws securing the silver SIM card reader to the motherboard.

  8. 2FMMTCpb1gLj4WkQ
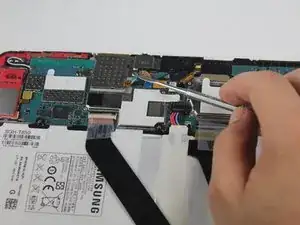
    • Using a plastic spudger, gently pop the SIM card reader connection off the motherboard.

    • There are 5 connection points all in a row. The one you want to pull off is the one furthest to the left.

  9. ddflMS5FQsGe2QB2
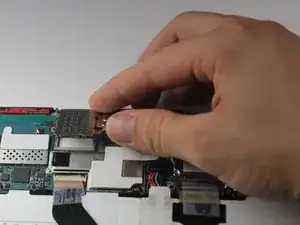
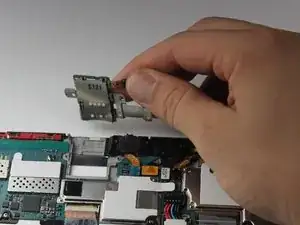
    • Lift up SIM card reader and remove it.

    • You should be able to just pick it up with your fingers. If the piece is hard to grasp, slide the metal spudger tool under the reader to lift it.

  10. qaYPU1XtZP11xJn6
    • Lift the SIM card reader off the motherboard, and replace it with a new SIM card reader.

    • Be sure to retrieve your SIM card from the old reader.

    Hi bro I do this best but I have not new sim card reader.where I buy new card reader

    Jazib -

  11. 5K4mOLiKwSQ3OWhN
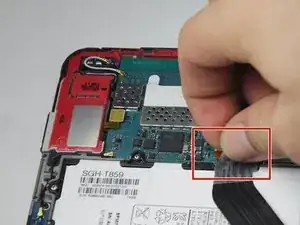
    • Remove the small piece of tape covering the ribbon connector.

    • You don't need to save this piece of tape.

    • When reassembling your device, simply replace this tape with a piece of scotch tape.

  12. xJw4sYpthSFUHgYg
    xJw4sYpthSFUHgYg
    YMQJINQcZ6wVZjtg
    y45rjoVsMKH3Ve45
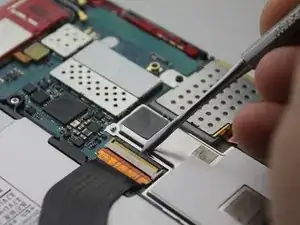
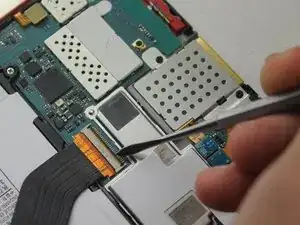
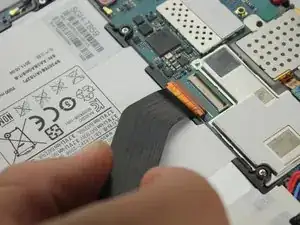
    • Carefully slide a plastic spudger under the black strip of plastic on the far side of the ribbon connector housing.

    • When working with electronics, it's important to choose a tool that's ESD-safe to avoid accidental damage to the device. The regular black nylon spudger or a plastic opening tool should be used whenever possible.

    • Lift the black strip upwards. This will release the ribbon.

    • Slide the ribbon out of the connector.

    • Repeat this step to release the other two ribbons.

    • You will need to remove the tape from covering those connectors, too.

  13. OTOWQXhoZHdQtZj2
    OTOWQXhoZHdQtZj2
    sETL12jWAdlhekGX
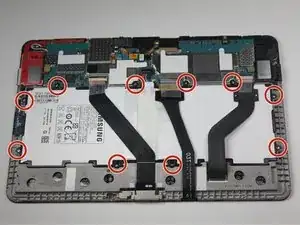
    • Use the Phillips #00 screwdriver to unscrew the 10 3mm screws holding the battery in place.

  14. rKSOyiPcG2GN3cMQ
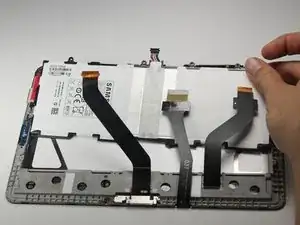
    • Lift the battery out of its housing to remove it.

  15. 6XMNf36LIgjmGQYX
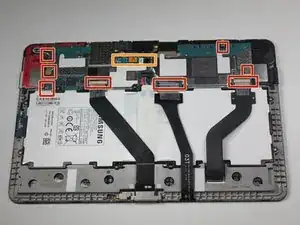
    • Use the metal spudger to disconnect every housing highlighted. There are 14 total disconnections.

    • There are 5 connections inside this box.

    • You've already taken care of several of these in previous steps, so check which ones you've already completed then proceed with the rest.

  16. 5hW2xWBfRXQMEORo
    5hW2xWBfRXQMEORo
    rtpgBTCqHH4Jfepl
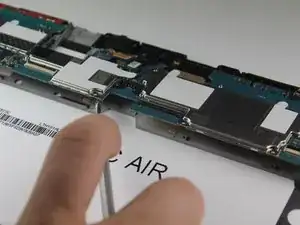
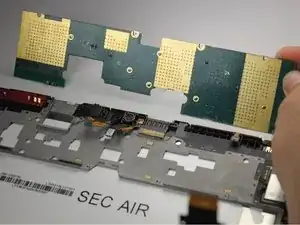
    • Lift the motherboard up and away from the device.

    • The motherboard will be easy to remove as long as all cables are disconnected. If you are having issues removing the motherboard, make sure there are no lingering connections.

  17. umGEJFZpiDyoHeTa
    umGEJFZpiDyoHeTa
    kLOWAlv2DInCyKrA
    yMtXjDCmbbANxofi
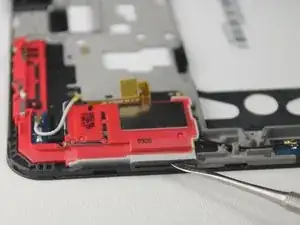
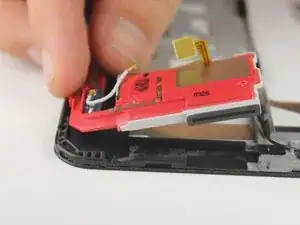
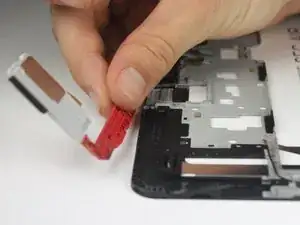
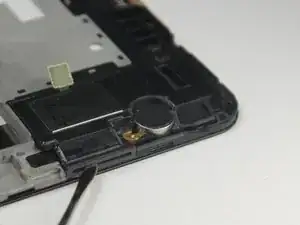
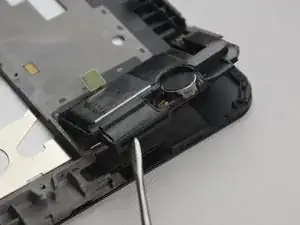
    • Using the metal spudger, pry the left speaker off of the device frame.

    • The speaker is adhered to the device frame. You will encounter resistance, so don't be alarmed if you struggle to remove the speaker.

  18. HsSjceR3unMQIHAS
    HsSjceR3unMQIHAS
    rLCyqePu5ifvfABT
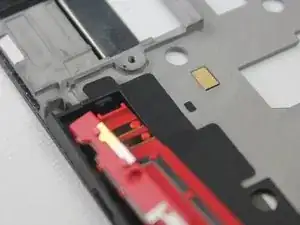
    • When you're removing the left speaker, note how the speaker piece fits into the device frame. When rebuilding, you need to slide the speaker under the black extrusion.

    • Also remember to keep the connectors above the speaker so that they can connect to the motherboard.

  19. lq6PYrVt4BSBCLQM
    lq6PYrVt4BSBCLQM
    LDqk2PjnGgijXSLk
    hAJlYDVLLNYaL1N2
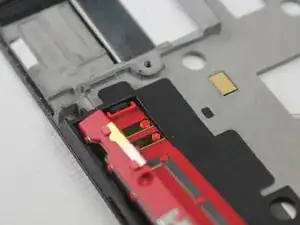
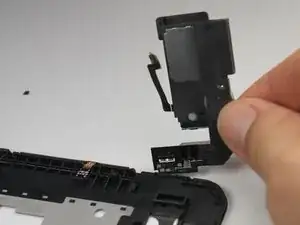
    • Using the metal spudger, pry the right speaker off of the device frame in the same way.

    • The speaker is adhered to the device frame. You will encounter resistance, so don't be alarmed if you struggle to remove the speaker.

Abschluss

To reassemble your device, follow these instructions in reverse order.
Aaron Lane

Mitglied seit: 23/09/15

425 Reputation

0 Kommentare