Einleitung

A touchscreen that is broken or damaged can prevent access to applications on a device, which can make the device useless. This guide highlights how to remove the back cover and front cover of the tablet in order to get to the touchscreen as a means to replace it.

  1. d4ArIBIOhoXdabSU
    • Make sure the device is turned off before attempting to disassemble it.

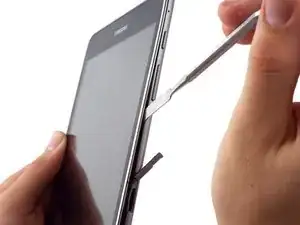
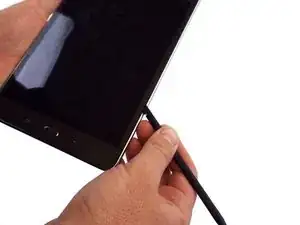
    • At the top portion of the memory card slot, use the small metal spudger to create separation between the back cover and the rest of the device.

    • The small metal spudger is only used to create separation between the back cover and the rest of the device, not to remove the back cover.

    Why can I use instead of the spudger

    elene fiala -

    plastic spudgers or guitar pick

    909 -

  2. UsgOMgkGP6OiijB2
    UsgOMgkGP6OiijB2
    UGL4VShYQKMQEQ6l
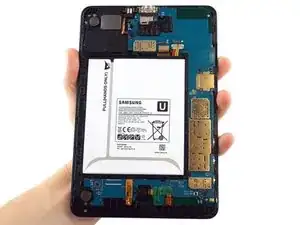
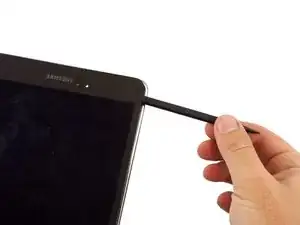
    • Use the intermediate metal spudger in place of the small metal spudger to remove the back cover. This is done by sliding the intermediate metal spudger around the perimeter of the device, beginning at the top portion of the memory card slot.

    • The second picture shows the internal portion of the device once the back cover is removed.

  3. WGaXxmCJGR1sTmYo
    WGaXxmCJGR1sTmYo
    EPFRYqD5qnUpCSnD
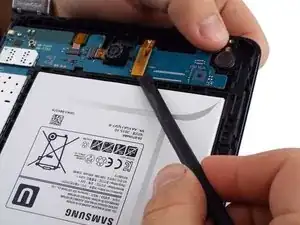
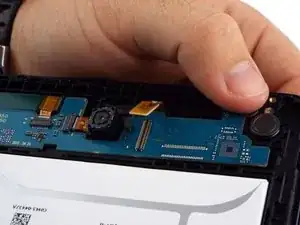
    • Use the spudger to disconnect the touchscreen from the motherboard. The two are connected at the top half of the motherboard where the yellow rubber portion of the touchscreen is located.

    • The first and second pictures illustrate the touchscreen when it connected and disconnected, respectively.

  4. 5eGB6usxDWgTNvJE
    5eGB6usxDWgTNvJE
    6vy4FgppT4SsWTuc
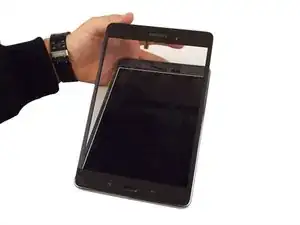
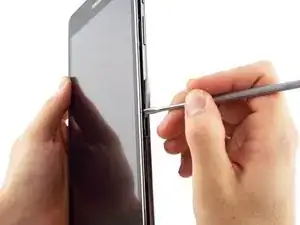
    • Use the spudger to separate the touch screen from the front cover of the device.

    • The touch screen is glued onto the front cover, so this step in the process requires patience and a fair amount of strength.

    • The top and bottom portions of the touch screen are more reinforced with glue than the other sections, so extra force will be required.

    • It is recommended to push inwards from the sides using the spudger to separate the top and bottom section from the front cover.

    Don't let either of these happen to you:

    I was not careful enough at this step. At the top left of the screen, near the digitizer's flex cable, I allowed my spudger to go between the glass and the digitizer film, rather than between the film and the LCD. This left a mark quite as bad as if I had broken the glass. To avoid it in future, I will use heat to loosen the adhesive and then keep the spudger near the very outer edge of the screen in this area, to avoid the flex cable's attachment point.

    At the bottom right corner, I was simply too vigorous, and broke the glass. The adhesive is very strong. In future I will always loosen it with heat (a hot air gun or an iOpener heating pad) before removal. In fact, I plan to reapply heat to each area I'm working on as I go--just enough so that the glass is quite hot to the touch.

    (I have pictures, but don't see how to attach them…moderator?)

    Bonnie Baxter -

    I also don’t see how the screen can come apart from the frame and the lcd as easily as is shown in the photos. My lcd came up with my screen and in the end I had to disconnect the lcd and take both the screen and the lcd out together. Now I have to order a replacement lcd to put with the digitiser screen that I purchased and install them together.

    Wayne Lyell -

    I have a question and it's that if I were to do this whole fix the screen on my tablet, what do I do if the screen is already coming off and I didn't even take off the front cover from the back cover?

    Cecilia tomas -

  5. jqqRMfnoV3pX4QKM
    jqqRMfnoV3pX4QKM
    3jeNyEiBNjbwBZdm
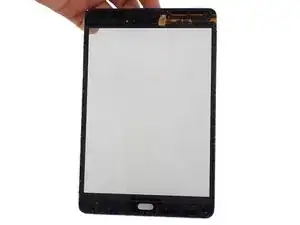
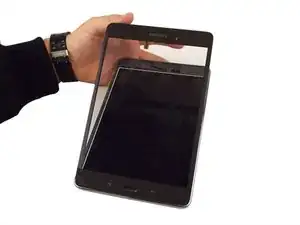
    • Once the touchscreen is loose enough, slowly pull it off the front cover to fully remove it from the rest of the device.

    • Avoid pulling the touchscreen off too quickly as this could result in damaging or even breaking the touchscreen. This could result in damaging the touchscreen connector in the back of the device.

    • The picture shows what the device should look like once the touchscreen is fully removed.

Abschluss

To reassemble your device, follow these instructions in reverse order.

Michael Wozny

Mitglied seit: 04/02/16

3613 Reputation

13 Kommentare

These steps worked well but you must use a metal spudger to get this started. I didn't have one and it was a nightmare. I finished the project but it was very difficult to start. I would also use a heat gun to loosen the glue for the bottom and top. Just my opinion from my experience.

lasthager -

See comments on the last step re: avoiding the area of the flex connector, and using heat, as the previous commenter suggested, throughout the removal process to loosen the adhesive and avoid breaking the glass.

Also, the “metal" frame around the digitizer is very susceptible to being dented. Be very careful of it.

Finally, a piece of advice from other iFixit commenters about cleaning the LCD before adding new glass: careful circular motions with a very clean, dry microfiber cloth are sufficient in most cases. If not, a small amount of water can be added to the cloth. Avoid adding alcohol or water directly to the LCD, as it is easily smudged.

Bonnie Baxter -

^This! An iOpener or heat is a MUST when separating the digitizer and LCD. There is no way the digitizer just pops off. This is especially important if the digitizer is cracked and spider-webbed.

Jeana Morales -

Oops--one final suggestion, also from other iFixit commenters (I can't find the original, or I’d reference it. It's in the Q&A section, answering a question about jumpy digitizer responses after screen replacement.)

The first time I did this, all seemed well until I tried to use the digitizer, when its response to touch was suddenly very jumpy and erratic in all areas of the screen. The next time I followed Ifixit advice and covered all metallic-looking areas of the back of the new screen with thin Kapton tape, and had no problems. I essentially made a thin frame of Kapton all the way around the non-transparent areas of the screen.

There have been various suggestions about why this might work, most speculating on small electrical shorts occurring between these metallic areas and the metal parts of the frame surrounding the LCD. I just know that it's quick and easy and seems to work.

Bonnie Baxter -

Hi Bonnie, would you happen to know what thickness of tape that should be? I’m getting little to no response then when I put the back on i’m getting nothing at all.
freeaswind -

If my front camera, the one to take pictures of like let's say other people is scratched, can I possibly fix the

Cecilia tomas -

This is for a T230 not a T280. The T280 digitizer and LCD are glued together,whereas the T230 are not glued together.

kalilbaste -

Are the steps to fix the glass on the SM-T380 the same as this model?

dAzon [FX] -

Hi I think I followed all instructions but it won't turn on and when I plug in the charger the first screen that shows up when you power up the tablet( says Samsung galaxy tab A) flashes on and of. What could be the problem?. I took it apart again and redid all the connections .

william keim -

Can anyone tell me if its possible to purchase ONLY the digitizer screen which i have cracked? if so where can i purchase one?

Ryan Herd -

I found mine on Amazon: B07BJG4N89 is the product ID number on the site.

It came with a plastic spudger and some triangular openers, but they’re pretty cheaply made, so you’re probably going to want some better tools (i.e. grab the “Essential Electronics Toolkit” or something similar from iFixIt)

Nerdy Anarchist -

Any tips on properly seating the new digitizer into place without cracking it?

Nerdy Anarchist -

I did the tuto, everything was OK. After launching the tablet, no response from the screen. Any idea of what could be the problem? I connected the new digitizer to the motherboard carefully…

Giovanni Andolfo -