Einleitung
Bevor du ins Innere des Geräts kommst musst du erst den Rückdeckel abnehmen. Das wird hier gezeigt. Der Ausbau kann leicht zum fruszrierendsten Teil der Reparatur an diesem Tablet werden. Du brauchst schon etwas Muskeleinsatz, wenn du die richtigen Plastiköffnungswekzeuge benutzt ist das Risiko gering.
Werkzeuge
-
-
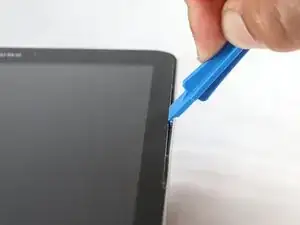
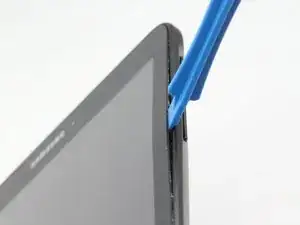
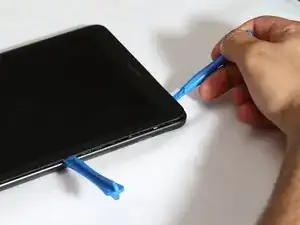
Setze eines dieser blauen Plastiköffnungswekzeuge zwischen Displayglas und dem Gehäuse ein. Es ist egal, wo du anfängst, wenn du irgendwo einen Spalt geöffnet hast dann kannst du den Spalt rings um das Gerät erweitern.
-
Die Displayeinheit und das Gehäuse sollten sich danach gut trennen lassen.
-
Abschluss
Um dein Gerät wieder zusammenzusetzen folge den Schritten in umgekehrter Reihenfolge.


*****Please be careful when removing the rear cover. The edge of the screen is very vulnerable and easy to break!!!! *****
Bev -
removing the back can be quite difficult. i found that the tools provided were absolutely useless. A guitar plectrum is much better. be careful on the top edge because the digitiser connector is there and you can easily cut thro it. Apart rom the aforementioned its dead easy.
jim beeby -
I started at the power button. Using a tin metal pry tool you have to push straight down, stop, lever away from the screen a little then push down again until you feel the snap of the back cover come away from the frame. repeat these steps working slow down the tab and along the bottom then up to the top.
vickyjean1007 -
*thin metal pry tool
vickyjean1007 -
Bear in mind that the outer edge of the screen rests on a thin ledge of the back cover so you cannot just pry straight down.
vickyjean1007 -