Einleitung

If your headphones aren’t properly working with your device, you may need to replace the headphone jack in it. Use this guide to replace the headphone jack in your tablet.

  1. AqbDR6UevUpHD4Ky
    AqbDR6UevUpHD4Ky
    GoNFfW4gBVXBCBWT
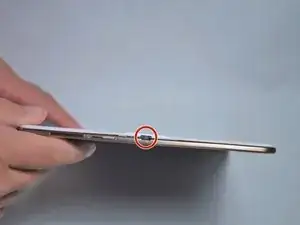
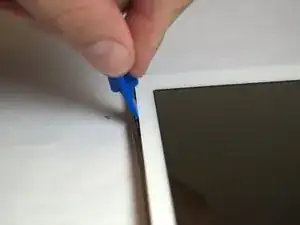
    • Place the plastic opening tool into the SD card slot or charge port.

    • Try in an upward motion until you see a separation between the tablet and back cover.

  2. X32DAYGcFxTVulOv
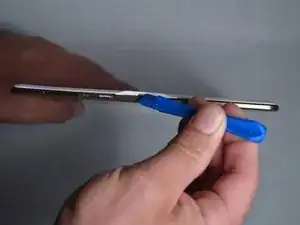
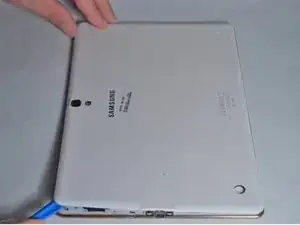
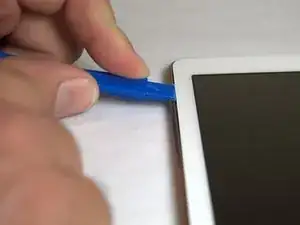
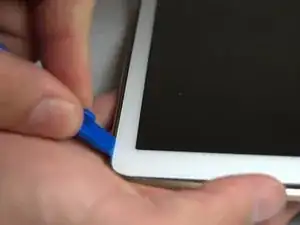
    • Work around the entire device by sliding the plastic opening tool around the rim.

    • If this is the first time, it will be hard to separate the back cover from the tablet.

    • The clips are approximately 5 cm apart. While working around the device, the clips will make a dislocating sound when disconnected.

    It is not necessary to remove just the white part under penalty of breaking the pins, it is necessary to remove the back with the colored outline of the tablet

    paquito -

    Both plastic tools broke within the first two minutes of use. Had to resort to a narrow conventional flat screwdriver.

    Dennis Durost -

  3. 1L2FAwXS62ifNYtD
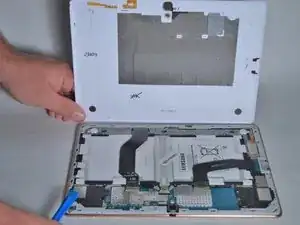
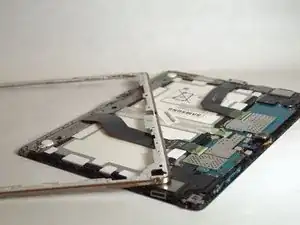
    • Remove the back cover once all links have been separated.

    • Be careful when touching any of the internal components of the tablet.

    This is the wrong method to open it! You have to open it beetween the front-Display and the golden rim.

    agnuz6569 -

    I’ve taken the back cover off my Samsung tablet, and in the process I have torn one of the little orange plastic connectors that are attached to the back cover. The connector I’ve damaged is the second one in on top left in the picture above. Can you please tell me if I need to replace this before I can get the tablet to work?

    Thanks.

    Tom -

    If you remove just the back cover - which to the uninitiated does look less scary than trying to get between the bezel and the display - you will destroy the tiny plastic rivets that lock the cover onto the bezel. More importantly, you will then find that getting to the parts you need to replace is rendered impossible because they will be hidden under the bezel, which of course will still be in place. So the correct way to take this tablet apart is the more challenging way i.e. separate the front display from the bezel and rear. But with care and the right tools this is still not too difficult. And if you are in any doubt about this, it is worth pointing out that in all of the photos below from Step 4 onwards, the work shown is taking place with the bezel removed. There is nothing written in this guide to indicate that this had to be done.

    PhilipHN -

    Have just gone through this process, successfully having read this and other guides and I totally agree with PhilipHN that the most reliable is the slightly scarier approach of removing the front display from the bezel and rear. It is easier overall, you just have to attack it confidently (but gently!).

    Jeremy Linskell -

  4. WdhoECZiDmQlR4Pw
    WdhoECZiDmQlR4Pw
    FqYYVtXkfmtXVlCg
    B5dkqREN2BoYHN5T
    • Place the plastic opening tool in between the outer rim.

    • Move the tool in a downward motion to separate the 2 parts.

    • Run the tool along the rim to disconnect all connectors holding the outer rim to the back of the device.

  5. 2VRrrXxyKY2a5yZu
    • Repeat this step for all four sides, then remove the rim.

  6. MsFxB34XKfZMktKQ
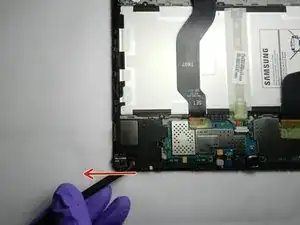
    • Using the Phillips #00 screwdriver, remove the two screws holding the headphone jack.

  7. iNUilTnQHBhCGtdH
    • Place the hook of a spudger on the backside of headphone jack and pop the headphone jack out.

Abschluss

To reassemble your device, follow these instructions in reverse order.
Ronald Dixon Flowers

Mitglied seit: 20/02/20

139 Reputation

0 Kommentare